# A B C D E F G H I J K L M N O P Q R S T U V W X Y Z

D-Link DSL- G604T Quick Installation Guide

Summary

This wireless ADSL2+ Modem Router allows you to establish and share a high-speed internet connection throughout your home or small office. This guide provides comprehensive, step-by-step instructions detailing everything from initial hardware setup and physical wiring connections to advanced configuration settings. Learn how to quickly install and configure the device using the intuitive Click’n Connect Utility or the web interface. Essential reading for users setting up a reliable ADSL Wi-Fi network from an Internet Service Provider (ISP).
📄 Preview PAGE OF 26

Page 1 Text Content

This product can be set up using any current web browser, i.e., DSL-G604T Internet Explorer 6 or Netscape

ADSL Modem Router

Navigator 6.2.3.

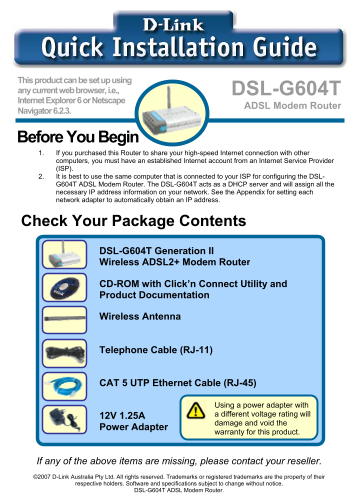
Before You Begin 1. If you purchased this Router to share your high-speed Internet connection with other computers, you must have an established Internet account from an Internet Service Provider

(ISP). 2. It is best to use the same computer that is connected to your ISP for configuring the DSL- G604T ADSL Modem Router. The DSL-G604T acts as a DHCP server and will assign all the necessary IP address information on your network. See the Appendix for setting each network adapter to automatically obtain an IP address.

Check Your Package Contents

DSL-G604T Generation II Wireless ADSL2+ Modem Router

CD-ROM with Click’n Connect Utility and Product Documentation

Wireless Antenna

Telephone Cable (RJ-11)

CAT 5 UTP Ethernet Cable (RJ-45)

Using a power adapter with 12V 1.25A a different voltage rating will damage and void the

Power Adapter

warranty for this product.

If any of the above items are missing, please contact your reseller. ©2007 D-Link Australia Pty Ltd. All rights reserved. Trademarks or registered trademarks are the property of their

respective holders. Software and specifications subject to change without notice.

DSL-G604T ADSL Modem Router.

Page Summary Contents For D-Link DSL- G604T Quick Installation Guide

Page 1 This product can be set up using any current web browser, i.e., DSL-G604T Internet Explorer 6 or Netscape ADSL Modem Router Navigator 6.2.3. Before You Begin 1. If you purchased this Router to share y...
Page 2 Connecting the Router to your Computer 1. First, connect the power adapter to the power input at the back panel of the DSL-G604T and then plug the other end of the power adapter to a wall outlet or po...
Page 3 Configuring the Router via the D-Link Click’n Connect Utility Insert the CD-ROM into your PCs CD Drive. The Click’n Connect utility should appear automatically. If it does not appear, explore your CD-...
Page 4 Configuring the Router via the D-Link Click’n Connect Utility The Click’n Connect utility will guide you through the installation process step- by-step. Follow the on-screen instructions, then proceed...
Page 5 Configuring the Router via the D-Link Click’n Connect Utility The Click’n Connect utility will guide you through the installation process step- by-step. Follow the on-screen instructions, then proceed...
Page 6 Configuring the Router via the D-Link Click’n Connect Utility The Click’n Connect utility will guide you through the installation process step- by-step. Follow the on-screen instructions, then proceed...
Page 7 Configuring the Router via the D-Link Click’n Connect Utility The Click’n Connect utility will guide you through the installation process step- by-step. Follow the on-screen instructions, then proceed...
Page 8 Configuring the Router via the D-Link Click’n Connect Utility The Click’n Connect utility will guide you through the installation process step- by-step. Follow the on-screen instructions, then proceed...
Page 9 Configuring the Router via the D-Link Click’n Connect Utility The Click’n Connect utility will guide you through the installation process step- by-step. Follow the on-screen instructions, then proceed...
Page 10 Configuring the Router via the D-Link Click’n Connect Utility The Click’n Connect utility will guide you through the installation process step- by-step. Follow the on-screen instructions, then proceed...
Page 11 Configuring the Router via the D-Link Click’n Connect Utility The Click’n Connect utility will guide you through the installation process step- by-step. Follow the on-screen instructions, then proceed...
Page 12 Configuring the Router via the D-Link Click’n Connect Utility The Click’n Connect utility will guide you through the installation process step- by-step. Follow the on-screen instructions, then proceed...
Page 13 Configuring the Router via the D-Link Click’n Connect Utility The Click’n Connect utility will guide you through the installation process step-by-step. Follow the on-screen instructions, then proceed ...
Page 14 Configuring the Router via the Web Interface Now it is time to configure the Router. Enter 10.1.1.1 into the URL address box. Open your Web browser and type http://10.1.1.1 into the URL address box. P...
Page 15 Configuring the Router via the Web Interface Once you have logged in, the Home directory tab is prominent with the setup Wizard window displayed. Most users will be able to use the setup wizard to est...
Page 16 Configuring the Router via the Web Interface The first Setup Wizard window lists a summary of the steps required to complete the setup. Click the Next button to begin setup. Click the Next button.
Page 17 Configuring the Router via the Web Interface Configure the time zone used for the Router’s system clock. Select the appropriate time zone setting for your location. Click Next to continue. Select the ...
Page 18 Configuring the Router via the Web Interface Configure the Internet connection type for the WAN interface. Your ISP has given this information to you. If you do not know what type of connection to use...
Page 19 Configuring the Router via the Web Interface PPPo E / PPPo A Connection If you selected the PPPo E/PPPo A connection type in the previous window, you will see the Setup Wizard window pictured here. Ty...
Page 20 Configuring the Router via the Web Interface Wireless LAN Connection Configure the SSID and Channel for the Wireless LAN. You may also configure either WEP or WPA security settings at this time or con...
Page 21 Configuring the Router via the Web Interface Wireless LAN Connection for WEP If you are configuring WEP security, select the Authentication Type, Cipher rate and Encryption Key. Click Next to continue...
Page 22 Configuring the Router via the Web Interface Wireless LAN Connection for WPA If you are configuring WPA security, select the type of WPA: WPA, WPA2, or Any WPA, enter a Group Key Interval in seconds, ...
Page 23 Configuring the Router via the Web Interface Setup Completed All the settings for the connection are now completed. Click the Restart button to save the new settings and restart the Router. The follow...
Page 24 Appendix Configuring IP Settings To connect to the network, make sure the network adapter in your computer is configured properly. The following section describes how to configure the network adapter ...
Page 25 The dialog box displays with a list of currently installed network items. Click Internet Protocol (TCP/IP) Click Properties Make the choice to get IP settings assigned automatically. Select Obtain an ...
Page 26 Technical Support You can find software updates and user documentation on the D-Link website. D-Link Australia 1 Giffnock Avenue, North Ryde, NSW 2113 Sydney, Australia TEL: +61-2-8899-1800 FAX: +61-2...

Manual Details

Brand D-Link
Pages 26
File Size 1.32 MB
Published May 30, 2026
64 views

Enter the captcha to get the download link:

captcha

Frequently Asked Questions

What is required to share a high-speed internet connection with multiple devices?

You must have an established Internet account from an Internet Service Provider (ISP).

Which software should be used to configure the DSL-G604T router?

Use the D-Link Click’n Connect Utility by running dslutility.exe from the included CD-ROM.

How do I connect the modem router to my computer for setup?

Connect an Ethernet cable from a LAN port (1-4) on the router to your computer's available Ethernet port.

What voltage power adapter should be used with this device?

Use a 12V 1.25A power adapter; using different voltages may void the warranty.