# A B C D E F G H I J K L M N O P Q R S T U V W X Y Z

D-Link DWL-7700AP Quick Installation Guide

Summary

Power up your outdoor networking with the DWL-7700AP Wireless Access Point/Bridge. This manual provides comprehensive, step-by-step instructions for experienced installers, covering everything from safe physical mounting and grounding to connecting it seamlessly into your existing network infrastructure. Easily configure robust wireless coverage using the guided setup wizard—setting up unique SSIDs and advanced encryption protocols (64/128/152-bit)—to ensure a stable, secure Wi-Fi connection for demanding environments.
📄 Preview PAGE OF 20

Page 1 Text Content

This product can be set up

DWL-7700AP

using any current web

browser, i.e. Internet D-Link Air Premier® Explorer or Netscape Wireless AG Navigator. Outdoor AP/Bridge

Before You Begin It’s best to use a computer (with an Ethernet adapter) connected to a switch to configure the DWL-7700AP. The default IP address for the DWL-7700AP is 192.168.0.50 with a subnet mask of 255.255.255.0 on the wired Ethernet side. You will need to assign your computer a static IP address within the same range as the DWL-7700AP’s IP address for the purpose of configuring the DWL-7700AP. If you need assistance assigning a static IP address to your network adapter, please refer to the manual on the CD-ROM.

Check Your Package Contents

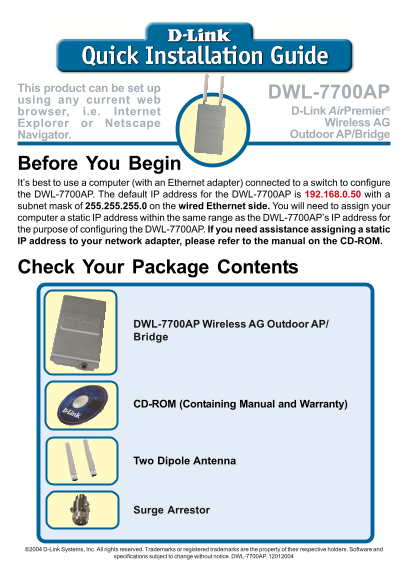
DWL-7700AP Wireless AG Outdoor AP/ Bridge

CD-ROM (Containing Manual and Warranty)

Two Dipole Antenna

Surge Arrestor

©2004 D-Link Systems, Inc. All rights reserved. Trademarks or registered trademarks are the property of their respective holders. Software and

specifications subject to change without notice. DWL-7700AP. 12012004

Page Summary Contents For D-Link DWL-7700AP Quick Installation Guide

Page 1 This product can be set up DWL-7700AP using any current web browser, i.e. Internet D-Link Air Premier® Explorer or Netscape Wireless AG Navigator. Outdoor AP/Bridge Before You Begin It’s best to use a...
Page 2 Check Your Package Contents (continued) Po E base unit RF jumper cable 30M Ethernet cable Grounding wire Power cord Power Adapter 8 Screws and rubber ring
Page 3 Check Your Package Contents (continued) Mounting Option A Mounting Kit Mounting Option B Mounting Kit Wall Mount Screws If any of the above items are missing, please contact your reseller.
Page 4 Important Information This product should ONLY be installed by an experienced installer who is familliar with local building and safety codes and where ever applicable, is licensed by the appropriate ...
Page 5 Physical Installation for your DWL-7700AP Step 1: Connect the supplied Ethernet cable with the waterproof enclosure to the Ethernet port on the DWL-7700AP and attach the grounding wire.
Page 6 Physical Installation for your DWL-7700AP (continued) Step 2: Install the two dipole antennas to the antenna connector, and attach the grounding wires.
Page 7 Physical Installation for your DWL-7700AP (continued)
Page 8 Physical Installation for your DWL-7700AP (continued) Step 3: Install the mounting kits. You can select between two mounting options. Mounting Option A:
Page 9 Physical Installation for your DWL-7700AP (continued) A complete DWL-7700AP with Mounting Option A should look like this.
Page 10 Physical Installation for your DWL-7700AP (continued) Mounting Option B: A complete DWL-7700AP with Mounting Option B should look like this.
Page 11 Connecting The DWL-7700AP Wireless Access Point To Your Network Hardware Installation Overview Step 1: Do the Physical Installation first (Please refer to pages 4-8). Step 2: Connect the remaining end...
Page 12 Using The Setup Wizard Open your Web browser and type http://192.168.0.50 into the URL address box. Then press the Enter or Return key. The logon pop-up screen will appear. Type admin for the username...
Page 13 Using The Setup Wizard (continued) You will see the following screens. Click Next Step 1 - Set up your new password. You have the option to establish a password. Click Next Step 2 - Set Wireless LAN 8...
Page 14 Using The Setup Wizard (continued) Step 3 - WEP Encryption for 802.11a The DWL-7700AP is capable of three levels of wireless encryption 64-bit, 128-bit and 152-bit. By default encryption is disabled. ...
Page 15 Your Setup is Complete! Click Restart When you have completed the steps in this Quick Installation Guide, your connected network should look similar to this. AP Mode:
Page 16 Your Setup is Complete! (continued) Bridging Mode:
Page 17 Appendix - High Gain External Antenna (Optional) An external high gain antenna (not included) can be connected to the DWL-7700AP to extend the range of the network. For high gain antenna information, ...
Page 18 Notes
Page 19 Notes
Page 20 Technical Support You can find software updates and user documentation on the D-Link website. D-Link provides free technical support for customers within the United States and within Canada for the du...

Manual Details

Brand D-Link
Pages 20
File Size 5.17 MB
Published May 18, 2026
170 views

Enter the captcha to get the download link:

captcha

Frequently Asked Questions

How do I configure the DWL-7700AP before use?

Use a computer with an Ethernet adapter connected to a switch. Assign your computer a static IP address in the 192.168.0.x range, then access http://192.168.0.50 in your browser.

What crucial safety steps are required for installation?

A necessary step is proper grounding of the antenna mast, Outdoor AP, and Surge Arrester to protect against lightning strikes. Always use a qualified electrician if you are unsure.

Is an external high gain antenna compatible with the AP?

Yes, it can be connected to extend range. For 802.11g connections, attach it to the left side of the front panel; for 802.11a, attach it to the right.

What is the default IP address and subnet used for setup?

The default IP address is 192.168.0.50, utilizing a subnet mask of 255.255.255.0 on the wired Ethernet side.