HP Photosmart C4500 All-in-One Series Setup Guide
Summary
The essential guide for setting up your HP Photosmart C4500 All-in-One printer. This manual provides comprehensive, step-by-step instructions designed for new owners requiring full setup assistance. You will learn how to handle initial unboxing and hardware preparation, expertly install genuine ink cartridges, connect the device via both USB cable and secure wireless networks, and perform necessary alignment procedures. Furthermore, troubleshoot common connectivity issues presented in Windows environments, ensuring you can start printing, copying, or scanning with confidence immediately.
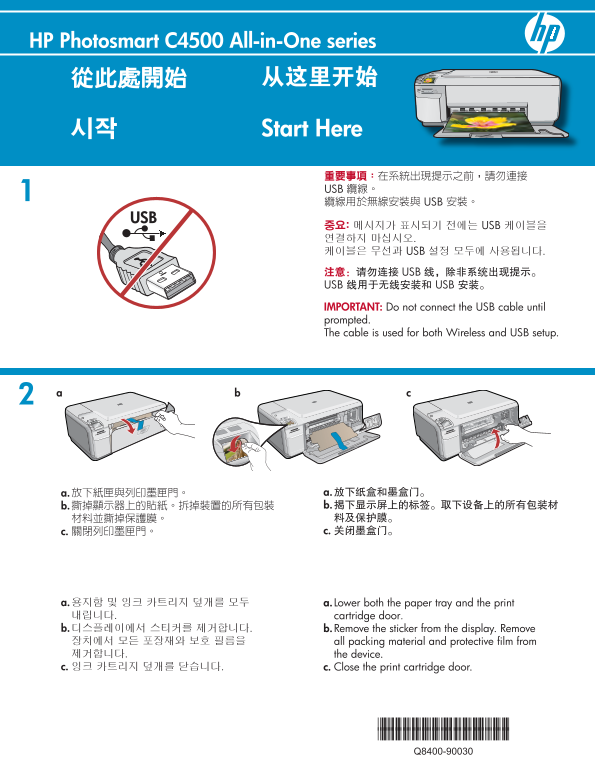
Page 1 Text Content
HP Photosmart C4500 All-in-One series
Start Here
USB USB
USB USB
IMPORTANT: Do not connect the USB cable until prompted. The cable is used for both Wireless and USB setup.
a. a. Lower both the paper tray and the print
cartridge door
b. b. Remove the sticker from the display. Remove
all packing material and protective fi lm from the device.
c. c. Close the print cartridge door.
Page Summary Contents For HP Photosmart C4500 All-in-One Series Setup Guide
Manual Details
| Brand | HP |
|---|---|
| Pages | 12 |
| File Size | 2.37 MB |
| Published | June 18, 2026 |
Enter the captcha to get the download link:

Frequently Asked Questions
When should I connect the USB cable?
You must not connect the USB cable until you are prompted to do so.
What steps should I take if I encounter setup failure errors in Windows?
Unplug the device, and then plug it back in. Check all connections and ensure the USB cable is plugged into the computer, not a hub or keyboard.
How do I correctly install new ink cartridges?
Ensure the print carriage moves to the right first. The device must be powered on to insert cartridges, and you cannot touch the copper-colored contacts.
What is the process for connecting the printer wirelessly?
During setup, use the Setup Assistant, select your device's option for a wireless network, click Continue, and follow the onscreen instructions.