HP DesignJet T1200 HD Multi-function Printer Setup Guide - Assembly Instructions
Summary
This comprehensive manual provides essential guidance for installing, assembling, and maintaining your HP DesignJet large format printer and scanner system. It offers detailed, step-by-step instructions on safely assembling heavy components like the stand and body, ensuring proper connections. Crucially, the guide also covers routine monthly maintenance procedures, including cleaning the scan area, alignment, and calibration to guarantee continuous optimal print quality for professional users.
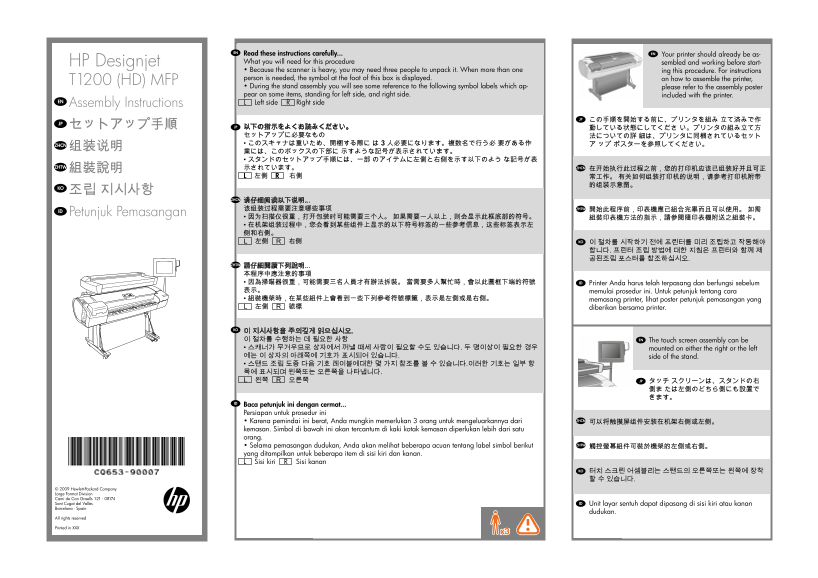
Page 1 Text Content
EN Read these instructions carefully... EN
Your printer should already be as-
HP Designjet What you will need for this procedure sembled and working before start- • Because the scanner is heavy, you may need three people to unpack it. When more than one ing this procedure. For instructions person is needed, the symbol at the foot of this box is displayed. on how to assemble the printer,
T1200 (HD) MFP
• During the stand assembly you will see some reference to the following symbol labels which ap- please refer to the assembly poster pear on some items, standing for left side, and right side. included with the printer.
EN L Left side R Right side Assembly Instructions
JP この手順を開始する前に、プリンタを組み 立て済みで作
JP セットアップ手順
JP 以下の指示をよくお読みください。 動している状態にしてくださ い。プリンタの組み立て方 セットアップに必要なもの 法についての詳 細は、プリンタに同梱されているセット ZHCN • このスキャナは重いため、開梱する際に は 3 人必要になります。複数名で行う必 要がある作 ア ップ ポスターを参照してください。
ZHTW 示されています。 ZHCN
KO 조립 지시사항
ZHCN 请仔细阅读以下说明...
该组装过程需要注意哪些事项 ZHTW 開始此程序前,印表機應已組合完畢而且可以使用。 如需
Petunjuk Pemasangan
L 左侧 R 右侧 KO 이 절차를 시작하기 전에 프린터를 미리 조립하고 작동해야 합니다. 프린터 조립 방법에 대한 지침은 프린터와 함께 제 공된조립 포스터를 참조하십시오.
ZHTW 請仔細閱讀下列說明...
本程序中應注意的事項 • 因為掃瞄器很重,可能需要三名人員才有辦法拆裝。 當需要多人幫忙時,會以此圖框下端的符號 Printer Anda harus telah terpasang dan berfungsi sebelum 表示。 memulai prosedur ini. Untuk petunjuk tentang cara • 組裝機架時,在某些組件上會看到一些下列參考符號標籤,表示是左側或是右側。 memasang printer, lihat poster petunjuk pemasangan yang L 左側 R 號標 diberikan bersama printer.
KO 이 지시사항을 주의깊게 읽으십시오.
이 절차를 수행하는 데 필요한 사항 EN The touch screen assembly can be
• 스캐너가 무거우므로 상자에서 꺼낼 때세 사람이 필요할 수도 있습니다. 두 명이상이 필요한 경우 mounted on either the right or the left 에는 이 상자의 아래쪽에 기호가 표시되어 있습니다. side of the stand. • 스탠드 조립 도중 다음 기호 레이블에대한 몇 가지 참조를 볼 수 있습니다.이러한 기호는 일부 항 목에 표시되며 왼쪽또는 오른쪽을 나타냅니다. L 왼쪽 R 오른쪽 JP タッチ スクリーンは、スタンドの右
Baca petunjuk ini dengan cermat... Persiapan untuk prosedur ini
• Karena pemindai ini berat, Anda mungkin memerlukan 3 orang untuk mengeluarkannya dari ZHCN 可以将触摸屏组件安装在机架右侧或左侧。
kemasan. Simbol di bawah ini akan tercantum di kaki kotak kemasan diperlukan lebih dari satu orang.
• Selama pemasangan dudukan, Anda akan melihat beberapa acuan tentang label simbol berikut ZHTW 觸控螢幕組件可裝於機架的左側或右側。
yang ditampilkan untuk beberapa item di sisi kiri dan kanan. L Sisi kiri R Sisi kanan
KO 터치 스크린 어셈블리는 스탠드의 오른쪽또는 왼쪽에 장착 할 수 있습니다.
© 2009 Hewlett-Packard Company Large Format Division Camí de Can Graells 1-21 · 08174 Sant Cugat del Vallès Unit layar sentuh dapat dipasang di sisi kiri atau kanan Barcelona · Spain
dudukan.
All rights reserved
Printed in XXX
AP.indd 1 28/01/2010 9:57:07
Page Summary Contents For HP DesignJet T1200 HD Multi-function Printer Setup Guide - Assembly Instructions
Manual Details
| Brand | HP |
|---|---|
| Pages | 20 |
| File Size | 4.24 MB |
| Published | June 15, 2026 |
Enter the captcha to get the download link:

Frequently Asked Questions
How many people are needed to unpack the scanner?
Because the scanner is heavy, you may need three people to unpack it.
How often should routine maintenance be performed?
Routine maintenance should be performed approximately once a month (once a month).
Can I change the units of measurement for scanning?
Yes, you can switch between centimeters and inches by sliding the scanner ruler out.