# A B C D E F G H I J K L M N O P Q R S T U V W X Y Z

HP DesignJet T2600 Multi-function Printer Series HP DesignJet T2600 Printer Series - Printer Series Manual Assembly Instructions

Summary

This comprehensive manual provides step-by-step assembly instructions for the professional-grade HP DesignJet T2600 Printer Series. Designed for new users, this guide details the complete setup process, including assembling the large format printer unit and its accompanying stand components. To ensure safe and efficient installation, the manual covers necessary tools, required working space, and proper handling procedures, enabling you to start your printing tasks with confidence.
📄 Preview PAGE OF 32

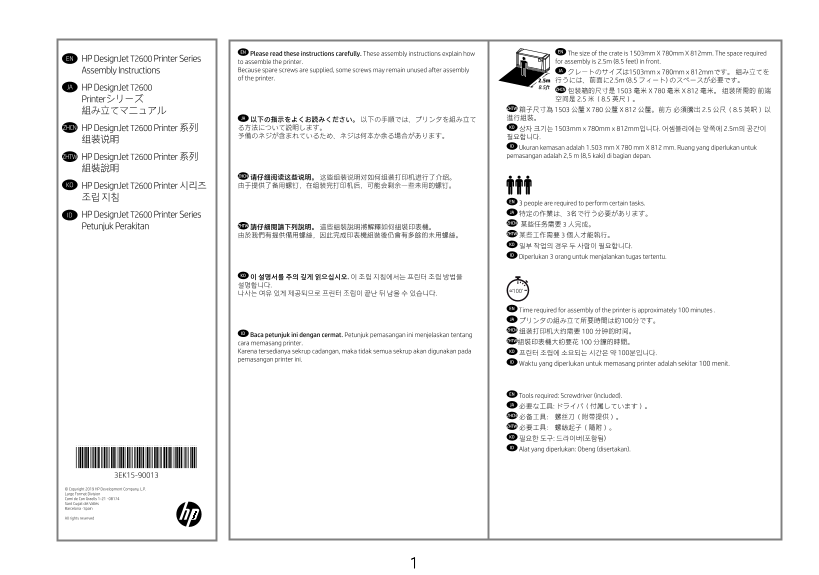
Page 1 Text Content

EN EN Please read these instructions carefully. These assembly instructions explain how The size of the crate is 1503mm X 780mm X 812mm. The space required

EN HP Design Jet T2600 Printer Series

to assemble the printer. for assembly is 2.5m (8.5 feet) in front.

Assembly Instructions Because spare screws are supplied, some screws may remain unused after assembly JA

クレートのサイズは1503mm x 780mm x 812mmです。 組み立てを

of the printer.

2.5m 行うには、前面に2.5m (8.5 フィート) のスペースが必要です。 JA HP Design Jet T2600 8.5ft ZHCN

包装箱的尺寸是 1503 毫米 X 780 毫米 X 812 毫米。 组装所需的 前端 Printerシリーズ 空间是 2.5 米(8.5 英尺)。

ZHTW 箱子尺寸為 1503 公釐 X 780 公釐 X 812 公釐。前方 必須騰出 2.5 公尺(8.5 英呎)以

JA 進行組裝。 以下の指示をよくお読みください。 以下の手順では、プリンタを組み立て

ZHCN HP Design Jet T2600 Printer 系列 る方法について説明します。 KO 상자 크기는 1503mm x 780mm x 812mm입니다. 어셈블리에는 앞쪽에 2.5m의 공간이

ID Ukuran kemasan adalah 1.503 mm X 780 mm X 812 mm. Ruang yang diperlukan untuk ZHTW HP Design Jet T2600 Printer 系列 pemasangan adalah 2,5 m (8,5 kaki) di bagian depan.

ZHCN 请仔细阅读这些说明。 这些组装说明对如何组装打印机进行了介绍。

KO HP Design Jet T2600 Printer 시리즈 由于提供了备用螺钉,在组装完打印机后,可能会剩余一些未用的螺钉。 조립 지침

EN 3 people are required to perform certain tasks. JA ID HP Design Jet T2600 Printer Series 特定の作業は、3名で行う必要があります。 ZHCN ZHTW 請仔細閱讀下列說明。 這些組裝說明將解釋如何組裝印表機。 某些任务需要 3 人完成。

Petunjuk Perakitan

ZHTW 某些工作需要 3 個人才能執行。

KO 일부 작업의 경우 두 사람이 필요합니다. ID Diperlukan 3 orang untuk menjalankan tugas tertentu.

KO 이 설명서를 주의 깊게 읽으십시오. 이 조립 지침에서는 프린터 조립 방법을 설명합니다.

EN Time required for assembly of the printer is approximately 100 minutes . JA プリンタの組み立て所要時間は約100分です。 ZHCN ID 组装打印机大约需要 100 分钟的时间。

Baca petunjuk ini dengan cermat. Petunjuk pemasangan ini menjelaskan tentang

ZHTW組裝印表機大約要花 100 分鐘的時間。

cara memasang printer.

Karena tersedianya sekrup cadangan, maka tidak semua sekrup akan digunakan pada KO 프린터 조립에 소요되는 시간은 약 100분입니다.

pemasangan printer ini.

ID Waktu yang diperlukan untuk memasang printer adalah sekitar 100 menit.

EN Tools required: Screwdriver (included). JA 必要な工具: ドライバ(付属しています)。 ZHCN 必备工具: 螺丝刀(附带提供)。 ZHTW 必要工具: 螺絲起子(隨附)。

KO 필요한 도구: 드라이버(포함됨) ID Alat yang diperlukan: Obeng (disertakan).

*3EK15-90013* 3EK15-90013 © Copyright 2019 HP Development Company, L.P. Large Format Division Camí de Can Graells 1-21 · 08174 Sant Cugat del Vallès Barcelona · Spain All rights reserved

Page Summary Contents For HP DesignJet T2600 Multi-function Printer Series HP DesignJet T2600 Printer Series - Printer Series Manual Assembly Instructions

Page 1 EN EN Please read these instructions carefully. These assembly instructions explain how The size of the crate is 1503mm X 780mm X 812mm. The space required EN HP Design Jet T2600 Printer Series to ass...
Page 2 EN Crate contents ZHTW 箱內包含 1. Documentation: Assembly 1. 說明文件 : 組裝說明、簡介資訊。 Instructions, Introductory information 2. 電源線 2. Power cords 3.印表機 3. Printer 4. 墨水匣 4. Ink cartridges 5.印字頭 5. Printhead 6....
Page 3 EN Assemble the stand JA スタンドの組み立て 组装支架 組裝機架 KO 스탠드 조립 ID Memasang dudukan EN Important: Do not cut the internal straps until requested. Locate the stand pieces: Place the crossbar on the floor; with ...
Page 4 EN Slot the two legs onto the crossbar. Fix the crossbar to the left leg with 5 screws, do not tighten Fix the crossbar to the right leg with 5 screws, do not Fully tighten all 10 screws: left and rig...
Page 5 EN Rotate the product 90° JA 製品を90度回転させます 将产品旋转 90 度 將產品旋轉 90 度 KO 제품을 90도 회전시킵니다 ID Putar posisi produk 90 derajat. EN Turn the stand 180° into the upright position. Remove the components tray. Remov...
Page 6 EN Remove the stacker cover. Remove the calibration sheet box and Keep it. Open the bottom cover of the box. Carefully roll the box 90° onto the floor. Slide the box forward on the pallet to create a ...
Page 7 EN Attach the printer body to the stand assembly JA スタンド アセンブリへのプリン タ本体の取り付け 将打印机主体连接到支架组件 將印表機機身裝到機架組件上 KO 프린터 본체를 스탠드 어셈블리에 장착합니다 ID Pasang badan printer ke unit dudukan EN Remove the end cap covers...
Page 8 EN Attach the stand assembly to the printer body slotting the Fix the stand assembly to the printer body with 2 screws Check the 4 wheels are locked. Rotate the printer 90° into the upright position. ...
Page 9 EN Cut the 2 straps. Remove the plastic cover. Remove all the orange tapes. Remove the screws from the stacker. Remove the 2 end caps. JA 2本のストラップを切断します。 プラスチックのカバーを取り外します。 オレンジ色のテープをすべて取り外します。 スタッカから...
Page 10 EN Unfold the stacker. Fix the stacker with 2 stacker screws. Remove the carton piece and attach the stacker cover by Insert the 6 deflectors. pushing it into place. JA スタッカを開きます。 2本のスタッカのネジでスタッカを固定しま...
Page 11 EN Open top roll cover. Remove the tape, pull the orange plastic piece, rotate Open the scanner cover (1 and 2) and remove the carton IMPORTANT: in the following step you must remove the horizontal an...
Page 12 EN Assemble the basket JA バスケットの取り付け 装配纸筐 組裝承接槽 KO 바스켓 조립 ID Memasang keranjang EN Carefully remove the carriage retainer without touching the Close the scanner window. Remove the orange plastic piece...
Page 13 EN Locate the basket pieces and connect the 2 elbows. Slot the basket arms into the feet until they click into Remove the tape, and feed the basket through to the Slot the bar through the basket. Note...
Page 14 EN Slot the basket into place. Make sure the basket is open; this indicates the amount Unlock the wheels. Move the printer to its final destination. of distance required at the back of the printer fro...
Page 15 EN Assemble the front panel JA フロントパネルを組み立てます 组装前面板 組裝前控制面板 KO 전면 패널을 조립합니다 ID Pasang panel depan EN Take the front panel and front panel supports from the box. Open the scanner window. Pass the cover...
Page 16 EN Insert the support in the unit. Attach the cover back into place. Close the scanner window. Click the cover onto the support. Attach the support to the printer with 3 x T25 screws. JA ユニットにサポートを差し込...
Page 17 EN Place a cloth below the screen to avoid scratches. Attach the arm to the front panel using 4x T25 screws. Slot the arm onto the support and make it is fully in place. Pass the cables through the gu...
Page 18 EN Set up the printer JA プリンタをセットアップする 设置打印机 設定印表機 KO 프린터 설치 ID Membuat pengaturan awal printer EN Connect the cables to the front panel. IMPORTANT: Attach the cables into the clamps: route the cables...
Page 19 Power cables attached to the right. Note: make sure that the cables do not hang out in order to IMPORTANT: Connect the LAN and power cable. Switch the EN Select your language on the touch screen, and ...
Page 20 EN The front panel will ask you to install the ink cartridges. Open the ink cartridge covers (left and right). Shake all the ink cartridges. Insert the ink cartridges: black, gray, and matte black on ...
Page 21 Close the ink cartridge covers (left and right). The printer will now prepare the ink system for use. When When prompted, open the scanner window. Lift up the printhead cover handle. the process finis...
Page 22 EN Pull the blue handle up as far as it will go. Open the printhead cover by pulling the handle down. Remove the orange caps from inside the carriage. Insert the printhead. JA 青いハンドルを、いっぱいまで上に引き出します。 ...
Page 23 EN Check the printhead is correctly alligned. Lift the printhead cover handle. Push the handle down to clip the cover to the bar. Pull the handle down to close the cover. Note: do not insert the nozzl...
Page 24 EN Load the paper JA 用紙の取り付け 装入纸张 裝入紙張 KO 용지 넣기 ID Isikan kertas EN Push down to close the cover completely. Close the scanner window and press OK. The tubes will now fill. This will take about 10 min...
Page 25 Push the latch, and open the upper front roll cover. Remove the orange tapes and two small carton pieces. Remove the spindle and remove the orange tape and Unlock (1), and remove the blue hub (2). car...
Page 26 EN Load the paper (1), replace, and lock the blue hub (2). Replace the spindle. Insert the paper edge into the printer. Feed the paper into the printer. JA 用紙を取り付け (1)、青色のハブを元の位置に戻して スピンドルを元の位置に戻します。 ...
Page 27 EN Roll the paper in. Follow steps 83 - 89 for the 2nd roll. When the roll/rolls are loaded, the printer will align the printheads. This process involves printing, and needs the paper to have a straig...
Page 28 EN ZHTWConnectivity and Mobile Printing 連線與行動列印 1 - Make sure that your printer is correctly connected to the Internet. 2 - Enable the services during initial setup of the printer, or later following ...
Page 29 hp.com/go/Design Jetclick EN The connectivity wizard will now start and take you Install the product software on your computer. Radically simplify the printing experience: step by step through connect...
Page 30 EN ZHTWPrint from your smartphone or tablet - i OS users can print through Airprint (no installation is required), or download HP Smart App for enhanced printing capabilities. - i OS 使用者可以透過 Airprint(...
Page 31 Optional: Managing printer security in HP Connected. When you enable web services the printer is in unlock mode meaning everyone who knows the printer’s email You can now, or at some later time, color...
Page 32 EN © Copyright 2019 HP Development Company, L.P. The information contained herein is subject to change without notice. The only warranties for HP products and services are set forth in the express war...

Manual Details

Brand HP
Pages 32
File Size 12.81 MB
Published June 16, 2026
7 views

Enter the captcha to get the download link:

captcha

Frequently Asked Questions

How much space is needed for printer assembly?

You require 2.5m (8.5 feet) of space directly in front of the unit.

Are roll paper and LAN cables included with the setup?

No, the crate contents note that rolls and LAN cables are not included.

What tool is required for assembly?

A screwdriver is needed for assembly, and one is provided with the package.

How long does printer assembly take?

The estimated time needed to assemble the printer is approximately 100 minutes.