# A B C D E F G H I J K L M N O P Q R S T U V W X Y Z

Hewlett-Packard HP DesignJet T1700 Printer Series HP DesignJet T1700 Printer Series Assembly Instructions

Summary

The guide provides comprehensive instructions for setting up the professional HP DesignJet T1700 large-format printer. It covers complete hardware assembly, printhead configuration, and essential software setup, enabling users to print massive documents effortlessly from laptops, touch screens, iPhones, or iPads anywhere. This manual is essential for new owners, detailing everything from physical installation guidelines and connectivity options to necessary driver downloads and advanced features like color calibration and security management.
📄 Preview PAGE OF 26

Page 1 Text Content

HP Design Jet T1700

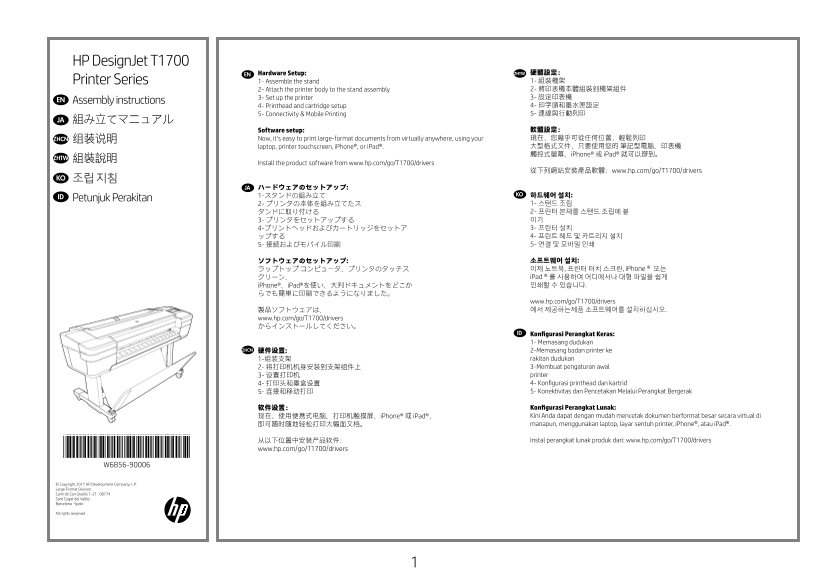
EN Hardware Setup: ZHTW 硬體設定: Printer Series 1- Assemble the stand 1- 組裝機架 2- Attach the printer body to the stand assembly 2- 將印表機本體組裝到機架組件 3- Set up the printer 3- 設定印表機

EN Assembly instructions

4- Printhead and cartridge setup 4- 印字頭和墨水匣設定 5- Connectivity & Mobile Printing 5- 連線與行動列印

JA 組み立てマニュアル

Software setup: 軟體設定: ZHCN 组装说明 Now, it’s easy to print large-format documents from virtually anywhere, using your 現在,您幾乎可從任何位置,輕鬆列印 laptop, printer touchscreen, i Phone®, or i Pad®. 大型格式文件,只要使用您的 筆記型電腦、印表機 觸控式螢幕、i Phone® 或 i Pad® 就可以辦到。

ZHTW 組裝說明

Install the product software from www.hp.com/go/T1700/drivers

從下列網站安裝產品軟體:www.hp.com/go/T1700/drivers

KO 조립 지침

JA ハードウェアのセットアップ:

1-スタンドの組み立て KOID 하드웨어 설치:

Petunjuk Perakitan

ソフトウェアのセットアップ: 소프트웨어 설치: ラップトップ コンピュータ、プリンタのタッチス 이제 노트북, 프린터 터치 스크린, i Phone® 또는 クリーン、 i Pad®를 사용하여 어디에서나 대형 파일을 쉽게 i Phone®、i Pad®を使い、大判ドキュメントをどこか 인쇄할 수 있습니다.

www.hp.com/go/T1700/drivers 製品ソフトウェアは、 에서 제공하는제품 소프트웨어를 설치하십시오.

www.hp.com/go/T1700/drivers からインストールしてください。

ID Konfigurasi Perangkat Keras: 1- Memasang dudukan

ZHCN 硬件设置: 2-Memasang badan printer ke

1-组装支架 rakitan dudukan 2- 将打印机机身安装到支架组件上 3-Membuat pengaturan awal 3- 设置打印机 printer 4- 打印头和墨盒设置 4- Konfigurasi printhead dan kartrid 5- 连接和移动打印 5- Konektivitas dan Pencetakan Melalui Perangkat Bergerak

软件设置: Konfigurasi Perangkat Lunak: 现在,使用便携式电脑、打印机触摸屏、i Phone® 或 i Pad®, Kini Anda dapat dengan mudah mencetak dokumen berformat besar secara virtual di 即可随时随地轻松打印大幅面文档。 manapun, menggunakan laptop, layar sentuh printer, i Phone®, atau i Pad®.

从以下位置中安装产品软件: Instal perangkat lunak produk dari: www.hp.com/go/T1700/drivers

*W6B56-90006* www.hp.com/go/T1700/drivers

© Copyright 2017 HP Development Company, L.P. Large Format Division Camí de Can Graells 1-21 · 08174 Sant Cugat del Vallès Barcelona · Spain

All rights reserved

Page Summary Contents For Hewlett-Packard HP DesignJet T1700 Printer Series HP DesignJet T1700 Printer Series Assembly Instructions

Page 1 HP Design Jet T1700 EN Hardware Setup: ZHTW 硬體設定: Printer Series 1- Assemble the stand 1- 組裝機架 2- Attach the printer body to the stand assembly 2- 將印表機本體組裝到機架組件 3- Set up the printer 3- 設定印表機 EN Assem...
Page 2 EN Please read these instructions carefully. These assembly instructions explain how to assemble the printer. Product working area • Because the product is heavy, you may need three people to unpack i...
Page 3 EN Assemble the stand JA スタンドの組み立て ZHCN 组装支架 ZHTW 組裝機架 KO 스탠드 조립 ID Memasang dudukan EN Fix one foot to a leg with 8 screws. Place the cross brace on the floor with the letters L and R Locate the stan...
Page 4 EN Fix the leg to the cross brace with 3 screws at the inner Slot the other leg onto the cross brace making sure that Fix the leg to the cross brace with 3 screws at the inner Slot a leg onto the cros...
Page 5 EN Fix the cross bar to the bottom of the legs with 4 screws Turn the stand upright. Attach the outside of the leg to the cross brace with 2 Fully tighten all the stand’s screws. (2 each side) . screw...
Page 6 EN Attach the printer body to the stand assembly JA プリンタの本体を組み立てたス タンドに取り付ける ZHCN 将打印机机身安装到支架组件上 ZHTW 將印表機本體組裝到機架組件 KO 프린터 본체를 스탠드 조립에 붙 이 ID Memasang badan printer kerakitan dudukan EN To finish the ...
Page 7 EN Remove the small flaps from each of the foam end pieces. Remove the tape from the transparent covering that Open the transparent covering and remove the desiccant There is a round yellow button pro...
Page 8 EN Place the stand on the product slowly and carefully, so that Locate the 4 black screws. Fix the printer to the stand from underneath with the 4 black Check that the wheels on the stand are locked. ...
Page 9 EN Make sure there is nothing on the printer. Hold the product by the foam end pieces and rotate it until Remove the foam end pieces. Remove the transparent covering from the product. Rotate the produ...
Page 10 EN Install the pocket at the back of the printer. Remove the tape from the stand, and unfold the fabric. Pass the fabric through to the front of the printer and then Clip the basket frame to the feet....
Page 11 EN Set up the printer JA プリンタをセットアップする ZHCN 设置打印机 ZHTW 設定印表機 KO 프린터 설치 ID Membuat pengaturan awal printer EN Remove the orange tape pieces from the product, except Open the Window. You will see a card...
Page 12 EN Carefully lift the cardboard support up and out of the Inside the right-hand side of the product, you will see a piece Remove the cardboard carefully. It will not be needed again Turn the cardboard...
Page 13 EN Connect the network cable. If you find a USB flash drive in a plastic bag inside the box, it Connect the power cable to the printer, and the outlet. Remove the orange tapes and unlock the wheels. M...
Page 14 EN Printhead and cartridge setup JA プリントヘッドおよびカートリッ ジをセットアップする ZHCN 打印头和墨盒设置 ZHTW 印字頭和墨水匣設定 KO 프린트 헤드 및 카트리지 설치 ID Konfigurasi printhead dan kartrid EN Remove the plastic film covering the window and ...
Page 15 Insert the ink cartridges one-by-one (x6). Each cartridge is The cartridges must be inserted the right way around: the ink The printer now prepares the ink system for use. When the ink system is ready...
Page 16 EN Open the window and pull the blue printhead cover handle Push the handle back to raise the lid to access the setup Look at each setup printhead to verify that it has ink inside. Remove and discard ...
Page 17 EN When all of the setup printheads have been removed, press Unwrap each printhead and remove all orange parts. The printhead is designed to be inserted into any available Insert the printheads one by...
Page 18 EN Pull the handle down to close the cover. Ensure that the end of the blue handle catches the wire loop Close the top cover. The product checks and prepares the Once the printhead check has finished ...
Page 19 When the front panel prompts you to load paper for print- If the blue removable stop is on the spindle, remove it. Load Add the removable stop to the spindle to keep the roll in From the front of the ...
Page 20 Feed the leading edge of the paper into the product until the The product will proceed to align the printheads. This process The front panel will display a series of messages showing HP Design Jet T17...
Page 21 EN Open the roll cover. Remove the spindle. Load the paper onto the spindle as indicated in steps 64 From the back of the product, place the spindle into the Feed the leading edge of the paper into th...
Page 22 EN Connectivity and Mobile Printing KO 연결 및 모바일 인쇄 1 - Make sure that your printer is correctly connected to the Internet. 1 - 프린터가 인터넷에 제대로 연결되었는지 확인하십 시오. 2 - Enable the services during initial setu...
Page 23 hp.com/go/Design Jetclick EN The connectivity wizard will now start and take you Install the product software on your computer. Radically simplify the printing experience: step by step through connect...
Page 24 EN Print from your smartphone or tablet ZHTW 從智慧型手機或平板電腦列印︰ - Air Print must be enabled on the printer. - 印表機必須啟用 Air Print。 - i OS printing is enabled through Airprint, no installation is required. -...
Page 25 EN Optional: Managing printer security in HP Connected. When you enable web services the printer is in unlock mode meaning You can now, or at some later time, color-calibrate the paper type that you i...
Page 26 EN © Copyright 2017 HP Development Company, L.P. The information contained herein is subject to change without notice. The only warranties for HP products and services are set forth in the express war...

Manual Details

Brand HP
Pages 26
File Size 10.61 MB
Published June 02, 2026
83 views

Enter the captcha to get the download link:

captcha

Frequently Asked Questions

组装打印机需要多长时间?

组装打印机大约需要110分钟。

运行此设备所需的最小空间要求是什么?

您需要至少3 x 3米(118 x 118 英寸)的空地。

下载所需驱动程序可以在哪里进行?

请访问网站www.hp.com/go/T1700/drivers下载产品软件。

使用哪些设备可以从任何位置打印大格式文档?

您可以使用笔记本电脑、印表机触摸屏、iPhone® 或 iPad®等设备实现远程打印。

连接打印机到互联网需要什么配件?

您附近必须有LAN连接才能将打印机连接到互联网。