# A B C D E F G H I J K L M N O P Q R S T U V W X Y Z

Hewlett-Packard HP DesignJet Z5200 Photo Printer HP Designjet Z5200p Printer - Assembly Instructions

Summary

This essential manual provides comprehensive setup guidelines for the professional HP Designjet Z5200 Photo Printer Series. It walks users through every step, ensuring the safe installation of your large-format equipment. Content includes detailed instructions on initial unboxing, assembling the printer stand, establishing proper placement clearances, and completing the vital software and driver installation process for both Mac and Windows operating systems. Ideal for system administrators or creative professionals needing expert setup guidance.
📄 Preview PAGE OF 26

Page 1 Text Content

EN HP Designjet Z5200

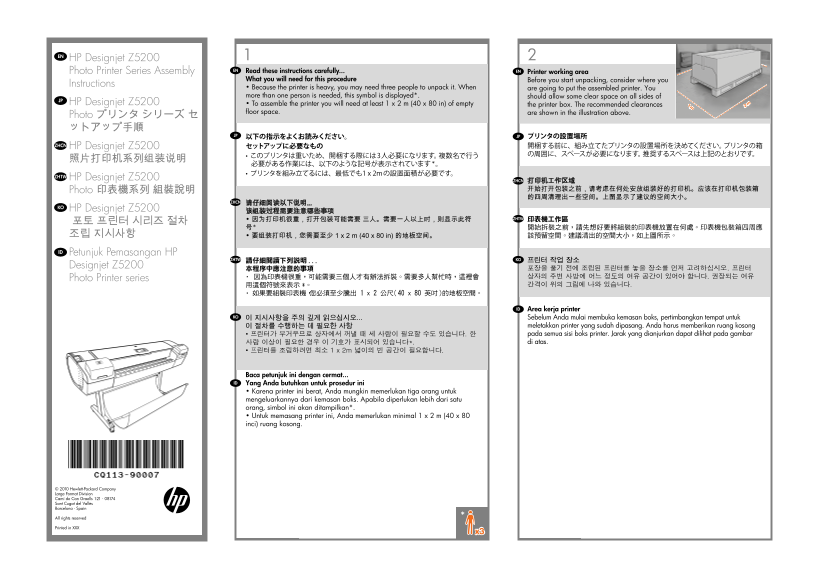
Photo Printer Series Assembly EN Read these instructions carefully... EN

Printer working area

What you will need for this procedure Before you start unpacking, consider where you

Instructions

• Because the printer is heavy, you may need three people to unpack it. When are going to put the assembled printer. You more than one person is needed, this symbol is displayed*. should allow some clear space on all sides of

JP HP Designjet Z5200 • To assemble the printer you will need at least 1 x 2 m (40 x 80 in) of empty the printer box. The recommended clearances

floor space. are shown in the illustration above.

Photo プリンタ シリーズ セ ットアップ手順

JP JP プリンタの設置場所 以下の指示をよくお読みください。

ZHCN HP Designjet Z5200 セットアップに必要なもの 開梱する前に、組み立てたプリンタの設置場所を決めてください。プリンタの箱

ZHTW HP Designjet Z5200

ZHCN 打印机工作区域 Photo 印表機系列 組裝說明 开始打开包装之前,请考虑在何处安放组装好的打印机。应该在打印机包装箱 的四周清理出一些空间。上图显示了建议的空间大小。

ZHCN 请仔细阅读以下说明...

KO HP Designjet Z5200

• 因为打印机很重,打开包装可能需要 三人。需要一人以上时,则显示此符 ZHTW 印表機工作區

조립 지시사항 • 要组装打印机,您需要至少 1 x 2 m (40 x 80 in) 的地板空间。 該預留空間。建議清出的空間大小,如上圖所示。

Petunjuk Pemasangan HP

ZHTW 請仔細閱讀下列說明 KO 프린터 작업 장소

Designjet Z5200

本程序中應注意的事項 포장을 풀기 전에 조립된 프린터를 놓을 장소를 먼저 고려하십시오. 프린터 Photo Printer series • 因為印表機很重,可能需要三個人才有辦法拆裝。需要多人幫忙時,這裡會 상자의 주변 사방에 어느 정도의 여유 공간이 있어야 합니다. 권장되는 여유 用這個符號來表示 *。 간격이 위의 그림에 나와 있습니다.

Area kerja printer

KO 이 지시사항을 주의 깊게 읽으십시오... Sebelum Anda mulai membuka kemasan boks, pertimbangkan tempat untuk

이 절차를 수행하는 데 필요한 사항 meletakkan printer yang sudah dipasang. Anda harus memberikan ruang kosong • 프린터가 무거우므로 상자에서 꺼낼 때 세 사람이 필요할 수도 있습니다. 한 pada semua sisi boks printer. Jarak yang dianjurkan dapat dilihat pada gambar 사람 이상이 필요한 경우 이 기호가 표시되어 있습니다*. di atas.

Baca petunjuk ini dengan cermat... Yang Anda butuhkan untuk prosedur ini • Karena printer ini berat, Anda mungkin memerlukan tiga orang untuk mengeluarkannya dari kemasan boks. Apabila diperlukan lebih dari satu orang, simbol ini akan ditampilkan*. • Untuk memasang printer ini, Anda memerlukan minimal 1 x 2 m (40 x 80 inci) ruang kosong.

© 2010 Hewlett-Packard Company Large Format Division Camí de Can Graells 1-21 · 08174 Sant Cugat del Vallès Barcelona · Spain

All rights reserved

Printed in XXX

all_achilles.indd 1 19/01/2010 19:27:37

Page Summary Contents For Hewlett-Packard HP DesignJet Z5200 Photo Printer HP Designjet Z5200p Printer - Assembly Instructions

Page 1 EN HP Designjet Z5200 Photo Printer Series Assembly EN Read these instructions carefully... EN Printer working area What you will need for this procedure Before you start unpacking, consider where you...
Page 2 Remove the accessories from the printer box. You will Remove the stand box, which is the largest one. To do Remove the pieces of cardboard. Remove the roll of paper. find the documentation and softwar...
Page 3 Lift up the sides and top of the printer box, and Stand Assembly: Cut and remove the straps around Open the stand box. Remove the cross-brace and the two pieces of remove them from the printer. the st...
Page 4 Place the two pieces of packaging material on the A screwdriver and 22 screws are provided in the stand Attach each leg of the stand to the cross-brace, using Make sure you have used 4 screws in each ...
Page 5 Attach a foot to each leg, using four screws in each Return to the main body of the printer, carefully turn Remove the small flaps from each of the foam Remove the tape from the transparent covering t...
Page 6 Open the transparent covering and remove the There is a round yellow button protruding from the Lift the stand, keeping it upside down. Place the stand on the printer slowly and carefully, desiccant b...
Page 7 44:80kg When the legs are correctly located on the printer, Check that you have used a total of twenty screws, Check that the wheels on the stand are locked. Turning the printer over is done in two st...
Page 8 If the full weight of the printer rests on the wheel lock, If necessary, rotate the wheel. The lock on each wheel should be facing inwards Now hold the printer by the foam end pieces and by it may bre...
Page 9 EN Remove the foam end pieces. Remove the transparent covering from the printer. Unlock the brake lever on each of the four wheels Lay out the components of the basket. by lifting the lever. ZHCN 取下泡沫...
Page 10 Fit the basket supports to the stand legs, one to Fit the two short tubes to the printer’s feet, one on the Attach the basket’s front tube to the two short tubes Rest the basket’s rear tube on the sup...
Page 11 EN The basket is now complete. Remove the orange tape from the printer window. Open the window (printer’s top cover). Beside the front panel, you will see a cardboard support attached to the printer w...
Page 12 EN Turn the cardboard support 90° to the right. Carefully lift the cardboard support up and out of the Inside the right-hand side of the printer, you will see Part of the stopper may fall off while yo...
Page 13 Move to the rear of the printer and fit the rear tray to Slide it in and then down. Push up the back of the tray into its closed position. Connect the power cable to the printer’s the printer. power s...
Page 14 Switch on power to the printer using the switch just On the front panel, the HP logo appears. Please The printer checks for the presence of ink cartridges. Press the ink cover firmly into place until ...
Page 15 Check that the ink cover is properly placed. Open the cover on the right-hand side of the printer. Shake each ink cartridge for about 10 seconds before Insert the ink cartridges one by one. Each cartr...
Page 16 The cartridges must be inserted the right way around: When you have inserted the correct cartridges into When you have inserted all of the ink cartridges cor- Open the window and grasp the blue handle...
Page 17 EN Pull the blue handle towards you as far as it will go. Lift the handle up to open the printhead cover. The The front panel now prompts you to remove the setup Remove and discard all orange setup pr...
Page 18 Press the OK key on the front panel when you have Shake each new printhead before unwrapping it. After shaking, unwrap each printhead. Remove all orange parts. EN removed all of the setup printheads. ...
Page 19 Insert the printheads one by one. Each printhead Push each printhead into the slot until it clicks into Pull the blue handle towards you as far as it will go, Push the handle down on top of the printh...
Page 20 While the printer is preparing the printheads, you could spend the time installing the printer software on your Once the printhead check has finished the printer will When the front panel prompts you ...
Page 21 Remove the spindle by lifting out first the right-hand If the blue removable stop is on the spindle, remove Push the removable stop towards the roll as far Replace the spindle into the printer, left e...
Page 22 Feed the leading edge of the paper into the printer The front panel will ask whether you are loading The front panel will display a series of messages showing the progress of the printhead alignment. ...
Page 23 You can now, or at some later time, color-calibrate the paper type that you intend to use in the printer. Color 1- View ink levels 6- Menu EN calibration is recommended for accurate color printing. It...
Page 24 EN ZHCN ZHTWJP Note for MAC & Windows connection: Mac および Windows の 接続に関する MAC 和 Windows 连接注意事项: 請注意,當 MAC 與 Windows 連線 注記: 時: Do not connect the computer to the printer yet. You 刚开始时,不要立即将计算机连接到打...
Page 25 MAC 및 Windows 연결을 위한 안 Catatan tentang sambungan USB untuk MAC & Windows: "MAC 및 Windows USB 연결을 위한 안내 “Catatan untuk sambungan USB Windows & MAC: 아직 컴퓨터를 프린터에 연결하지 마십시오. 먼저프린 Jangan samb...
Page 26 Legal notices © Copyright 2010 Hewlett-Packard Development Company, L.P. The information contained herein is subject to change without notice. The only warranties for HP products and services are set ...

Manual Details

Brand HP
Pages 26
File Size 10.68 MB
Published May 30, 2026
71 views

Enter the captcha to get the download link:

captcha

Frequently Asked Questions

What is required before assembling the printer?

You must pre-determine a location, ensuring clearance on all sides and having at least a 1 x 2 meter (40 x 80 in) clear floor space.

How many people are needed to open the packaging box?

Due to the weight of the printer, opening the carton may require three people. The symbol * indicates when more than one person is needed.

What should I do before connecting the computer?

Install the driver software onto your computer first. Then connect the printer either via USB or network connection.