HP DesignJet T120 Printer HP DesignJet T120 and T520 Printer Series - Printer Assembly Guide
Summary
Assemble your large format HP DesignJet T120 or T520 printer system with confidence using this comprehensive guide. This manual walks users through every step of the assembly process, ensuring accurate setup from unboxing to initial power-on. It details component identification, necessary tools (screwdriver), and provides crucial guidance for optimal performance, allowing any user to successfully build their professional printing solution in about 100 minutes.
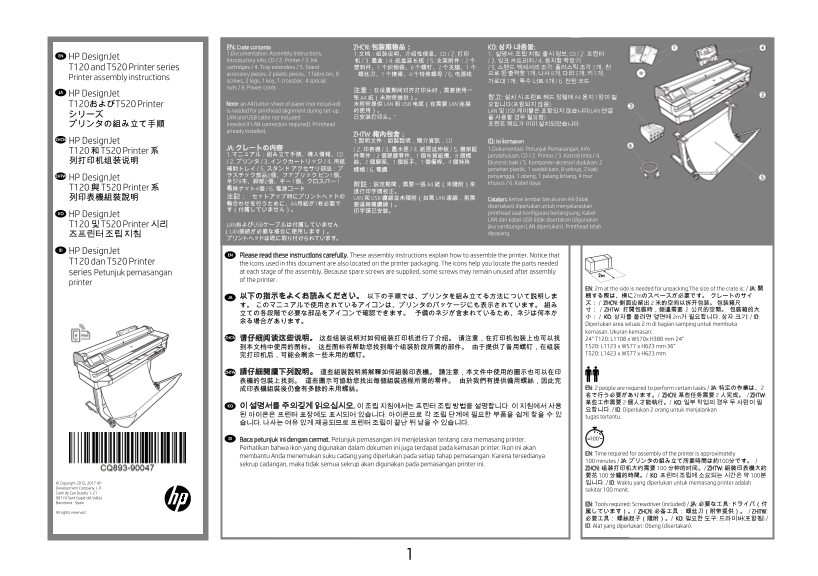
Page 1 Text Content
EN: Crate contents ZHCN: 包装箱物品: KO: 상자 내용물: 1. Documentation: Assembly Instructions, 1. 文档: 组装说明、介绍性信息、CD / 2. 打印 1. 설명서: 조립 지침, 출시 정보, CD / 2. 프린터
EN HP Design Jet
Introductory info, CD / 2. Printer / 3. Ink 机 / 3. 墨盒 / 4. 纸盘延长板 / 5. 支架附件: 2 个 / 3. 잉크 카트리지 / 4. 용지함 확장기 T120 and T520 Printer series cartridges / 4. Tray extenders / 5. Stand 塑料件、1 个织物袋、8 个螺钉、2 个支腿、1 个 / 5. 스탠드 액세서리 조각: 플라스틱 조각 2개, 천
accessory pieces: 2 plastic pieces, 1 fabric bin, 8 螺丝刀、1 个横梁、4 个特殊螺母 / 6. 电源线 으로 된 출력함 1개, 나사 8개, 다리 2개, 키 1개,
Printer assembly instructions
screws, 2 legs, 1 key, 1 crossbar, 4 special 가로대 1개, 특수 너트 4개 / 6. 전원 코드 nuts / 6. Power cords
JA 注意: 在设置期间对齐打印头时,需要使用一
HP Design Jet
T120およびT520 Printer Note: an A4/Letter sheet of paper (not includ-ed) 未附带提供 LAN 和 USB 电缆(在需要 LAN 连接 요합니다(포함되지 않음).
is needed for printhead alignment during set-up. 时使用)。 LAN 및 USB 케이블은 포함되지 않습니다(LAN 연결
LAN and USB cable not included 을 사용할 경우 필요함). プリンタの組み立て手順 (needed if LAN connection required). Printhead 프린트 헤드가 이미 설치되었습니다.
already installed.
ZHTW: 箱內包含:
HP Design Jet 1. 說明文件: 組裝說明,簡介資訊,CD ID: Isi kemasan
JA: クレートの内容 / 2. 印表機 / 3. 墨水匣 / 4. 紙匣延伸板 / 5. 機架配 1. Dokumentasi: Petunjuk Pemasangan, Info
T120 和 T520 Printer 系
1. マニュアル: 組み立て手順、導入情報、CD 件零件: 2 個塑膠零件、1 個布質紙槽、8 個螺 pendahuluan, CD / 2. Printer / 3. Kartrid tinta / 4.
列打印机组装说明 / 2. プリンタ / 3. インクカートリッジ / 4. 用紙 絲、2 個腳架、1 個扳手、1 個橫桿、4 個特殊 Ekstensi baki / 5. Komponen aksesori dudukan: 2
補助トレイ / 5. スタンド アクセサリ部品: プ 螺帽 / 6. 電纜 penahan plastik, 1 wadah kain, 8 sekrup, 2 kaki ZHTW ラスチック部品2個、ファブリック ビン1個、 penyangga, 1 obeng, 1 palang lintang, 4 mur
HP Design Jet
ネジ8本、脚部2個、キー 1個、クロスバー 1 khusus / 6. Kabel daya
T120 與 T520 Printer 系 本、特殊ナット4個 / 6. 電源コード
列印表機組裝說明 注記: セットアップ時にプリントヘッドの LAN 和 USB 纜線並未隨附(如需 LAN 連線,則需
Catatan: kertas lembar berukuran A4 (tidak
disertakan) diperlukan untuk menyelaraskan
KO HP Design Jet printhead saat konfigurasi berlangsung. Kabel LAN dan kabel USB tidak disertakan (digunakan
T120 및 T520 Printer 시리 LANおよびUSBケーブルは付属していません jika sambungan LAN diperlukan). Printhead telah (LAN接続が必要な場合に使用します)。 dipasang.
ID HP Design Jet
EN Please read these instructions carefully. These assembly instructions explain how to assemble the printer. Notice that
T120 dan T520 Printer the icons used in this document are also located on the printer packaging. The icons help you locate the parts needed
series Petunjuk pemasangan at each stage of the assembly. Because spare screws are supplied, some screws may remain unused after assembly of the printer.
printer
EN: 2m at the side is needed for unpacking.The size of the crate is: / JA: 開 JA 以下の指示をよくお読みください。 以下の手順では、プリンタを組み立てる方法について説明しま 梱する際は、横に2mのスペースが必要です。 クレートのサイ ズ: / ZHCN: 侧面应留出 2 米的空间以拆开包装。 包装箱尺
寸: / ZHTW: 打開包裝時,側邊需要 2 公尺的空間。 包裝箱的大
小: / KO: 상자를 풀려면 옆면에 2m가 필요합니다. 상자 크기: / ID:
Diperlukan area seluas 2 m di bagian samping untuk membuka kemasan. Ukuran kemasan:
ZHCN 请仔细阅读这些说明。 这些组装说明对如何组装打印机进行了介绍。 请注意,在打印机包装上也可以找 24” T120: L1108 x W570x H380 mm 24”
到本文档中使用的图标。 这些图标将帮助您找到每个组装阶段所需的部件。 由于提供了备用螺钉,在组装 T520: L1123 x W577 x H623 mm 36” T520: L1423 x W577 x H623 mm
ZHTW 請仔細閱讀下列說明。 這些組裝說明將解釋如何組裝印表機。 請注意,本文件中使用的圖示也可以在印 表機的包裝上找到。 這些圖示可協助您找出每個組裝過程所需的零件。 由於我們有提供備用螺絲,因此完
成印表機組裝後仍會有多餘的未用螺絲。 EN: 2 people are required to perform certain tasks / JA: 特定の作業は、2 名で行う必要があります。/ ZHCN: 某些任务需要 2 人完成。 / ZHTW: 某些工作需要 2 個人才能執行。/ KO: 일부 작업의 경우 두 사람이 필
KO 이 설명서를 주의깊게 읽으십시오. 이 조립 지침에서는 프린터 조립 방법을 설명합니다. 이 지침에서 사용
요합니다. / ID: Diperlukan 2 orang untuk menjalankan
된 아이콘은 프린터 포장에도 표시되어 있습니다. 아이콘으로 각 조립 단계에 필요한 부품을 쉽게 찾을 수 있 tugas tertentu. 습니다. 나사는 여유 있게 제공되므로 프린터 조립이 끝난 뒤 남을 수 있습니다.
ID Baca petunjuk ini dengan cermat. Petunjuk pemasangan ini menjelaskan tentang cara memasang printer. 100’ Perhatikan bahwa ikon yang digunakan dalam dokumen ini juga terdapat pada kemasan printer. Ikon ini akan
EN: Time required for assembly of the printer is approximately
membantu Anda menemukan suku cadang yang diperlukan pada setiap tahap pemasangan. Karena tersedianya
100 minutes / JA: プリンタの組み立て所要時間は約100分です。 /
sekrup cadangan, maka tidak semua sekrup akan digunakan pada pemasangan printer ini.
ZHCN: 组装打印机大约需要 100 分钟的时间。/ ZHTW: 組裝印表機大約 要花 100 分鐘的時間。/ KO: 프린터 조립에 소요되는 시간은 약 100분
© Copyright 2012, 2017 HP 입니다. / ID: Waktu yang diperlukan untuk memasang printer adalah Development Company, L.P.
sekitar 100 menit.
Camí de Can Graells 1-21 · 08174 Sant Cugat del Vallès Barcelona · Spain
EN: Tools required: Screwdriver (included) / JA: 必要な工具: ドライバ(付 All rights reserved 属しています)。/ ZHCN: 必备工具: 螺丝刀(附带提供)。 / ZHTW: 必要工具: 螺絲起子(隨附)。/ KO: 필요한 도구: 드라이버(포함됨) / ID: Alat yang diperlukan: Obeng (disertakan).
HP Company - Learning Products - Barcelona
Page Summary Contents For HP DesignJet T120 Printer HP DesignJet T120 and T520 Printer Series - Printer Assembly Guide
Manual Details
| Brand | HP |
|---|---|
| Pages | 23 |
| File Size | 8.46 MB |
| Published | June 18, 2026 |
Enter the captcha to get the download link:

Frequently Asked Questions
What paper is needed when aligning the printhead during setup?
You need an A4 sheet of paper (which is not included) for printhead alignment during configuration.
When should I connect my computer to the printer?
Do not connect your computer first; you must install the product driver software on the computer initially.
Are LAN and USB cables provided with the unit?
No, LAN and USB cables are not included but are required if a connection is needed.
What tools and time do I need for assembly?
Assembly takes about 100 minutes, and the only tool listed as required is a screwdriver (included).