HP Color LaserJet 5500 Series Printers - Start Guide
Summary
This comprehensive guide serves as the essential manual for setting up and operating the HP Color LaserJet 5500 series color laser printer. It provides step-by-step instructions covering initial installation, environment setup, network connectivity (parallel/network), and software integration for both Windows and Macintosh systems. Designed for IT professionals and businesses, this resource ensures proper deployment of advanced printing capabilities while covering crucial regulatory standards and best practices for optimal performance in any professional setting.
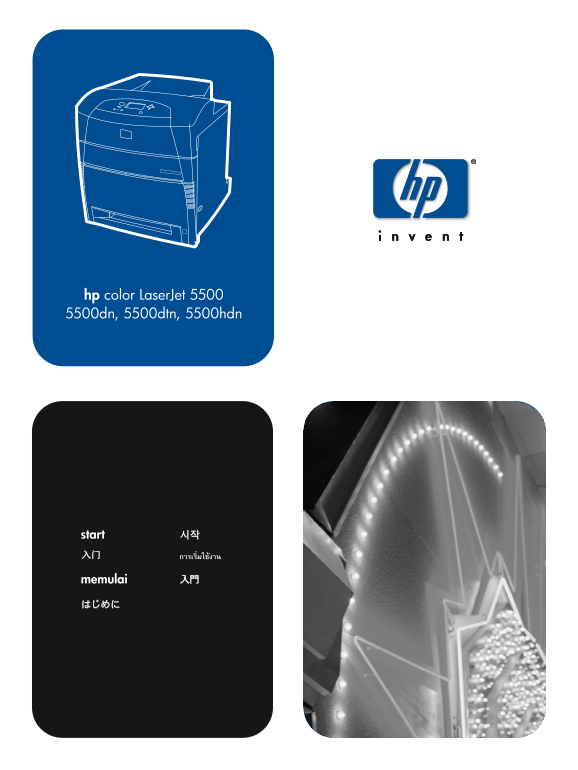
Page 1 Text Content
hp color Laser Jet 5500 5500dn, 5500dtn, 5500hdn
start
memulai
start
A4/Letter FRONT COVER
Page Summary Contents For HP Color LaserJet 5500 Series Printers - Start Guide
Page 1
hp color Laser Jet 5500 5500dn, 5500dtn, 5500hdn start memulai start A4/Letter FRONT COVER
Page 2
Copyright Information Warranty © Copyright Hewlett-Packard Company 2002 The information contained in this document is subject to change without notice. All Rights Reserved. Reproduction, adaptation, o...
Page 3
lish ah asa In esia Models HP Color Laser Jet 5500dtn: includes the features of HP Color Laser Jet 5500: base model. Includes 96 MB of 5500dn, additional 500-sheet paper feeder, a printer stand, SDRAM...
Page 4
ah as In es ia lis mm (37 inches) mm (43 inches) 627.50 mm (25 inches) HP Color Laser Jet 5500hdn: includes the features of Prepare the location. Place on a sturdy, level surface. Locate in 5500dtn, a...
Page 5
Regulate the environment. Do not place in direct sunlight. Unpack the printer. Cut the tape to open the box. Do not cut the Ensure the environment is free from abrupt temperature or humidity strapping...
Page 6
ah as In es ia lis Open the flaps and disconnect the strapping loops. Lift the box off and set it aside. Buka kelepak penutup kardus dan lepaskan tali pengikat. Angkat kardus dan sisihkan.
Page 7
Locate the two connecting tabs on the bottom. Bend the tabs out Lift the inner sleeve up and off of the printer. and down. Remove the two top cushion rails. Cari kedua tonjolan kelepak penghubung yang...
Page 8
ah as In es ia lis Remove the accessory box. Slide the top sections of each packing Package contents. 1) HP Color Laser Jet 5500 series printer. cushion off. 2) Print cartridges. 3) Software and elect...
Page 9
Optional package contents: 6) Optional 500-sheet paper Install the stand and optional 500-sheet paper feeder: feeder (Tray 3). 7) Overlays. 8) Parallel cable. 9) Printer stand. Remove the 500-sheet pa...
Page 10
ah as In es ia lis Place the printer stand in the prepared location. CAUTION: The Remove trays: Remove the trays from the printer and 500-sheet prepared location must be level, sturdy, and must suppor...
Page 11
Remove the packing material from the trays. Use the guide pins on the printer stand to align the 500-sheet paper feeder as you lower it onto the printer stand. Lepaskan bahan pengemas dari semua baki....
Page 12
ah as In es ia lis If you are installing another 500-sheet paper feeder, align the Note: If you already have one optional 500-sheet paper feeder second paper feeder with the guide pins on the first pa...
Page 13
WARNING! If the printer is already set up, turn the printer off and Set up the printer: It takes four people to lift and move the unplug the power cord from both the printer and the power outlet. prin...
Page 14
ah as In es ia lis Use the guide pins on the 500-sheet paper feeder to align the Gently lower the printer onto the 500-sheet paper feeder. printer as you lower it onto the paper feeder. CAUTION: Avoid...
Page 15
Use caution when stacking the 500-sheet paper feeders and the Secure the units: Insert an attachment screw into each of the four printer. Avoid tipping. alignment holes. Using your fingers or a coin, ...
Page 16
ah as In es ia lis Install paper trays: Adjust the rear guide by squeezing the Slide the side guides to the desired size. guide adjustment latch and sliding the back of the tray to the size of the pap...
Page 17
Load paper face-up. Load up to 500 sheets of 75 g/m2 (20 lb) Insert the trays into the printer and the 500-sheet paper feeder. stock in the 500-sheet feeder trays. Capacity may vary with other paper t...
Page 18
ah as In es ia lis Locate the printer parts: Front 1) Control panel. 2) Top cover. Rear 1) 250-sheet output bin. 2) On/off switch. 3) Optional 3) Front cover (access to Tray 1). 4) 500-sheet input tra...
Page 19
Using the side handles, open the top cover. Remove the orange Install a new overlay (optional): Position the new overlay packing tape from the printer. Remove the orange shipping locks over the top of...
Page 20
ah as In es ia lis Connect Power. Using the control panel menus: 1) Press or to scroll 1) Plug the AC power cord into the printer and into the power outlet. through menus. 2) Press ✔ to select an item...
Page 21
Change display language (optional): The control panel displays LANGUAGE= in English. 1) Press until If the control panel displays LANGUAGE= in English, go to the next the preferred language appears. 2...
Page 22
ah as In es ia lis Install print cartridges: 2) Grasp the top edge of the front cover and pull to open the front After a short while, the control panel displays INSTALL SUPPLIES. cover. 1) Using the s...
Page 23
3) Grasp the green handles on either side of the transfer unit and 4) Remove the print cartridge from the plastic bag. 5) Grasp both pull down. CAUTION: Do not place anything on the transfer unit side...
Page 24
ah as In es ia lis 6) Remove the orange shipping tape. Remove and discard the 7) Remove the inside sealing tape by pulling the orange loop on the orange shipping locks. end of the cartridge and pullin...
Page 25
8) Grasp the blue handles on the sides of the print cartridge. Insert 9) Using the green handles on either side of the transfer unit, close the print cartridges in the position shown (C cyan, Y yellow...
Page 26
ah as In es ia lis 10) Close the front cover. 11) Close the top cover. 10) Tutup penutup depan. 11) Tutup penutup atas.
Page 27
INFORMATION After a short while, the control panel should display READY. Print a configuration page to ensure that the printer is working properly. Press ✔. Press until INFORMATION appears. Press ✔. P...
Page 28
ah as In es ia lis On the configuration page, verify that the installed tray appears in Connections: the list of Paper Trays and Options. Direct to network. Connect one end of the network cable to the...
Page 29
Network print server. Connect one end of a network cable into Peer to peer (direct to network). Connect one end of a the server. Connect the other end to the network. Connect one end network cable to ...
Page 30
ah as In es ia lis Peer to peer (parallel). Connect two or more computers to the Parallel connection. Connect the parallel cable to the proper network hub using network cables. Connect one end of a pa...
Page 31
Install the printer software. Place the compact disc shipped Windows. If the CD browser starts automatically, select Install with the printer in the CD-ROM drive on the computer. Printer. Otherwise, c...
Page 32
ah as In es ia lis Macintosh. Run the Laser Jet installer. Or, from the Chooser, select On all computers that print to the printer, configure the printer the HP Color Laser Jet 5500 printer. drivers t...
Page 36
copyright © 2002 Hewlett-Packard Company www.hp.com A4/Letter BACK COVER
Manual Details
| Brand | HP |
|---|---|
| Pages | 36 |
| File Size | 11.11 MB |
| Published | May 29, 2026 |
80 views
Enter the captcha to get the download link:
