D-Link ShareCenter 2-Bay Network Storage Quick Installation Guide
Summary
Enhance your home network with this 2-bay network storage device, creating a central point for backing up and securely sharing valuable documents, photos, videos, and music across the internet and local area. This comprehensive quick start guide provides expert instructions on installation, connection requirements, and system configuration, ensuring smooth setup for both Windows and non-Windows users. Ideal for families, friends, or small businesses needing reliable, accessible network storage for all their digital memories and essential files.
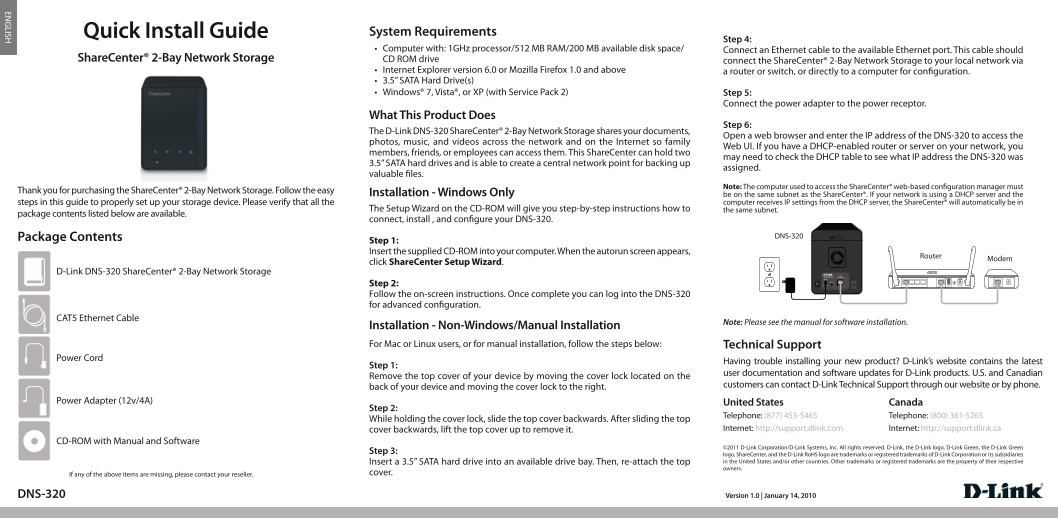
Page 1 Text Content
Quick Install Guide System Requirements
Step 4:
• Computer with: 1GHz processor/512 MB RAM/200 MB available disk space/ Connect an Ethernet cable to the available Ethernet port. This cable should
Share Center® 2-Bay Network Storage CD ROM drive connect the Share Center® 2-Bay Network Storage to your local network via
• Internet Explorer version 6.0 or Mozilla Firefox 1.0 and above a router or switch, or directly to a computer for configuration. • 3.5” SATA Hard Drive(s) • Windows® 7, Vista®, or XP (with Service Pack 2) Step 5:
Connect the power adapter to the power receptor.
What This Product Does
Step 6:
The D-Link DNS-320 Share Center® 2-Bay Network Storage shares your documents,
Open a web browser and enter the IP address of the DNS-320 to access the
photos, music, and videos across the network and on the Internet so family
Web UI. If you have a DHCP-enabled router or server on your network, you
members, friends, or employees can access them. This Share Center can hold two
may need to check the DHCP table to see what IP address the DNS-320 was
3.5” SATA hard drives and is able to create a central network point for backing up
assigned.
valuable files.
Note: The computer used to access the Share Center® web-based configuration manager must
Thank you for purchasing the Share Center® 2-Bay Network Storage. Follow the easy Installation - Windows Only
be on the same subnet as the Share Center®. If your network is using a DHCP server and the steps in this guide to properly set up your storage device. Please verify that all the computer receives IP settings from the DHCP server, the Share Center® will automatically be in
The Setup Wizard on the CD-ROM will give you step-by-step instructions how to the same subnet.
package contents listed below are available.
connect, install , and configure your DNS-320.
Package Contents DNS-320
Step 1: Insert the supplied CD-ROM into your computer. When the autorun screen appears,
Router
Modem
click Share Center Setup Wizard.
D-Link DNS-320 Share Center® 2-Bay Network Storage
Model: DNS-320 10/100/1000 LAN
DC IN RESET
RESET
Step 2: LAN INTERNET USB 3A1 INTERNET5V
Follow the on-screen instructions. Once complete you can log into the DNS-320 for advanced configuration.
CAT5 Ethernet Cable
Note: Please see the manual for software installation.
Installation - Non-Windows/Manual Installation For Mac or Linux users, or for manual installation, follow the steps below: Technical Support
Power Cord
Having trouble installing your new product? D-Link’s website contains the latest
Step 1:
user documentation and software updates for D-Link products. U.S. and Canadian
Remove the top cover of your device by moving the cover lock located on the
back of your device and moving the cover lock to the right. customers can contact D-Link Technical Support through our website or by phone.
Power Adapter (12v/4A) United States Canada
Step 2:
Telephone: (877) 453-5465 Telephone: (800) 361-5265
While holding the cover lock, slide the top cover backwards. After sliding the top
cover backwards, lift the top cover up to remove it. Internet: http://support.dlink.com Internet: http://support.dlink.ca
CD-ROM with Manual and Software
©2011 D-Link Corporation/D-Link Systems, Inc. All rights reserved. D-Link, the D-Link logo, D-Link Green, the D-Link Green
Step 3:
logo, Share Center, and the D-Link Ro HS logo are trademarks or registered trademarks of D-Link Corporation or its subsidiaries Insert a 3.5” SATA hard drive into an available drive bay. Then, re-attach the top in the United States and/or other countries. Other trademarks or registered trademarks are the property of their respective owners.
If any of the above items are missing, please contact your reseller. cover.
DNS-320 Version 1.0 | January 14, 2010
EN LISH
Page Summary Contents For D-Link ShareCenter 2-Bay Network Storage Quick Installation Guide
Manual Details
| Brand | D-Link |
|---|---|
| Pages | 1 |
| File Size | 250.85 KB |
| Published | May 31, 2026 |
Enter the captcha to get the download link:

Frequently Asked Questions
How do I physically install a hard drive?
Open the top cover by moving the lock to the right, slide the top back, and insert the 3.5” SATA hard drive into an available bay before re-attaching the cover.
What operating systems are required for setup?
The system supports Windows XP (with Service Pack 2), Vista, or Windows 7. Access requires Internet Explorer version 6.0 or Mozilla Firefox 1.0 and above.
Does my network need specific IP settings?
Yes, the computer used to configure the ShareCenter must be on the same subnet as the device. If using DHCP, check the table for the assigned DNS-320 IP address.
What types of digital media can this unit share?
The D-Link DNS-320 shares documents, photos, music, and videos across the network and potentially over the public Internet.