Dell AP-220- MNT-W2 Wall Mount Installation Guide
Summary
This installation guide covers the AP-220-MNT-W2 Wall Mount Kit for Aruba access points. It provides installation instructions including package contents, three Ethernet cable routing options, and step-by-step mounting bracket installation. The guide covers cable routing from below, behind, or using the Ethernet cable adapter. Target users are network installers mounting Aruba AP-220 series access points.
Page 1 Text Content
AP-220-MNT-W2 Wall Mount Kit Installation Guide
This mount kit supports multiple AP models. All installation images show the 225 AP.
Package Contents AP-220-MNT-W2 Mounting Bracket 2x Ethernet Cable Adapter T8 Torx Security Screw
Installation Complete the following steps to install your access point using the AP-220-MNT-W2.
Ethernet Cable Routing Options There are three options for routing the Ethernet cable depending the placement of your AP in relation to the source of the Ethernet cable.
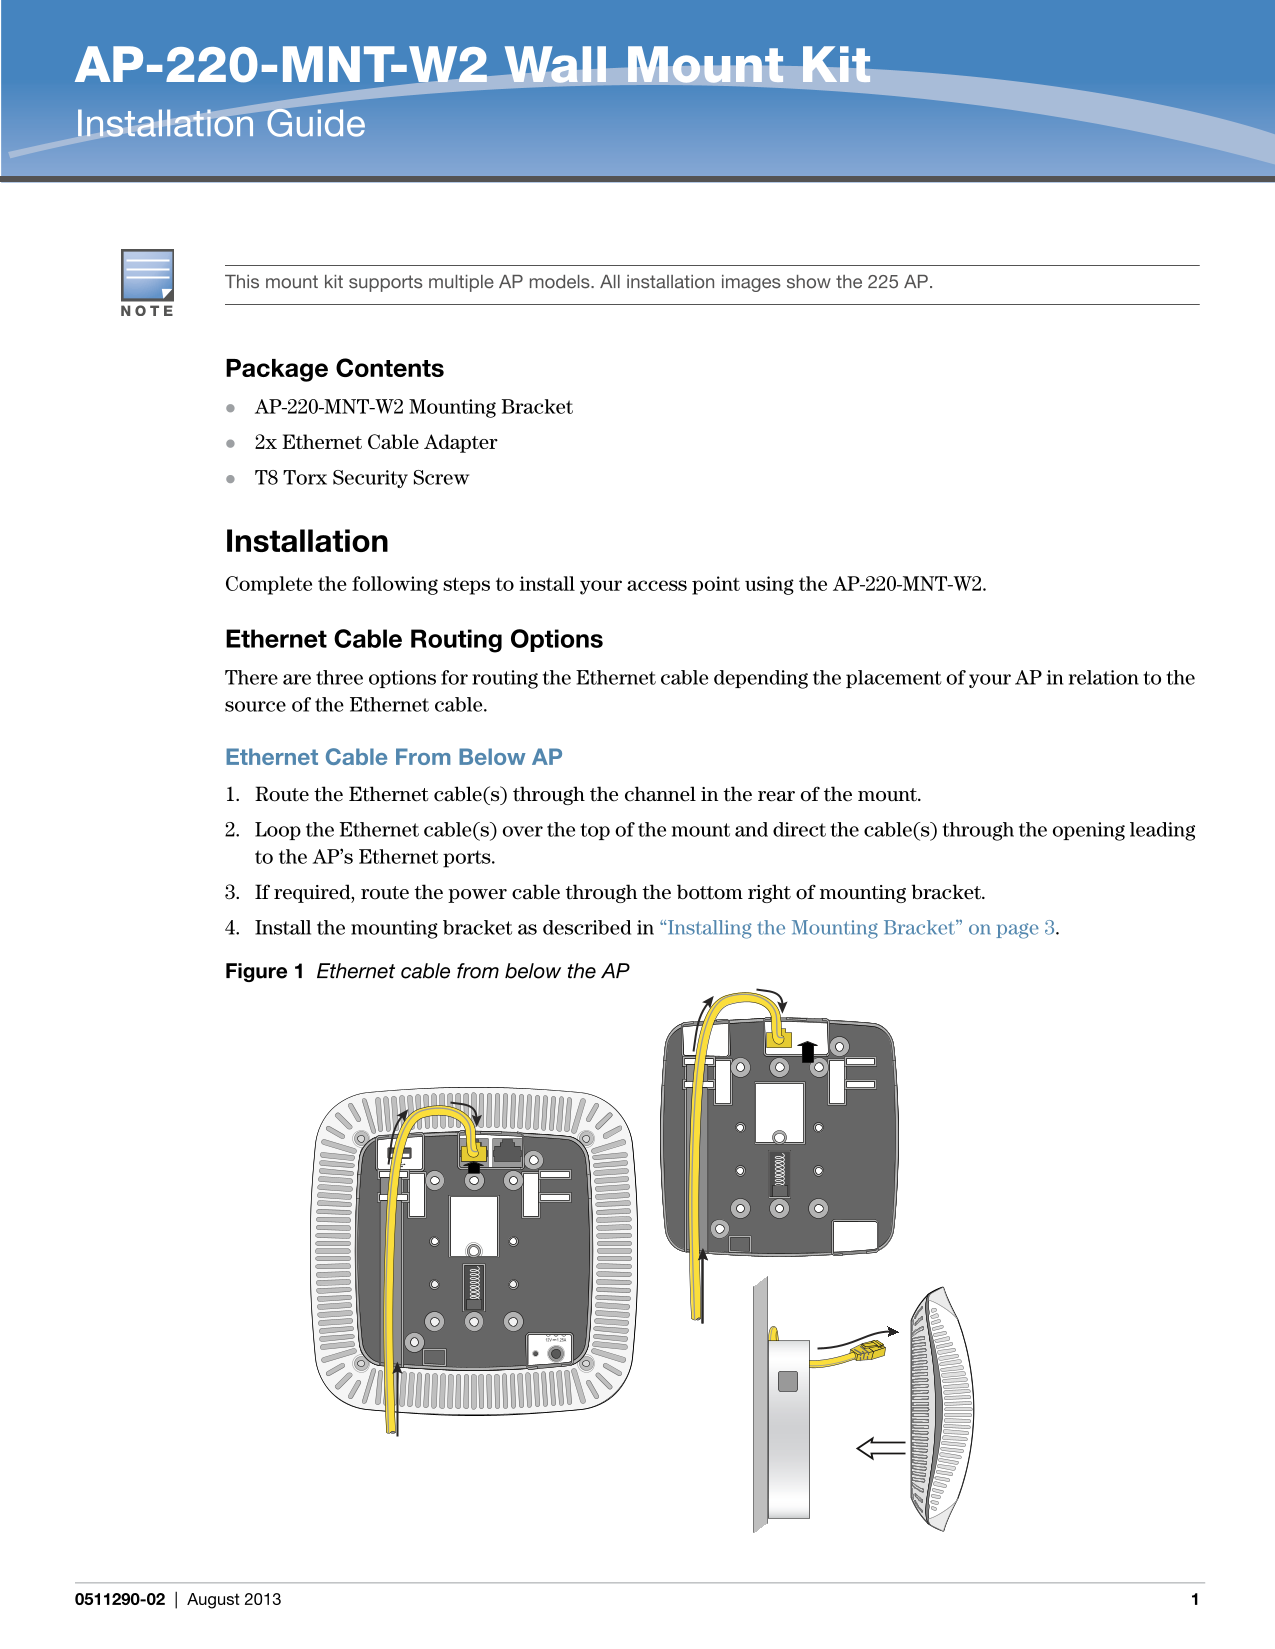
Ethernet Cable From Below AP 1. Route the Ethernet cable(s) through the channel in the rear of the mount. 2. Loop the Ethernet cable(s) over the top of the mount and direct the cable(s) through the opening leading to the AP’s Ethernet ports. 3. If required, route the power cable through the bottom right of mounting bracket. 4. Install the mounting bracket as described in “Installing the Mounting Bracket” on page 3.
Figure 1 Ethernet cable from below the AP
0511290-02 August 2013
Page Summary Contents For Dell AP-220- MNT-W2 Wall Mount Installation Guide
Manual Details
| Brand | Dell |
|---|---|
| Pages | 4 |
| File Size | 684.01 KB |
| Published | June 29, 2026 |
Enter the captcha to get the download link:

Frequently Asked Questions
What is included in the AP-220-MNT-W2 package?
The kit includes the Mounting Bracket, two Ethernet Cable Adapter(s), and T8 Torx Security Screws.
How do I prepare the surface for mounting the bracket?
First, install any necessary wall anchors. Then, align the screw holes of the bracket with these anchors or demarcated screw points.
Which cable routing option should be used?
There are three options: Ethernet from Below AP, Ethernet Behind AP, and Using The Ethernet Cable Adapter.
What tools/supplies do I need besides what's in the box?
The kit does not include wall anchors or screws. You must also ensure your power cable is routed when necessary.