Page 1
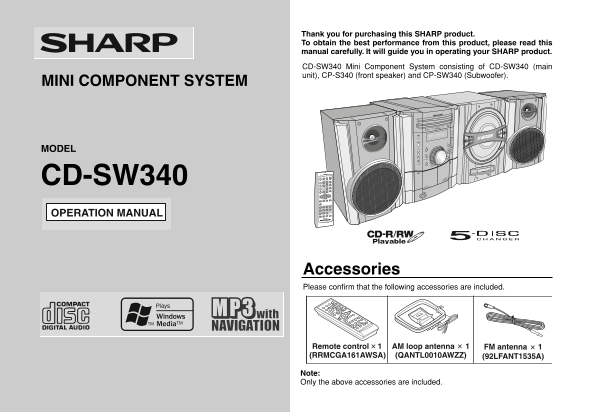
Thank you for purchasing this SHARP product. To obtain the best performance from this product, please read this manual carefully. It will guide you in operating your SHARP product. CD-SW340 Mini Compo...
Page 2
SPECIAL NOTES CD-SW340 Im rt an In st ru ct io NOTE This equipment has been tested and found to comply with the limits for a Class B digital device, pursuant to Part 15 of the FCC Rules. These limits ...
Page 3
IMPORTANT SAFETY INSTRUCTIONS CD-SW340 Electricity is used to perform many useful functions, but it can also 10) Protect the power cord from being walked on or pinched particularly at cause personal i...
Page 4
CD-SW340 IMPORTANT SAFETY INSTRUCTIONS (continued) Im rt an In st ru ct io 18) Damage Requiring Service - Unplug this product from the wall 23) Outdoor Antenna Grounding - If an outside antenna or cab...
Page 5
Contents CD-SW340 General Information ENERGY STAR® Program Information Precautions . . . . . . . . . . . . . . . . . . . . . . . . . . . . . . . . . . . . . . . . . 6 Controls and indicators . . . . ....
Page 6
CD-SW340 Precautions en er al In fo rm at io General Hold the AC power plug by the head when Please ensure that the equipment is positioned in a well ventilated removing it from the AC outlet, as pull...
Page 7
Controls and indicators CD-SW340 Front panel Reference page 1. Disc Trays . . . . . . . . . . . . . . . . . . . . . . . . . . . . . . . . . . . . . . . 18 2. Timer Indicator . . . . . . . . . . . . . ...
Page 8
043WS-DC )deunitnoc( srotacidni dna slortno C en er al In fo rm at io yalpsi D egap ecnerefe R 81 . . . . . . . . . . . . . . . . . . . . . . . . . . . . srotacidn I rebmu N csi D.1 22 . . . . . . . ....
Page 9
CD-SW340 Front Speaker 1. Tweeter 2. Woofer 3. Bass Reflex Duct 4. Speaker Wire 5. Speaker Light-Up Wire Subwoofer 1. Subwoofer 2. Bass Reflex Duct 3. Subwoofer Light-Up Wire 4. Speaker Wire 03/12/17 ...
Page 10
CD-SW340 Controls and indicators (continued) en er al In fo rm at io Remote control Reference page 1. Remote Control Transmitter . . . . . . . . . . . . . . . . . . . . . . . . 14 2. Disc Number Selec...
Page 11
snoitcennoc metsy S 043WS-DC .snoitcennoc yna gnikam erofeb droc rewop CA eht gulpnu ot erus eka M )21 egap ees( noitcennoc annetn A annetna MF annetna pool MA refoowbu Srekaeps tfe Lrekaeps thgi R er...
Page 12
CD-SW340 System connections (continued) re ar at io se Antenna connection Speaker Light-Up connection Supplied FM antenna: Connect the speaker light-up wires to the Connect the FM antenna wire to the ...
Page 13
CD-SW340 Placing the speaker system Demonstration mode There is no distinction between the right and left speakers. The first time the unit is plugged in, the Left speaker Main unit Right speaker unit...
Page 14
CD-SW340 Remote control re ar at io se Battery installation Notes concerning use: Replace the batteries if the operating distance is reduced or if the Use 2 “AA” size batteries (UM/SUM-3, R6, HP-7 or ...
Page 15
General control CD-SW340 Volume control Main unit operation: When the VOLUME control is turned clockwise, the volume will increase. TIMER When it is turned counterclockwise, the MAXIMUM0 CD volume wil...
Page 16
CD-SW340 Setting the clock (Remote control only) as ic er at io Press the or button to adjust the hour and then press the MEMORY button. Press the or button once to advance the time by 1 hour. Hold it...
Page 17
Listening to a CD or MP3/WMA disc CD-SW340 This system can play back a standard CD, CD-R/RW in the CD format and CD-R/RW with MP3 or WMA files, but cannot record on them. Some audio CD-R and CD-RW dis...
Page 18
CD-SW340 Listening to a CD or MP3/WMA disc (continued) 3/ is la yb ac Playback will begin from track 1 on disc 1. After that disc finishes Press the ON/STAND-BY button to turn the power on. playing, t...
Page 19
Advanced CD or MP3/WMA disc CD-SW340 playback Various disc functions Function Main unit Remote Operation To specify a disc to play control You can play a disc by specifying the disc number. Play Press...
Page 20
CD-SW340 Advanced CD or MP3/WMA disc playback (continued) 3/ is la yb ac Direct track search To repeat one disc: By using the direct search buttons, the desired tracks on the current Press the / butto...
Page 21
CD-SW340 Programmed play To clear the programmed selections: You can choose up to 32 selections for playback in the order you like. Press the CLEAR/DIMMER button on the remote control while the “MEMOR...
Page 22
CD-SW340 MP3/WMA navigation (only for MP3/WMA files) 3/ is la yb ac MP3/WMA navigation: You can search and play files by folder or title. For example, when you assign three titles to a file, enter gen...
Page 23
CD-SW340 File search (by folder or title 1/2/3) Use the or cursor button to scroll and select a folder You can search and play files by folder or title 1/2/3 within one MP3/ (or title), and then press...
Page 24
CD-SW340 MP3/WMA navigation (only for MP3/WMA files) (continued) 3/ is la yb ac Character search (for folder or title 1/2/3) When finished, press the ENTER button. The unit searches By entering a name...
Page 25
CD-SW340 Programmed play (for folder, title 1/2/3) To check, add or delete programmed contents: Folders or titles can be programmed within one MP3/WMA disc. In the stop mode, select a folder (or title...
Page 26
CD-SW340 Listening to the AM/FM stations ad io Tuning Press the ON/STAND-BY button to turn the power on. POWER ON/ STAND-BY Press the TUNER (BAND) button repeatedly to select the TIMER desired frequen...
Page 27
CD-SW340 Memorizing a station To recall a memorized station You can store 40 AM and FM stations in memory and recall them at Press the PRESET ( or ) button for less than 0.5 seconds to the push of a b...
Page 28
CD-SW340 Listening to a cassette tape (TAPE 1 or TAPE 2) ap la yb ac Tape playback Before playback: For playback, use normal or low-noise tapes for Press the ON/STAND-BY button to turn the power on. t...
Page 29
Recording on a cassette tape CD-SW340 Various tape functions Before recording: Function Main unit Remote Operation When recording important selections, make a preliminary test to control ensure that t...
Page 30
CD-SW340 Recording on a cassette tape (continued) ap ec rd in To stop recording: POWER ON/ STAND-BY Press the (TAPE ) button. The disc and tape will stop. To perform programmed recording: OPEN/ CLOSE ...
Page 31
Timer and sleep operation CD-SW340 (Remote control only) Dubbing from tape to tape You can record from TAPE 1 to TAPE 2. Timer playback: Press the ON/STAND-BY button to turn the power on. The unit tur...
Page 32
CD-SW340 Timer and sleep operation (Remote control only) (continued) va ce ea tu re Press the or button to select “PLAY” or “REC”, and press the MEMORY button. White Red The illustrations show the dai...
Page 33
CD-SW340 Note: 10 Adjust the volume using the VOLUME control, and then When performing timer playback or recording using another unit press the MEMORY button. connected to the AUDIO IN jack, select “A...
Page 34
CD-SW340 Timer and sleep operation (Remote control only) (continued) va ce ea tu re Sleep operation To cancel the sleep operation: Press the ON/STAND-BY button while “SLEEP” is indicated. The radio, C...
Page 35
Enhancing your system CD-SW340 The connection cord is not included. Purchase a commercially Auto power on function: available cord as shown below. When you press any of the following buttons, the unit...
Page 36
CD-SW340 Troubleshooting chart ef er en ce Many potential problems can be resolved by the owner without Cassette deck calling a service technician. Symptom Possible cause If something is wrong with th...
Page 37
CD-SW340 Tuner Clearing all the memory (reset) Press the ON/STAND-BY button to enter the power stand-by Symptom Possible cause mode. The radio makes unusual Is the unit placed near the TV or While pre...
Page 38
CD-SW340 Maintenance Specifications ef er en ce Cleaning the tape-handling parts As part of our policy of continuous improvement, SHARP reserves Dirty heads, capstans or pinch rollers can cause poor s...
Page 39
CD-SW340 CD player Front Speaker Type 5-disc multi-play compact disc player Type 2-way type speaker system Signal readout Non-contact, 3-beam semiconductor laser 2" (5 cm) tweeter pickup 6-5/16&q...
Page 40
CONSUMER LIMITED WARRANTY SHARP ELECTRONICS CORPORATION warrants to the first consumer purchaser that this Sharp brand product (the Product ), when shipped in its original con- tainer, will be free fr...