# A B C D E F G H I J K L M N O P Q R S T U V W X Y Z

SHARP CD-PC3500 Operation Manual

Summary

Enhance your audio setup with this Mini Component System (CD-PC3500), which includes a main unit and comprehensive front, center, and rear speakers. This manual serves as your complete guide for safe operation and optimal performance. It covers essential usage instructions, detailed safety warnings (including electrical precautions and proper grounding), ensuring that new owners can setup and enjoy their system with confidence.
📄 Preview PAGE OF 24

Page 1 Text Content

HK <P=001>

MODEL

MINI COMPONENT SYSTEM

CD-PC3500

OPERATION MANUAL

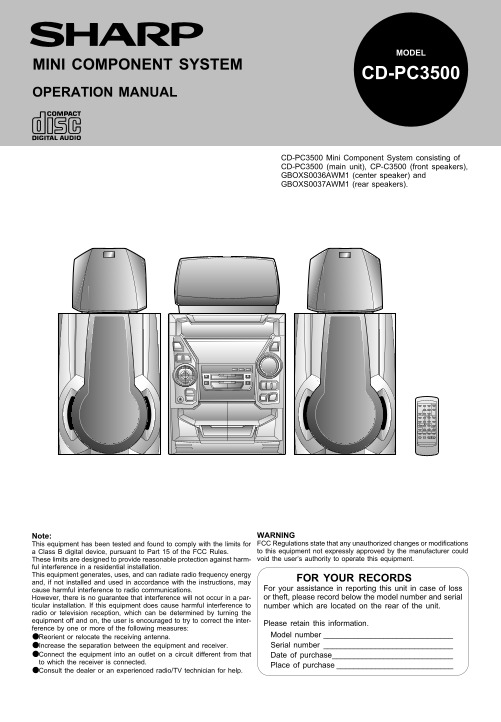
CD-PC3500 Mini Component System consisting of CD-PC3500 (main unit), CP-C3500 (front speakers), GBOXS0036AWM1 (center speaker) and GBOXS0037AWM1 (rear speakers).

Note: WARNING This equipment has been tested and found to comply with the limits for FCC Regulations state that any unauthorized changes or modifications a Class B digital device, pursuant to Part 15 of the FCC Rules. to this equipment not expressly approved by the manufacturer could These limits are designed to provide reasonable protection against harm- void the user’s authority to operate this equipment.

ful interference in a residential installation. This equipment generates, uses, and can radiate radio frequency energy

FOR YOUR RECORDS

and, if not installed and used in accordance with the instructions, may

cause harmful interference to radio communications. For your assistance in reporting this unit in case of loss However, there is no guarantee that interference will not occur in a par- or theft, please record below the model number and serial

ticular installation. If this equipment does cause harmful interference to number which are located on the rear of the unit. radio or television reception, which can be determined by turning the equipment off and on, the user is encouraged to try to correct the inter-

Please retain this information.

ference by one or more of the following measures:

●Reorient or relocate the receiving antenna. Model number _ _ _ _ _ _ _ _ _ _ _ _ _ _ _ _ _ _ _ _ _ _ _ _ _ _ _ _ _ _ Increase the separation between the equipment and receiver. Serial number _ _ _ _ _ _ _ _ _ _ _ _ _ _ _ _ _ _ _ _ _ _ _ _ _ _ _ _ _ _

●Connect the equipment into an outlet on a circuit different from that Date of purchase _ _ _ _ _ _ _ _ _ _ _ _ _ _ _ _ _ _ _ _ _ _ _ _ _ _ _ _ to which the receiver is connected.

Place of purchase _ _ _ _ _ _ _ _ _ _ _ _ _ _ _ _ _ _ _ _ _ _ _ _ _ _ _

●Consult the dealer or an experienced radio/TV technician for help.

CD-PC3500(SEC) TINSE0281AWZZ

Page Summary Contents For SHARP CD-PC3500 Operation Manual

Page 1 HK &lt;P=001&gt; MODEL MINI COMPONENT SYSTEM CD-PC3500 OPERATION MANUAL CD-PC3500 Mini Component System consisting of CD-PC3500 (main unit), CP-C3500 (front speakers), GBOXS0036AWM1 (center speaker) a...
Page 2 HK &lt;P=001&gt; RISK OF ELECTRIC SHOCK DO NOT OPEN The lightning flash with arrowhead CAUTION: TO REDUCE THE The exclamation point within an equi- symbol, within an equilateral triangle, RISK OF ELEC...
Page 3 INTRODUCTION Thank you for purchasing this SHARP product. To obtain the best performance from this product, please read this manual carefully. It will guide you in operating your SHARP product. CONTEN...
Page 4 PRECAUTIONS General Care of compact discs Compact discs are fairly resistant to damage, however Please make sure that the unit is positioned in a well ven- mistracking can occur due to an accumulation...
Page 5 NAMES OF CONTROLS AND INDICATORS ■ Front panel 11. (CD) Disc Tray 12. Extra Bass Indicator 13. Spectrum Analyzer/Volume Level Indicator 14. (CD) Disc Number Indicators 15. (CD/TUNER) Memory Indicator ...
Page 6 (Continued) ■ Rear panel 11. AC Power Cord 12. CD Digital Output Jack 13. FM/AM Loop Antenna Jack 14. Subwoofer Output Jack 15. Video/Auxiliary (Audio Signal) Input Jacks 16. Front Speaker Terminals 1...
Page 7 HK &lt;P=001&gt; (Continued) ■ Remote control 11. Remote Control Transmitter LED 12. Surround Level Buttons 13. Center Level Buttons 14. Dolby Pro Logic Surround Mode Button 15. Test Tone Button 16. B...
Page 8 (Continued) Speaker connection Connect the speaker wires to the SPEAKER terminals as shown. Front speakers Connect the black wire to the minus (−) terminal, and the red Black wire to the plus (+) term...
Page 9 (Continued) Installation of the rear speakers: Example: When installed on the wall If possible, mount the rear speakers on the wall. lnstall them 23&quot; - 35&quot; (60 - 90 cm) above the height of y...
Page 10 (Continued) Demo mode (Main unit operation) When the AC power cord is first connected, the unit will enter the demonstration mode. To cancel the demonstration mode: When the unit is in the stand-by mo...
Page 11 HK &lt;P=001&gt; SOUND CONTROL Volume (Main unit) (Remote control) (Main unit operation) When the VOLUME control is turned clockwise, the volume will increase. When it is turned counterclockwise, the ...
Page 12 (Continued) Dolby Pro Logic Surround mode Center speaker Video and DVD software programs carrying the trademark are recordings that contain the same Dolby Surround data as used in movie theaters. spea...
Page 13 SETTING THE CLOCK In this example, the clock is set for the 12-hour (AM 12:00) sys- (Main unit operation) tem. Press the ON/STAND-BY button to enter the stand-by mode. MEMORY/SET POWER Press the CLOCK...
Page 14 COMPACT DISC OPERATION CD playback 5&quot; (12 cm) Press the ON/STAND-BY button to turn the power on. Press the CD button. 3&quot; (8 cm) Press the OPEN/CLOSE button to open the disc tray. Place the C...
Page 15 (Continued) Disc number selection When stopped, press the DISC SKIP button. Press the 0/R (0R) button. The next disc playback will begin, after which each following disc will be played sequentially. N...
Page 16 HK &lt;P=001&gt; (Continued) APMS (Automatic Programmable Music Selector) Selected disc number You can playback the tracks on the CDs in the disc 1 - 3 positions in any order desired. By specifying th...
Page 17 RADIO OPERATION Tuning (Main unit operation) Press the ON/STAND-BY button to turn the power on. Press the TUNER (BAND) button. Press the TUNER (BAND) button to select the desired fre- quency band. (FM...
Page 18 (Continued) To recall a memorized station: Preset memory scan Press the PRESET (X or W) button for less than 0.5 seconds to select the desired station. The stations saved in the preset memory can be s...
Page 19 RECORDING When recording important selections, be sure to Metal and Cr O2 tapes should not be used for recording or make a preliminary test to ensure that the desired dubbing. material is being proper...
Page 20 HK &lt;P=001&gt; HOW TO USE THE BUILT-IN TIMER Before setting the timer, make sure that the clock Timer playback setting is correct. (Page 12) (Main unit operation) Press the ON/STAND-BY button to tur...
Page 21 (Continued) (Main unit operation) Sleep operation MEMORY/ The radio, compact disc and cassette deck can all be turned off automatically. Play back the desired sound source. Press the TIMER/SLEEP butto...
Page 22 (Continued) Headphones Before plugging in or unplugging the headphones, make sure the volume level is reduced. Be sure your headphones have a 1/8&quot; (3.5 mm) diameter plug and are between 16 ohms a...
Page 23 TRANSPORTING THE UNIT Before you move this product to a new location, proceed OPEN/ as follows: CLOSE Press the ON/STAND-BY button to turn the power on. POWER ON/ Press the CD button. STAND-BY Press t...
Page 24 CONSUMER LIMITED WARRANTY SHARP ELECTRONICS CORPORATION warrants to the first consumer purchaser that this Sharp brand product (the “Product”), when shipped in its original container, will be free fro...

Manual Details

Brand Sharp
Pages 24
File Size 1023.14 KB
Published May 28, 2026
98 views

Enter the captcha to get the download link:

captcha

Frequently Asked Questions

What should I do if I experience radio or television interference?

Try reorienting the receiving antenna, increasing the separation between the equipment and receiver, or changing the electrical circuit.

Is there any risk of electric shock when operating this unit?

The manual includes cautions regarding high voltage; only qualified personnel should perform servicing (Do not open cover).

What is the warranty period for the CD-PC3500 Mini Component System?

It comes with a one (1) year warranty covering parts and labor from the date of purchase.

Can this appliance be used near sinks or tubs?

No, the unit should not be used near water sources such as bathtubs, washbowls, kitchen sinks, or pools.