HP Scanjet 4850 Professional Image Scanner Setup Poster
Summary
Digitize your memories and documents with the HP Scanjet 4800 series Photo Scanner. This essential manual provides comprehensive setup instructions, guiding users through hardware connection, software installation on Windows and Mac, and advanced scanning techniques. Whether you are capturing photos, preserving films, or digitizing everyday documents, this guide ensures a smooth start. Ideal for hobbyists, photographers, and professionals requiring reliable high-quality digitization in one easy-to-follow resource.
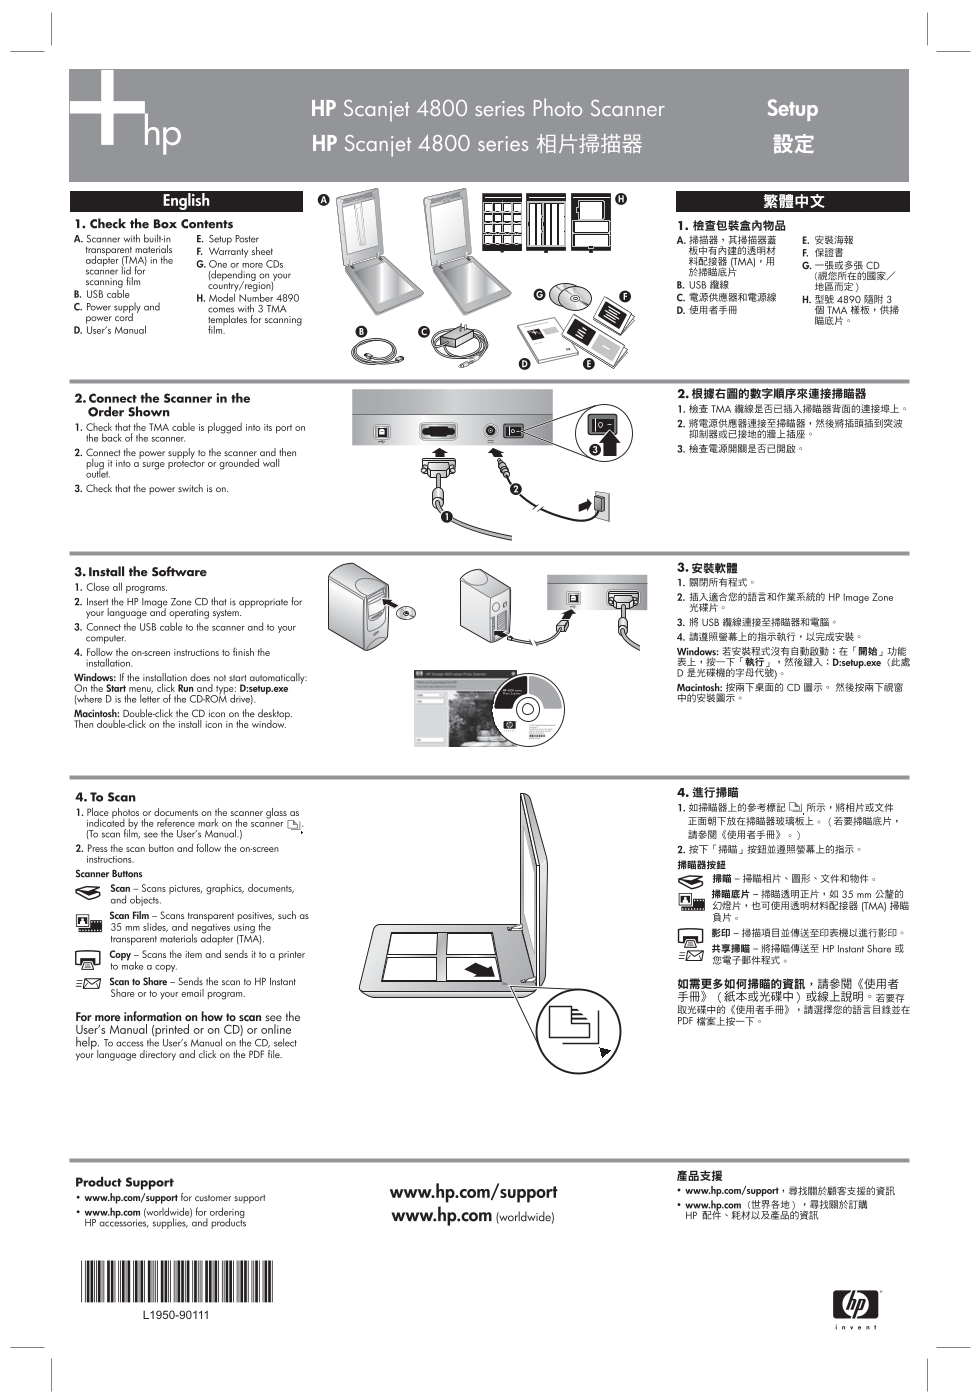
Page 1 Text Content
Setup HP Scanjet 4800 series Photo Scanner
English
1. Check the Box Contents A. Scanner with built-in E. Setup Poster transparent materials F. Warranty sheet adapter (TMA) in the
G. One or more CDs
scanner lid for
(depending on your
scanning film
country/region)
B. USB cable FG
H. Model Number 4890
C. Power supply and comes with 3 TMA power cord templates for scanning D. User’s Manual film.
2. Connect the Scanner in the Order Shown 1. Check that the TMA cable is plugged into its port on the back of the scanner. 2. Connect the power supply to the scanner and then plug it into a surge protector or grounded wall outlet. 3. Check that the power switch is on.
3. Install the Software 1. Close all programs. 2. Insert the HP Image Zone CD that is appropriate for your language and operating system. 3. Connect the USB cable to the scanner and to your computer. 4. Follow the on-screen instructions to finish the installation. Windows: If the installation does not start automatically:
On the Start menu, click Run and type: D:setup.exe HP 4800 series Photo Scanner
(where D is the letter of the CD-ROM drive). Macintosh: Double-click the CD icon on the desktop.
Then double-click on the install icon in the window. © 2004 Hewlett-Packard Development Company, L.P. Confidential commercial computer software. Valid license required. Product of Puerto Rico
4. To Scan 1. Place photos or documents on the scanner glass as indicated by the reference mark on the scanner . (To scan film, see the User’s Manual.) 2. Press the scan button and follow the on-screen instructions. Scanner Buttons Scan – Scans pictures, graphics, documents, and objects. Scan Film – Scans transparent positives, such as 35 mm slides, and negatives using the transparent materials adapter (TMA). Copy – Scans the item and sends it to a printer to make a copy. Scan to Share – Sends the scan to HP Instant Share or to your email program.
For more information on how to scan see the User’s Manual (printed or on CD) or online help. To access the User’s Manual on the CD, select your language directory and click on the PDF file.
Product Support
www.hp.com/support
• www.hp.com/support for customer support • www.hp.com (worldwide) for ordering
www.hp.com (worldwide)
HP accessories, supplies, and products
Page Summary Contents For HP Scanjet 4850 Professional Image Scanner Setup Poster
Manual Details
| Brand | Image |
|---|---|
| Pages | 2 |
| File Size | 1.12 MB |
| Published | May 29, 2026 |
Enter the captcha to get the download link:

Frequently Asked Questions
Where should I connect the scanner's power supply safely?
You must plug it into a surge protector or a grounded wall outlet before checking that the power switch is on.
What procedure should I follow if the software installation does not start automatically on Windows?
Go to the Start menu, click Run, and type: D:setup.exe.
How do I scan specialized materials like slides or negatives?
Use the 'Scan Film' button while utilizing the Transparent Materials Adapter (TMA) for these positives.
Where should physical photos and documents be placed before scanning?
Place them directly on the scanner glass, ensuring they are positioned according to the reference mark visible on the scanner.