HP Photosmart 140 Series Printer HP Photosmart 148 Photo Printer Setup Guide (Chinese Version)
Summary
Essential setup guide for the HP Photosmart Photo Printer, ensuring new users can easily get started. This manual walks you through connecting the device, installing the ink cartridge, performing language selection, running calibration tests, and preparing all materials. Learn how to load photo paper or memory cards and successfully print your first high-quality photos, making it perfect for any new home photo enthusiast.
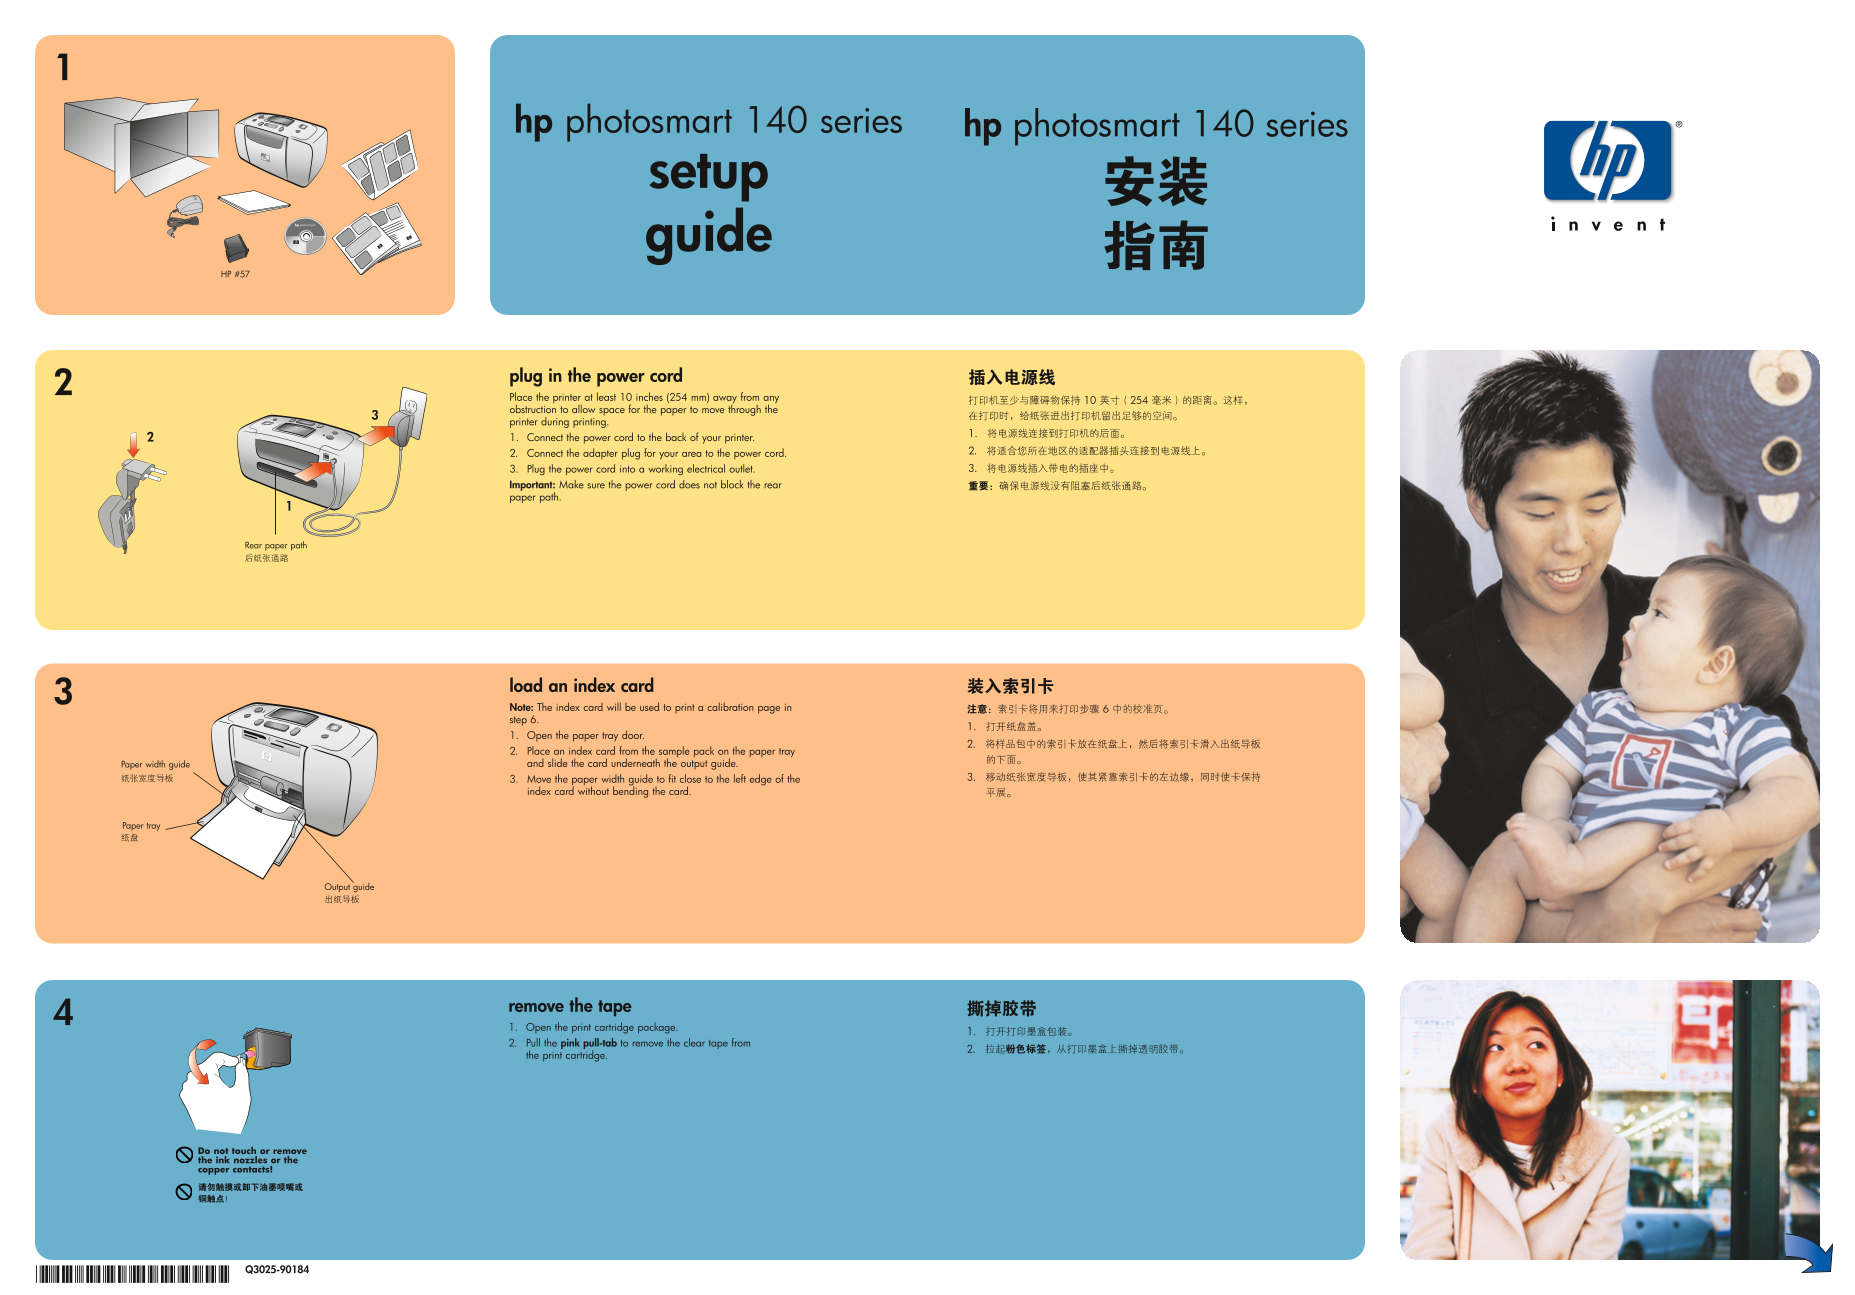
Page 1 Text Content
hp photosmart 140 series setup guide
HP #57
plug in the power cord Place the printer at least 10 inches (254 mm) away from any obstruction to allow space for the paper to move through the printer during printing. 1. Connect the power cord to the back of your printer. 2. Connect the adapter plug for your area to the power cord. 3. Plug the power cord into a working electrical outlet. Important: Make sure the power cord does not block the rear paper path.
Rear paper path
load an index card Note: The index card will be used to print a calibration page in step 6. 1. Open the paper tray door. 2. Place an index card from the sample pack on the paper tray Paper width guide and slide the card underneath the output guide. 3. Move the paper width guide to fit close to the left edge of the index card without bending the card.
Paper tray
Output guide
remove the tape 1. Open the print cartridge package. 2. Pull the pink pull-tab to remove the clear tape from the print cartridge.
Do not touch or remove the ink nozzles or the copper contacts!
Page Summary Contents For HP Photosmart 140 Series Printer HP Photosmart 148 Photo Printer Setup Guide (Chinese Version)
Manual Details
| Brand | HP |
|---|---|
| Pages | 2 |
| File Size | 2.17 MB |
| Published | June 16, 2026 |
Enter the captcha to get the download link:

Frequently Asked Questions
How far away must the printer be from obstacles when setting up?
The printer must be placed at least 10 inches (254 mm) away from any obstruction to allow space for paper movement.
What safety warnings should I follow during cartridge installation?
Do not touch or remove the ink nozzles or copper contacts. The cartridges must face inward and the nozzles facing down when inserted.
How do I correctly load glossy photo paper into the printer?
Place several sheets in the paper tray with the glossy side up, slide them under the output guide, and adjust the width guide to fit close to the left edge.