HP Photosmart 2600 Series Multifunction Printer Setup Brochure
Summary
Start your printing journey flawlessly with this essential setup guide for the HP Photosmart 2600 series all-in-one printer. This manual provides comprehensive instructions designed for new owners, guiding you through every step of deployment. The detailed content covers hardware connection—including power and cable wiring—initial physical installation procedures like loading paper and cartridges, powering up the device, and completing regional setup. Furthermore, it includes proactive troubleshooting sections to resolve common issues such as connectivity failures, software errors, or paper jams, ensuring a reliable start right out of the box.
Page 1 Text Content
Start Here
USB USB
HP all-in-one
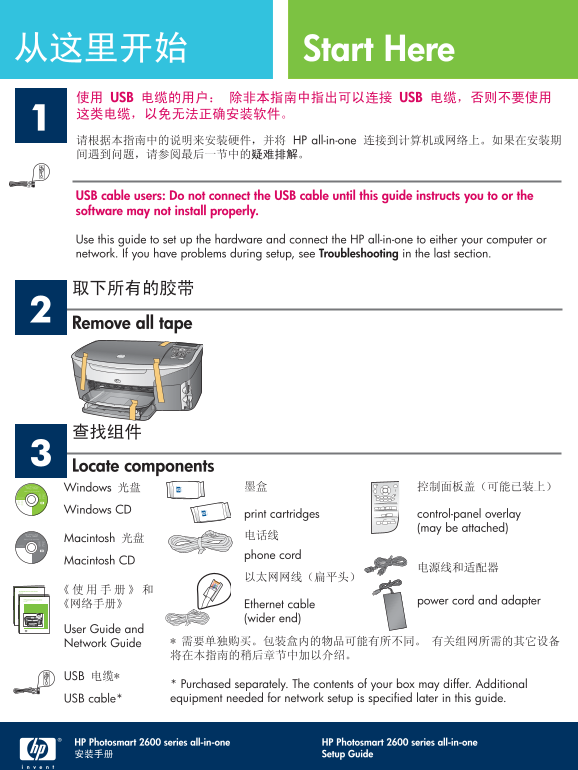
USB cable users: Do not connect the USB cable until this guide instructs you to or the software may not install properly.
Use this guide to set up the hardware and connect the HP all-in-one to either your computer or network. If you have problems during setup, see Troubleshooting in the last section.
Remove all tape
Locate components Title in HP Futura Book 14-20 pt., centered Subtitle in 10-14 pt., centered, white Windows
Magyar Italiano Japanese Español Slovencina Slovenšcina Svenska
© 2004 Hewlett-Packard Norsk Português Russian Simplified Traditional- Thai Türkçe
Development Company, L.P. Chinese Ukrainian
English Arabic Bahasa Português Suomi Français Deutsch Greek
Hrvatski Cesky Dansk Nederland Hangul Hebrew Magyar Italiano
Español
Windows CD
print cartridges control-panel overlay
(may be attached)
Title in HP Futura Book 14-20 pt., centered
Subtitle in 10-14 pt., centered, white Macintosh Magyar Italiano Japanese Español Slovencina Slovenšcina Svenska
© 2004 Hewlett-Packard Norsk Português Russian Simplified Traditional- Thai Türkçe
Development Company, L.P. Chinese Ukrainian
phone cord
Macintosh CD
HP Photosmart 2600/2700 series all-in-one User Guide
Horizontal cover image: HP Photosmart 2600/2700 series all-in-one User Guide
with either a cropped product photograph or a straight-on Replace this guideline area power cord and adapter front-view illustration
Ethernet cable
with either a cropped product Replace this guideline area Horizontal cover image:
photograph or a straight-on front-view illustration
with either a cropped product Replace this guideline area Horizontal cover image: (wider end) photograph or a straight-on front-view illustration
User Guide and Network Guide
* Purchased separately. The contents of your box may differ. Additional USB cable* equipment needed for network setup is specifi ed later in this guide.
HP Photosmart 2600 series all-in-one HP Photosmart 2600 series all-in-one
Setup Guide
Page Summary Contents For HP Photosmart 2600 Series Multifunction Printer Setup Brochure
Manual Details
| Brand | HP |
|---|---|
| Pages | 16 |
| File Size | 1.79 MB |
| Published | June 18, 2026 |
Enter the captcha to get the download link:

Frequently Asked Questions
What should I do if my cartridges cause an error message?
Remove the print cartridges, ensure all tape is removed from copper contacts, and then close the access door.
How can I fix a paper jam in the printer?
Remove the back access door, gently pull out any trapped paper, turn the device off, and restart it before reloading the paper.
When should I connect the USB cable to the all-in-one?
Do not connect the USB cable until the setup guide instructs you to, or the software may fail to install properly.
What steps fix a failed device setup completion error?
Verify that the control-panel overlay is firmly attached. Unplug and replug the unit, checking all connections, especially ensuring the USB cable connects directly to the computer.