# A B C D E F G H I J K L M N O P Q R S T U V W X Y Z

HP Latex 310 Printer HP Latex 300 Printer Series - Printer Setup Instructions

Summary

This comprehensive assembly guide provides detailed instructions for setting up and maintaining your large-format commercial printer system. It covers everything from physical installation—including required workspace dimensions and necessary components like printheads and ink collectors—to complex technical setup procedures such as LAN connectivity and proxy configuration. Designed for professional technicians, this manual ensures safe, efficient, and correct initial setup of advanced printing equipment.
📄 Preview PAGE OF 32

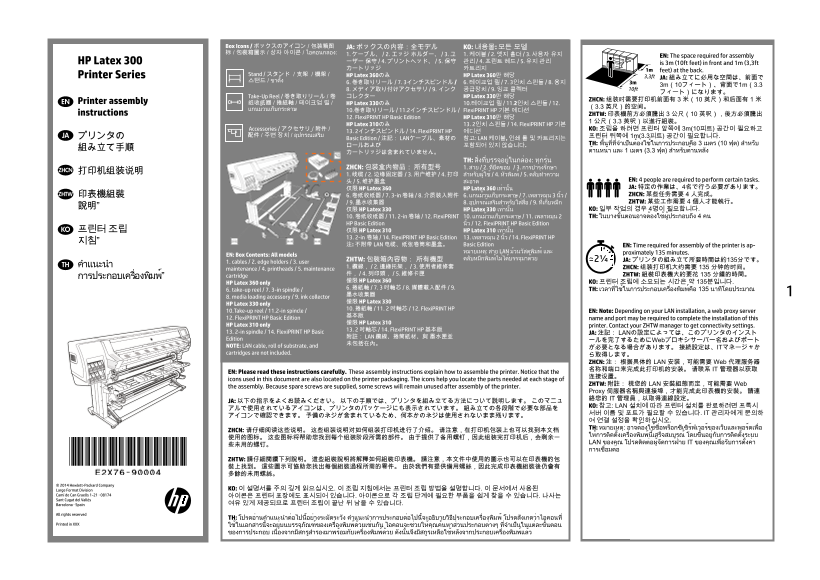
Page 1 Text Content

Box Icons / ボックスのアイコン / 包装箱图 JA: ボックスの内容:全モデル KO: 내용물: 모든 모델 标 / 包裝箱圖示 / 상자 아이콘 / ไอคอนกล่อง: 1. ケーブル、 / 2. エッジ ホルダー、 / 3. ユ 1. 케이블 / 2. 엣지 홀더 / 3. 사용자 유지

EN: The space required for assembly

HP Latex 300 ーザー 保守 / 4. プリントヘッド、 / 5. 保守 관리 / 4. 프린트 헤드 / 5. 유지 관리 is 3m (10ft feet) in front and 1m (3,3ft カートリッジ 카트리지

feet) at the back.

Printer Series Stand / スタンド / 支架 / 機架 / HP Latex 360のみ HP Latex 360만 해당

JA: 組み立てに必用な空間は、前面で

Take-Up Reel / 巻き取りリール / 卷 コレクター HP Latex 330만 해당

ZHCN: 组装时需要打印机前面有 3 米(10 英尺)和后面有 1 米

EN Printer assembly 纸收纸器 / 捲紙軸 / 테이크업 릴 / HP Latex 330のみ 10.테이크업 릴 / 11.2인치 스핀들 / 12.

แกนม้วนเก็บกระด�ษ 10.巻き取りリール / 11.2インチスピンドル / Flexi PRINT HP 기본 에디션

instructions ZHTW: 印表機前方必須騰出 3 公尺(10 英呎),後方必須騰出

12. Flexi PRINT HP Basic Edition HP Latex 310만 해당

HP Latex 310のみ 13. 2인치 스핀들 / 14. Flexi PRINT HP 기본

Accessories / アクセサリ / 附件 / KO: 조립을 하려면 프린터 앞쪽에 3m(10피트) 공간이 필요하고

13. 2インチスピンドル / 14. Flexi PRINT HP 에디션

JA プリンタの 配件 / 주변 장치 / อุปกรณ์เสริม 프린터 뒤쪽에 1m(3.3피트) 공간이 필요합니다.

Basic Edition / 注記: LANケーブル、素材の 참고: LAN 케이블, 인쇄 롤 및 카트리지는

ロールおよび 포함되어 있지 않습니다. TH: พื้นที่ที่จำ�เป็นต้องใช้ในก�รประกอบคือ 3 เมตร (10 ฟุต) สำ�หรับ

TH: สิ่งที่บรรจุอยู่ในกล่อง: ทุกรุ่น

ZHCN: 包装盒内物品: 所有型号 1. ส�ย / 2. ที่ยึดขอบ / 3. ก�รบำ�รุงรักษ�

ZHCN 打印机组装说明

头 / 5. 维护墨盒 สะอ�ด EN: 4 people are required to perform certain tasks. 仅限 HP Latex 360 HP Latex 360 เท่�นั้น JA: 特定の作業は、4名で行う必要があります。

ZHTW 印表機組裝 6. 卷纸收纸器 / 7. 3-in 卷轴 / 8. 介质装入附件 6. แกนม้วนเก็บกระด�ษ / 7. เพล�หมุน 3 นิ้ว / ZHCN: 某些任务需要 4 人完成。

/ 9. 墨水收集器 8. อุปกรณ์เสริมสำ�หรับใส่สื่อ / 9. ที่เก็บหมึก ZHTW: 某些工作需要 4 個人才能執行。

說明” KO: 일부 작업의 경우 4명이 필요합니다.

仅限 HP Latex 330 HP Latex 330 เท่�นั้น

10. 卷纸收纸器 / 11. 2-in 卷轴 / 12. Flexi PRINT 10. แกนม้วนเก็บกระด�ษ / 11. เพล�หมุน 2 TH: ในบ�งขั้นตอนอ�จต้องใช้ผู้ประกอบถึง 4 คน

HP Basic Edition นิ้ว / 12. Flexi PRINT HP Basic Edition

KO 프린터 조립 仅限 HP Latex 310 HP Latex 310 เท่�นั้น

13. 2-in 卷轴 / 14. Flexi PRINT HP Basic Edition 13. เพล�หมุน 2 นิ้ว / 14. Flexi PRINT HP

注: 不附带 LAN 电缆、纸张卷筒和墨盒。 Basic Edition EN: Time required for assembly of the printer is ap-

หม�ยเหต:ุ ส�ย LAN ม้วนวัสดุพิมพ์ และ proximately 135 minutes.

EN: Box Contents: All models

ZHTW: 包裝箱內容物: 所有機型 ตลับหมึกพิมพ์ไม่ได้บรรจุม�ด้วย 2¼ JA: プリンタの組み立て所要時間は約135分です。

1. cables / 2. edge holders / 3. user

TH คำ�แนะนำ� 1. 纜線, / 2. 邊緣托架, / 3. 使用者維修套

maintenance / 4. printheads / 5. maintenance ZHCN: 组装打印机大约需要 135 分钟的时间。

件, / 4. 列印頭, / 5. 維修卡匣 ZHTW: 組裝印表機大約要花 135 分鐘的時間。

ก�รประกอบเคร่ืองพิมพ์” cartridge

僅限 HP Latex 360 KO: 프린터 조립에 소요되는 시간은 약 135분입니다.

HP Latex 360 only

6. 捲紙軸 / 7. 3 吋軸芯 / 8. 媒體載入配件 / 9. TH: เวล�ที่ใช้ในก�รประกอบเครื่องพิมพ์คือ 135 น�ทีโดยประม�ณ

6. take-up reel / 7. 3-in spindle /

8. media loading accessory / 9. ink collector

僅限 HP Latex 330

HP Latex 330 only

10. 捲紙軸 / 11. 2 吋軸芯 / 12. Flexi PRINT HP

10.Take-up reel / 11.2-in spincle / EN: Note: Depending on your LAN installation, a web proxy server

12. Flexi PRINT HP Basic Edition name and port may be required to complete the installation of this

僅限 HP Latex 310

HP Latex 310 only printer. Contact your ZHTW manager to get connectivity settings.

13. 2 吋軸芯 / 14. Flexi PRINT HP 基本版

13. 2-in spindle / 14. Flexi PRINT HP Basic JA: 注記: LANの設定によっては、このプリンタのインスト

附註: LAN 纜線、捲筒紙材、與 墨水匣並

Edition ールを完了するためにWebプロキシサーバー名およびポート

NOTE: LAN cable, roll of substrate, and が必要となる場合があります。 接続設定は、ITマネージャか cartridges are not included.

ら取得します。 ZHCN: 注: 根据具体的 LAN 安装,可能需要 Web 代理服务器 名称和端口来完成此打印机的安装。 请联系 IT 管理器以获取

EN: Please read these instructions carefully. These assembly instructions explain how to assemble the printer. Notice that the

icons used in this document are also located on the printer packaging. The icons help you locate the parts needed at each stage of

ZHTW: 附註: 視您的 LAN 安裝組態而定,可能需要 Web

the assembly. Because spare screws are supplied, some screws will remain unused after assembly of the printer.

Proxy 伺服器名稱與連接埠,才能完成此印表機的安裝。 請連 絡您的 IT 管理員,以取得連線設定。

JA: 以下の指示をよくお読みください。 以下の手順では、プリンタを組み立てる方法について説明します。 このマニュ

KO: 참고: LAN 설치에 따라 프린터 설치를 완료하려면 프록시

서버 이름 및 포트가 필요할 수 있습니다. IT 관리자에게 문의하

여 연결 설정을 확인하십시오. TH: หม�ยเหตุ: อ�จต้องใช้ชื่อพร็อกซีเซิร์ฟเวอร์ของเว็บและพอร์ตเพื่อ

ZHCN: 请仔细阅读这些说明。 这些组装说明对如何组装打印机进行了介绍。 请注意,在打印机包装上也可以找到本文档

LAN ของคุณ โปรดติดต่อผู้จัดก�รฝ่�ย IT ของคุณเพื่อรับก�รตั้งค�่

ZHTW: 請仔細閱讀下列說明。 這些組裝說明將解釋如何組裝印表機。 請注意,本文件中使用的圖示也可以在印表機的包 裝上找到。 這些圖示可協助您找出每個組裝過程所需的零件。 由於我們有提供備用螺絲,因此完成印表機組裝後仍會有 多餘的未用螺絲。

© 2014 Hewlett-Packard Company

Large Format Division KO: 이 설명서를 주의 깊게 읽으십시오. 이 조립 지침에서는 프린터 조립 방법을 설명합니다. 이 문서에서 사용된

Camí de Can Graells 1-21 · 08174 아이콘은 프린터 포장에도 표시되어 있습니다. 아이콘으로 각 조립 단계에 필요한 부품을 쉽게 찾을 수 있습니다. 나사는 Sant Cugat del Vallès

Barcelona · Spain 여유 있게 제공되므로 프린터 조립이 끝난 뒤 남을 수 있습니다.

All rights reserved

TH: โปรดอ่�นคำ�แนะนำ�ต่อไปนี้อย่�งระมัดระวัง คำ�แนะนำ�ก�รประกอบต่อไปนี้จะอธิบ�ยวิธีประกอบเครื่องพิมพ์ โปรดสังเกตว่�ไอคอนที่

Printed in XXX ใช้ในเอกส�รนี้จะอยู่บนบรรจุภัณฑ์ของเครื่องพิมพ์ด้วยเช่นกัน ไอคอนจะช่วยให้คุณค้นห�ส่วนประกอบต่�งๆ ที่จำ�เป็นในแต่ละขั้นตอน

Hewlett-Packard Company - Learning Products - Barcelona

Page Summary Contents For HP Latex 310 Printer HP Latex 300 Printer Series - Printer Setup Instructions

Page 1 Box Icons / ボックスのアイコン / 包装箱图 JA: ボックスの内容:全モデル KO: 내용물: 모든 모델 标 / 包裝箱圖示 / 상자 아이콘 / ไอคอนกล่อง: 1. ケーブル、 / 2. エッジ ホルダー、 / 3. ユ 1. 케이블 / 2. 엣지 홀더 / 3. 사용자 유지 EN: The space required for assembly HP Latex ...
Page 2 EN Remove the packaging JA パッケージの開梱 ZHCN 拆开包装 ZHTW 移除包裝 KO 포장 제거 TH ถอดกล่องบรรจุภัณฑ์ออก Close de box lids and remove the box by lifting it Carefully cut the straps around the boxes. Make sure that R...
Page 3 EN Assemble the stand JA スタンドの組み立て ZHCN 组装支架 ZHTW 組裝機架 KO 스탠드 조립 TH ประกอบข�ตั้ง Open the stand box, and remove the contents. Place the cross-brace on the floor with the yellow (shown Remove the cover...
Page 4 Locate the ‘L’ (left) and ‘R’ (right) marks on the legs and Lower the left leg into place on the cross-brace (A) and Use 4 screws on the outside of the leg to attach it to the Repeat steps 8 and 9 for...
Page 5 Take the foot bar and locate the right side (the side with Attach the foot bar to the cross-brace, first inserting the Fix the foot bar on the outside with two screws each side. Take the feet, notice ...
Page 6 Connect each foot to the stand, inserting the two pins, Roll the stand assembly upright in the direction of the Fix the cross brace to the left leg with 2 screws. On the left side, put 2 screws in pla...
Page 7 EN Put the cover in place, placing it first on the left, and then Use 4 screws to fix the cover in place, do not tighten them Fully tighten all 6 screws. Repeat steps 17 to 21 for the other leg. the r...
Page 8 EN Attach the printer to the stand JA プリンタをスタンドへ取り付け ZHCN 将打印机安装到支架上 ZHTW 將印表機裝到機架上 KO 스탠드에 프린터 부착 TH ว�งเครื่องพิมพ์ลงบนข�ตั้ง Remove the 2 packing pieces. Open all 4 box flaps. Push the printer out ...
Page 9 Rotate the printer on the pallet 90º. Remove the end cap pieces and open the plastic bag. Remove the 2 desiccant bags. Attach the stand onto the printer. When attaching, check the plastic bag isn’t be...
Page 10 EN Rotate the printer JA プリンタを回転する ZHCN 旋转打印机 ZHTW 旋轉印表機 KO 프린터 회전 TH หมุนเครื่องพิมพ์ Attach the right side of the stand (the side with a hole) to Use 2 screws to attach the left side of the stand to...
Page 11 Carefully roll the printer down onto the packing pieces. Carefully lift the printer upright. Remove the 2 foam end caps, and remove the plastic Remove the anti-slip material from the 2 rear wheels. EN...
Page 12 EN Unpack more components JA その他のコンポーネントの開梱 ZHCN 从包装箱取出其他组件 ZHTW 拆開其他組件的包裝 KO 나머지 구성 요소 포장 풀기 TH แกะส่วนประกอบอื่นๆ Remove all the tapes including the two on the spindle. Open the window. Detach the t...
Page 13 EN Open the maintenance cartidge door and remove the HP Designjet 360 Printer only: Remove the tape. Remove the tapes from the edge holders. Close the window. packaging from inside of the printer. JA ...
Page 14 EN HP Designjet 360 and 330 Printers only (or accessory for the 310): Assemble the Loop shaper and tension bar JA HP Designjet 360および330プリンタ のみ(または310用アクセサリ): ループシェイパーおよびテンション バーの組み立て ZHCN 仅限 HP Desig...
Page 15 EN Locate the left pivot block (marked with “L”) onto the left Insert the loop shaper into the left hand side pivot block. Locate the right pivot block onto the other side of the Slide the pivot block...
Page 16 EN HP Designjet 360 and 330 Printers only (or accessory for the 310): Assemble the Take Up Reel JA HP Designjet 360および330プリンタ のみ(または310用アクセサリ): 巻き取りリールの 組み立て ZHCN 仅限 HP Designjet 360 和 330 打印机 (或 310 ...
Page 17 EN Assemble the Loading Table Support JA 取り付け用テーブルサポートの組み 立て ZHCN 组装卷纸收纸器盘支架 ZHTW 組裝送紙台支架 KO 공급 테이블 지지대 조립 TH ประกอบที่รองรับแท่ีนโหลด Connect the cable to the port at the rear of the printer. Identif...
Page 18 EN Attach the right loading table support (marked with an R) Insert the tube into the left support (marked with an L). Insert the bar on the right support and attach the left Attach the loading table ...
Page 19 EN HP Designjet 360 and 330 Printer only (or as an accessory for 310): Assemble the take up reel spindle HP Designjet 360および330プリンタ JA のみ(または310用アクセサリ): 巻き取りリールスピンドルの組み 立て ZHCN 仅限 HP Designjet 360 和 3...
Page 20 Carefully lift the take-up reel assembly. The central core Remove the 2 take-up reel spindle hubs. Unlock the hubs by pushing the blue lever up. If the printer is a 330 or a 310, and 3 inch core paper...
Page 21 Slide the 2 hubs onto the spindle placing the black hub Lock the hubs. Note: you can adjust the hub when Raise the take-up reel loading table to its upright position. Unlock the take-up reel by pushin...
Page 22 EN Setup the Printer JA プリンタのセットアップ ZHCN 设置打印机 ZHTW 安裝印表機 KO 프린터 설치 TH ตั้งค�่เครื่องพิมพ์ EN Load the take-up reel spindle into the printer by pushing Note: If you are not using the loop shaper, you ...
Page 23 EN Connect LAN and power cord cables: printer and curing. Switch on the printer at the back. The printer will ask you to select altitude. Important: Ensure that the building’s electrical system meets ...
Page 24 The installer is fully responsible of installing the RIP software and train the customer about how to operate with the Gently shake the ink cartridges. When prompted; install the 7 ink cartridges and ...
Page 25 Open the window; the carriage comes out. Remove the When prompted by the front panel, open the window and Open the maintenance cartridge door. Remove the maintenance cartridge packaging. EN carriage p...
Page 26 EN Insert the maintenance cartridge, and push it in as far as When prompted; remove the setup printhead. Remove the orange packaging from the printhead. Insert the printheads and close the printhead c...
Page 27 EN Load the substrate JA 素材の取り付け ZHCN 装入纸张 ZHTW 裝入紙材 KO 인쇄물 공급 TH ใส่วัสดุพิมพ์ The printer will start the printhead alignment. Wait until Remove the adhesive tape, and lift the spindle lock lever Rem...
Page 28 EN Unlock and remove the blue hub from the left end of the Rest the roll of substrate that you want to load on the 360 only: The right hub of the spindle has 2 positions: 1 Fully insert the spindle in...
Page 29 EN Slide the blue hub onto the spindle. Make sure that With the blue hub on the left, lift the loading table to Insert the lead-edge of the substrate into the printer Wait until the substrate emerges ...
Page 30 On the front panel, select the family of the substrate The printer automatically performs substrate If the network requires a web proxy to access the Internet, ensure you have the proxy port and proxy...
Page 31 http://www.hp.com/go/latex300/eoi EN Follow connectivity wizard to: If during the wizard process, you get an error on proxy Important: To complete printer installation, access the • Enable online subs...
Page 32 EN © Copyright 2014 Hewlett-Packard Development Company, L.P. ZHTW © Copyright 2014 Hewlett-Packard Development Company, L.P. The information contained herein is subject to change without 本文件包含的資訊可能有所...

Manual Details

Brand HP
Pages 32
File Size 12.50 MB
Published June 03, 2026
49 views

Enter the captcha to get the download link:

captcha

Frequently Asked Questions

How much space is required to set up the printer?

You need approximately 3 meters in front and 1 meter at the back for proper assembly.

Are ink cartridges included with the purchase?

No, LAN cables, rolls of substrate material, and cartridges are explicitly noted as not being included.

What should I do if I face a proxy test error during installation?

Use the provided link to access the settings, select 'Details - Change - Enable Proxy,' and input your required proxy address and port.

Does the number of people working affect assembly?

Yes; certain tasks or models (like the HP Latex 360) may require up to four people.