# A B C D E F G H I J K L M N O P Q R S T U V W X Y Z

HP DesignJet 510 Printer Series - Assembly Instructions for Chinese (Simplified)

Summary

Designed for commercial environments, this guide provides professional step-by-step instructions for setting up the HP Designjet 510 high-performance inkjet printer series. The manual comprehensively covers both hardware and software setup, guiding new users through unpacking main components, assembling accessories like the stand and paper bin, loading consumables, and connecting to networks or computers (Mac/Windows). It ensures a smooth initial installation experience for commercial printing professionals.
📄 Preview PAGE OF 24

Page 1 Text Content

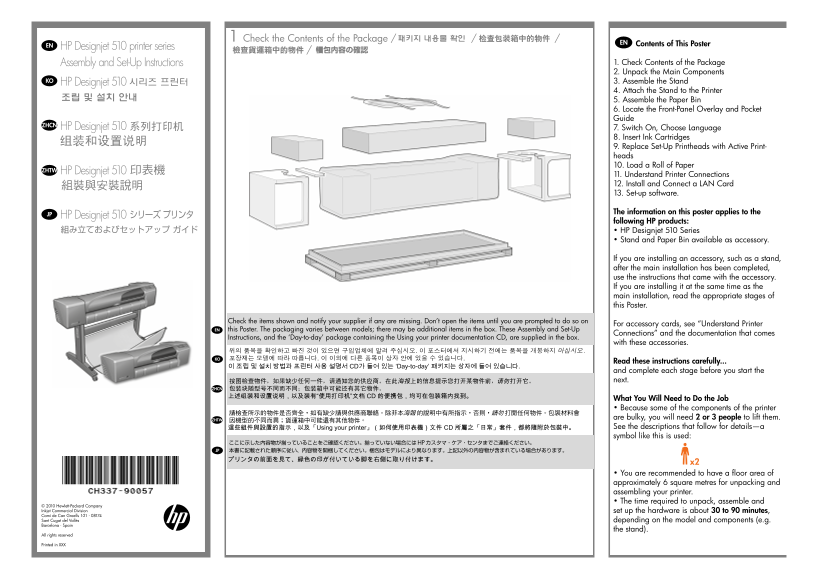
1 Check the Contents of the Package / / /

EN Contents of This Poster

EN HP Designjet 510 printer series

Assembly and Set-Up Instructions 1. Check Contents of the Package 2. Unpack the Main Components

KO 3. Assemble the Stand HP Designjet 510

4. Attach the Stand to the Printer 5. Assemble the Paper Bin 6. Locate the Front-Panel Overlay and Pocket Guide

ZHCN HP Designjet 510 7. Switch On, Choose Language

8. Insert Ink Cartridges 9. Replace Set-Up Printheads with Active Print- heads 10. Load a Roll of Paper

ZHTW HP Designjet 510

11. Understand Printer Connections 12. Install and Connect a LAN Card 13. Set-up software.

The information on this poster applies to the

JP HP Designjet 510

following HP products: • HP Designjet 510 Series • Stand and Paper Bin available as accessory.

If you are installing an accessory, such as a stand, after the main installation has been completed, use the instructions that came with the accessory. If you are installing it at the same time as the main installation, read the appropriate stages of this Poster.

Check the items shown and notify your supplier if any are missing. Don’t open the items until you are prompted to do so on

For accessory cards, see “Understand Printer

EN this Poster. The packaging varies between models; there may be additional items in the box. These Assembly and Set-Up

Connections” and the documentation that comes

Instructions, and the ‘Day-to-day’ package containing the Using your printer documentation CD, are supplied in the box.

with these accessories.

Read these instructions carefully...

이 조립 및 설치 방법과 프린터 사용 설명서 CD가 들어 있는 ‘Day-to-day’ 패키지는 상자에 들어 있습니다.

and complete each stage before you start the next.

上述组装和设置说明,以及装有“使用打印机”文档 CD 的便携包,均可在包装箱内找到。

What You Will Need to Do the Job • Because some of the components of the printer ZHTW are bulky, you will need 2 or 3 people to lift them. 這些組件與設置的指示,以及「Using your printer」(如何使用印表機)文件 CD 所屬之「日常」套件,都將隨附於包裝中。 See the descriptions that follow for details—a symbol like this is used:

• You are recommended to have a floor area of approximately 6 square metres for unpacking and assembling your printer. • The time required to unpack, assemble and

© 2010 Hewlett-Packard Company Inkjet Commercial Division set up the hardware is about 30 to 90 minutes, Camí de Can Graells 1-21 · 08174 Sant Cugat del Vallès depending on the model and components (e.g. Barcelona · Spain

the stand).

All rights reserved

Printed in XXX

ap.indd 1 9/30/2010 4:08:57 PM

Page Summary Contents For HP DesignJet 510 Printer Series - Assembly Instructions for Chinese (Simplified)

Page 1 1 Check the Contents of the Package / / / EN Contents of This Poster EN HP Designjet 510 printer series Assembly and Set-Up Instructions 1. Check Contents of the Package 2. Unpack the Main Components ...
Page 2 KO ZHCN ZHTW JP ap.indd 2 9/30/2010 4:08:58 PM
Page 3 2 Unpack the Main Components / / / / 2:1 2:2 The E+/A0+ size printer with stand and paperbin as The D/A1-size printer with no stand or paper bin as Remove: Remove the foam restraints on top of the pri...
Page 4 3 Assemble the Stand For assembly of the accessory stand, use the poster supplied with it / / / / 2:3 3:1 3:2 3:3 For E+/A0+-size models and if you have the stand Make sure you have used 4 screws in e...
Page 5 4 Attach the Stand to the printer / / / / 3:4 3:5 4:1 4:2 Attach a foot to each leg, using four screws in each foot. Turn the stand upright. EN Check that all the stand screws are tight. If you can’t ...
Page 6 4:3 4:4 4:5 4:6 Secure the stand with the four screws that have large flat Ensure all four brakes are applied, as shown. Tilt and lift the printer (1): WARNING: 2–3 people for the Tilt and lift the pr...
Page 7 5 Assemble the paper Bin EN Remove the plastic covering and foam end caps. Remove the tapes from the window and the spindle. Remove Remove the tapes from the spindle at the back of the printer. Lay ou...
Page 8 EN Fit the basket supports to the stand legs, one to each leg. Fit the two short tubes to the printer’s feet, one on the front Rest the basket’s rear tube on the supports that you have just Attach the...
Page 9 6 Introductory information / 기본 정보 7 Switch On and Choose a Language / / / 介绍性信息 / 資訊導引 / 基本情報 / / WARNINGS • When the printer is powered on, keep objects such as hair, jewelry and clothing away from ...
Page 10 7 8 Insert Ink Cartridges / / / Select a language: After up to a minute, the printer’s front- Switch on if the printer doesn’t automatically come on: The Open the ink cartridge cover and remove the pa...
Page 11 9 Replace Set-Up Printheads with Active Printheads / / / / The set-up printheads are provided to protect the ink system while the printer is being transported from the factory, and to fill up the ink ...
Page 12 Lift up the printhead cover; this will give you access to the To remove a set-up printhead, lift up the blue handle. With controlled force pull the blue handle upwards until the Release the latch on t...
Page 13 EN Remove the tape from the new printheads. Insert a new normal printhead ensuring that the colored When you have replaced all the set-up printheads with Close the latch on the printhead cover. The la...
Page 14 10 Load a Roll of Paper / / / / The printer will now use a certain amount of paper for checking and calibration. (If you prefer to use sheet paper, see the Pocket Guide for loading instructions.) 9:10...
Page 15 The spindle has a stop at each end to keep the roll in Slide the new roll of paper on to the spindle. Make sure the Put the removable stop on to the upper end of the With the blue-colored roll stop on...
Page 16 A front-panel message prompts you to load paper to align the printheads. Press the Enter key.Then, as above left, select Load roll (or Load sheet, if you prefer–see the Pocket Guide EN for loading ins...
Page 17 At the front of the printer, align the paper against the blue Lower the blue paper-load lever. The printer checks the Leaning over the printer, feed the paper through towards If there is an excess of ...
Page 18 11 Understand Printer Connections / / / / The printer will now print its alignment pattern, using the paper you have loaded. If there is a problem print- If you have purchased a network card, for conn...
Page 19 12 Install and Connect a LAN Card / / USB socket Sockets for connecting your printer to a computer or to a / / network. The diagram on the right shows the sockets (or “ports”) that you can use. EN • T...
Page 20 Carefully remove the plastic cover from the left-hand back Remove the cover completely. Inside the compartment there When you have inserted the card, screw it into place, using To insert a LAN card (o...
Page 21 Carefully replace the plastic cover by clipping it back into Network Printer: To obtain the information you’ll need when You have now finished the hardware assembly and set-up Insert the LAN cable int...
Page 22 EN ZHCN ZHTWJP Note for MAC & Windows USB Mac および Windows の USB 接続 MAC 和 Windows USB 连接注意事 請注意,當 MAC 與 Windows connection: に関する注記: 项: USB 連線時: 請不要急著將電腦連接到印表機。您必須先在 Do not connect the computer to t...
Page 23 MAC 및 Windows USB 연결을 Catatan tentang sambungan USB 위한 안내 untuk MAC & Windows: Jangan sambungkan dulu komputer ke printer. Anda harus terlebih dulu menginstal perangkat lunak driver printer di kom...
Page 24 Legal notices © Copyright 2010 Hewlett-Packard Development Company, L.P. The information contained herein is subject to change without notice. The only warranties for HP products and services are set ...

Manual Details

Brand HP
Pages 24
File Size 12.18 MB
Published May 22, 2026
110 views

Enter the captcha to get the download link:

captcha

Frequently Asked Questions

What is required for unpacking and assembling this printer?

You need a floor area of approximately 6 square metres, and it is recommended to have 2 or 3 people due to the bulky components.

Do I install accessories like stands beforehand?

If installing an accessory at the same time as main installation, read the appropriate stages in the poster; otherwise, use the instructions that came with the accessory.

What is the recommended procedure for connecting a computer (MAC/Windows)?

Do not connect the computer to the printer first. You must install the printer driver software onto the computer first using the provided HP Start-Up Kit DVD.