Page 1
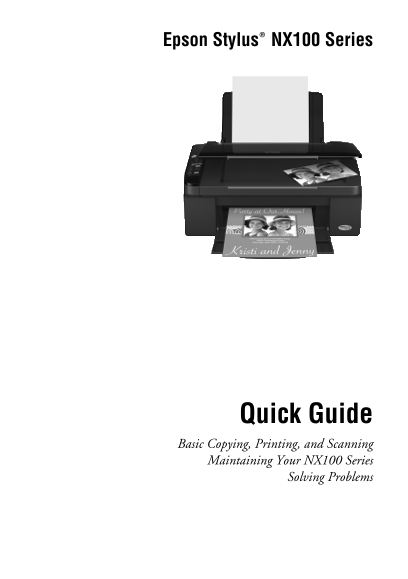
Epson Stylus NX100 Series Quick Guide Basic Copying, Printing, and Scanning Maintaining Your NX100 Series Solving Problems
Page 2
Contents Introduction . . . . . . . . . . . . . . . . . . . . . . . . . . . . . . . . . . . . . . . . . . . 3 Loading Paper . . . . . . . . . . . . . . . . . . . . . . . . . . . . . . . . . . . . . . ...
Page 3
Introduction After you have set up your Epson Stylus® NX100 Series as described on the Start Here sheet, turn here to: Load paper Make a copy of a document or photo Get the basic steps for printing fr...
Page 4
Loading Paper You can print on a variety of paper types and sizes. For details, see page 5. 1. Open the paper support, then open the output tray and pull out the extension. 2. Flip the clear plastic f...
Page 5
You can load up to 80 sheets of plain paper, Epson Bright White Paper, or Presentation Paper Matte, or 20 sheets of photo paper. Load other special papers one sheet at a time. Note: The type of paper ...
Page 6
Part Sheet Paper type Size number count Epson Premium Photo Paper Glossy Borderless 4 in. S041808 Borderless 5 in. S041464 Borderless 8 in. S041465 Letter (8.5 in.) S042183 Epson Ultra Premium Photo P...
Page 7
Copying a Document or Photo Follow the instructions in this section to position your originals correctly on the glass and make color or black-and-white copies. Placing the Original on the Glass 1. Ope...
Page 8
Copying a Document You can copy documents onto letter- or A4-size plain paper or Epson special paper just like a copy machine. 1. Load letter- or A4-size plain paper or Epson special paper. 2. Place y...
Page 9
Copying a Photo You can copy photos onto 4 6-inch Epson photo paper (various types available) for borderless photo reprints. 1. Load up to 20 sheets of 4 6-inch Epson photo paper. 2. Place your origin...
Page 10
Copying Draft Documents You can make quick draft copies of documents on plain paper or Epson Bright White paper. Draft copies have reduced print quality, but they print faster. 1. Load letter- or A4-s...
Page 11
Printing From Your Computer This section describes the basic steps for printing a photo or document stored on your Windows or Macintosh computer. For detailed instructions on printing, see the on-scre...
Page 12
4. On the Main tab, select the basic print settings. Make sure you choose the correct paper Type setting for the paper you are using (see page 17 for details). Select the type of document you’re print...
Page 13
10. Click OK or Print to start printing. This window appears and shows the progress of your print job. Check ink cartridge status Cancel printing Printing With a Macintosh See one of the sections belo...
Page 14
5. Select the basic page setup options. For borderless photos, choose a Paper Size setting with a Sheet Feeder - Borderless option. Note: If the setting you want isn’t shown (for example, Scale), chec...
Page 15
9. To monitor your print job, click the printer icon in the dock. Select your print job, then select an option to cancel, pause, or resume printing, if necessary. Pause or resume printing Cancel print...
Page 16
4. Select Print from the File menu. You see a window like this one: Select your printer Select Print Settings 5. Choose Print Settings from the pop-up menu and select the following settings as necessa...
Page 17
9. To monitor the progress of your print job, click the printer icon in the dock (or click the Print Center icon and double-click Stylus NX100 on the next screen). Pause or resume printing Cancel prin...
Page 18
Scanning a Photo or Document You can use your NX100 Series to scan a photo or document and save it on your computer or other device. You can even restore and correct photographs as you scan (see page ...
Page 19
You see the Epson Scan standby window: 4. If the Mode setting in the upper right corner is set to Full Auto Mode, click the Scan button. If you are in Home or Professional Mode, you see a different Ep...
Page 20
Maintaining Your NX100 Series Follow the instructions in this chapter for checking and cleaning the print head nozzles and replacing ink cartridges. To align the print head, if necessary, see your on-...
Page 21
4. Check the nozzle check pattern that prints to see if there are gaps in the lines. Nozzles are clean Nozzles need cleaning 5. If there are no gaps, the print head is clean. If there are gaps or the ...
Page 22
Checking the Ink Cartridge Status When the B ink light starts flashing, a cartridge is low on ink. You can continue printing until a cartridge needs replacement. When the B ink light stays on, you nee...
Page 23
Note: We recommend that you use genuine Epson cartridges and do not refill them. The use of other products may affect your print quality and could result in printer damage. The printer ships with full...
Page 24
2. Open the scanner and prop it up with its support. Caution: Do not touch the white cable inside the printer or you may damage it. 3. Press the y Stop button. The print head moves to the position to ...
Page 25
5. Squeeze the tab on the cartridge and lift it up. Dispose of it carefully. Do not take the used cartridge apart or try to refill it. Caution: Do not touch the white cable inside the printer or you m...
Page 26
7. Remove the yellow tape from the bottom of the ink cartridge. Caution: Do not remove any other labels or seals, or ink may leak. 8. Insert the new ink cartridge into the holder and push it down unti...
Page 27
10. Press the y Stop button to begin charging the ink. This takes about 1 1/2 minutes. When it’s finished, the P On light stops flashing and remains on, and the B ink light goes out. Caution: Never tu...
Page 28
Solving Problems If you have a problem with your NX100 Series, check the lights on the control panel to diagnose the cause. You can also check “Problems and Solutions” on page 29 for basic troubleshoo...
Page 29
Light status Problem and Solution ink light flashing One or more cartridges have low ink. You can continue printing until a cartridge needs replacement. Check the cartridge status to determine which c...
Page 30
Paper Feeding Problems If paper doesn’t feed, remove it from the sheet feeder. Flip through the stack to separate the sheets a little. Then reload the paper against the right side, and slide the left ...
Page 31
If you notice jagged vertical lines, you may need to align the print head. See your Epson Information Center for instructions. The ink cartridges may be low on ink. Check your cartridge status (see pa...
Page 32
Days and hours of support are subject to change without notice. Toll or long distance charges may apply. Purchase Supplies and Accessories You can purchase genuine Epson ink and paper at Epson Supplie...
Page 33
Notices Important Safety Instructions Before using your NX100 Series, read and follow these safety instructions: Be sure to follow all warnings and instructions marked on the NX100 Series. Use only th...
Page 34
Place the NX100 Series on a flat, stable surface that extends beyond its base in all directions. It will not operate properly if it is tilted or at an angle. Do not open the scanner section while the ...
Page 35
FCC Compliance Statement For United States Users This equipment has been tested and found to comply with the limits for a Class B digital device, pursuant to Part 15 of the FCC Rules. These limits are...
Page 36
Declaration of Conformity According to 47CFR, Part 2 and 15 for: Class B Personal Computers and Peripherals; and/or CPU Boards and Power Supplies used with Class B Personal Computers: We: Epson Americ...
Page 37
Epson America, Inc. Limited Warranty What Is Covered: Epson America, Inc. (“Epson”) warrants to the original retail purchaser that the Epson printer covered by this limited warranty statement, if purc...
Page 38
with non-Epson products, or service other than by an Epson Authorized Servicer. If a claimed defect cannot be identified or reproduced, you will be held responsible for the costs incurred. THE WARRANT...
Page 39
Copyright Notice All rights reserved. No part of this publication may be reproduced, stored in a retrieval system, or transmitted in any form or by any means, electronic, mechanical, photocopying, rec...
Page 40
CPD-25632 oss Printed in XXXXXX