Dell W1 Wall Mount Installation Guide
Summary
This is the AP-220-MNT-W1 Wall Mount Kit Installation Guide. It provides step-by-step instructions for mounting wireless access points to walls, including attaching the wall mount adapter, installing wall anchors and screws, connecting cables and antennas, and securing the AP to the mounting bracket. The guide supports multiple AP models with installation images showing the 225 AP. It is intended for installers and IT technicians deploying wireless access points in wall-mounted configurations.
Page 1 Text Content
AP-220-MNT-W1 Wall Mount Kit Installation Guide
This mount kit supports multiple AP models. All installation images show the 225 AP.
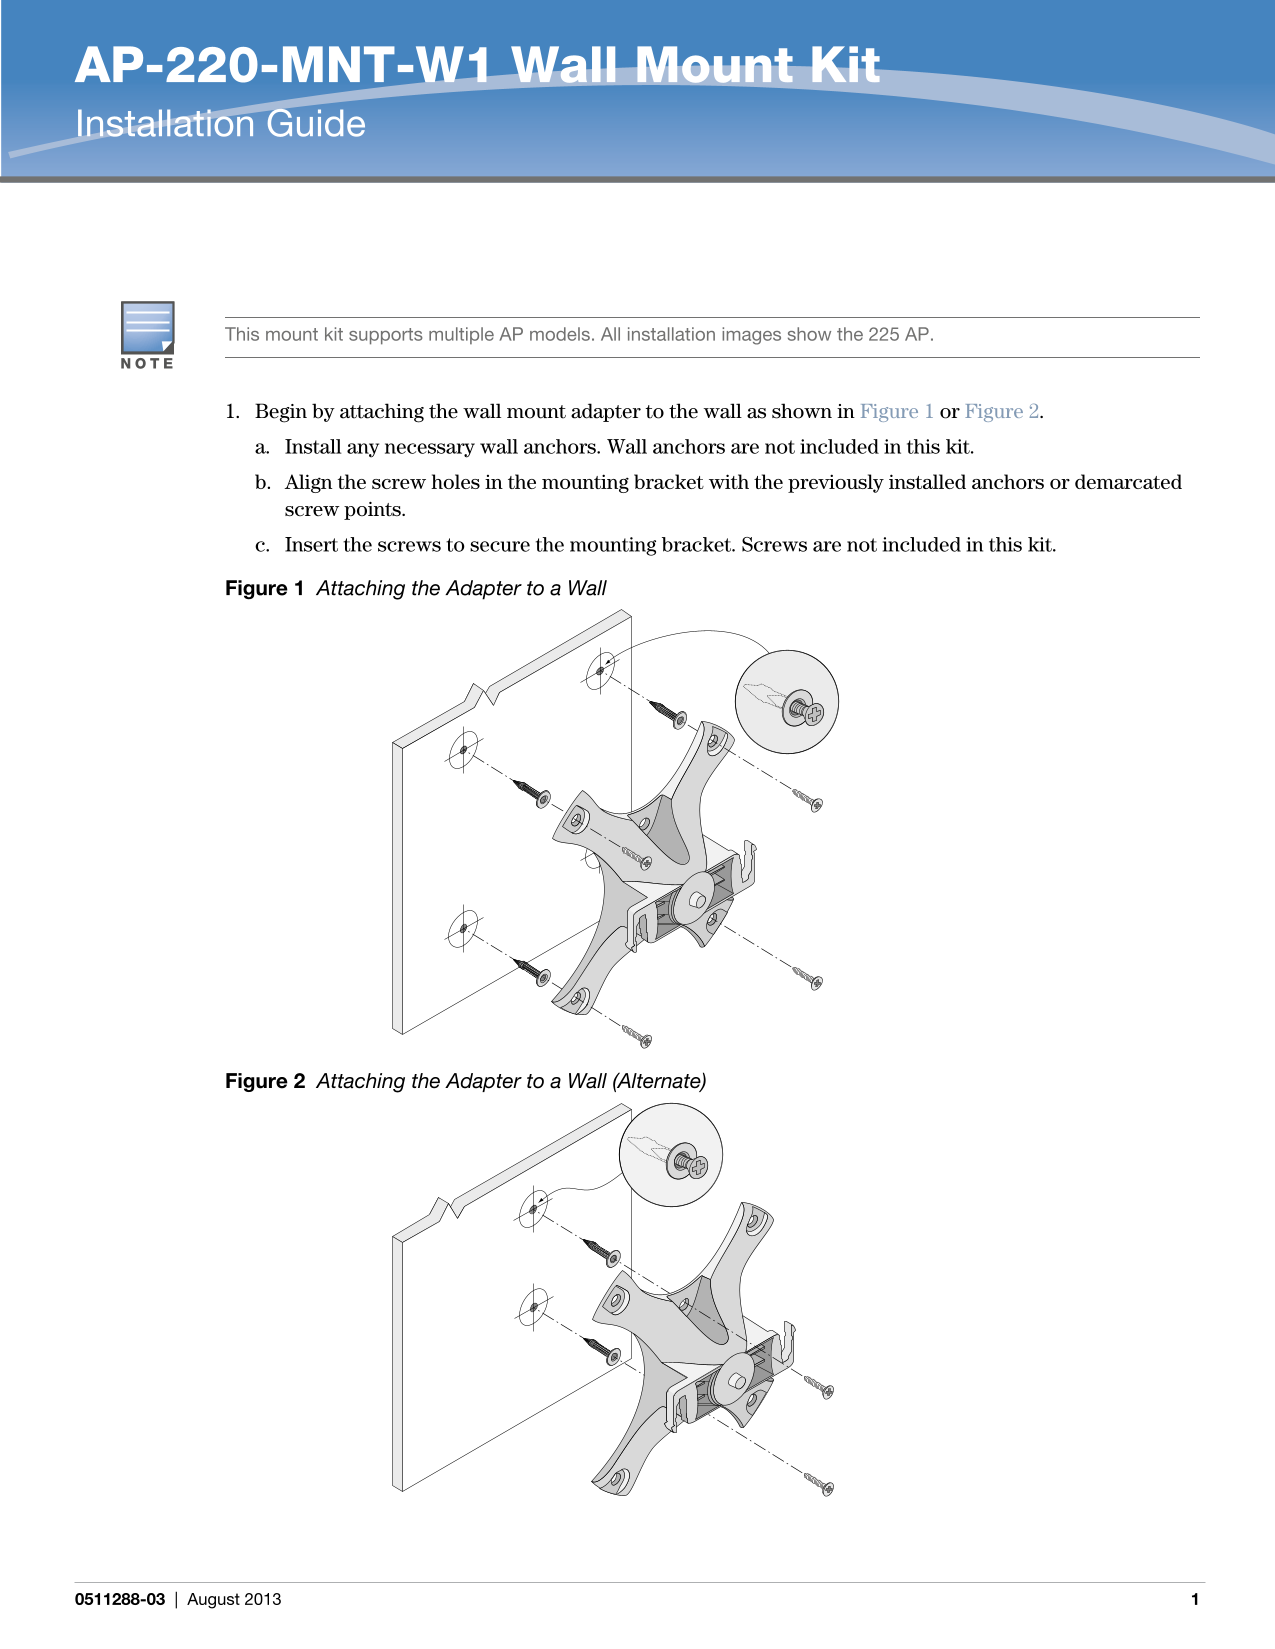
1. Begin by attaching the wall mount adapter to the wall as shown in Figure 1 or Figure 2. a. Install any necessary wall anchors. Wall anchors are not included in this kit. b. Align the screw holes in the mounting bracket with the previously installed anchors or demarcated screw points. c. Insert the screws to secure the mounting bracket. Screws are not included in this kit.
Figure 1 Attaching the Adapter to a Wall
Figure 2 Attaching the Adapter to a Wall (Alternate)
0511288-03 | August 2013
Page Summary Contents For Dell W1 Wall Mount Installation Guide
Manual Details
| Brand | Dell |
|---|---|
| Pages | 2 |
| File Size | 285.79 KB |
| Published | June 29, 2026 |
Enter the captcha to get the download link:

Frequently Asked Questions
What is needed before installing the mounting adapter?
You must install any necessary wall anchors first.
Are screws and wall anchors included with this kit?
No, both wall anchors and screws are not included in this kit.
How should I attach the Access Point (AP) to the mounting bracket?
Align the AP so its mounting tabs are at a 30-degree angle to the adapter, and rotate it clockwise until it clicks into place.