Page 1
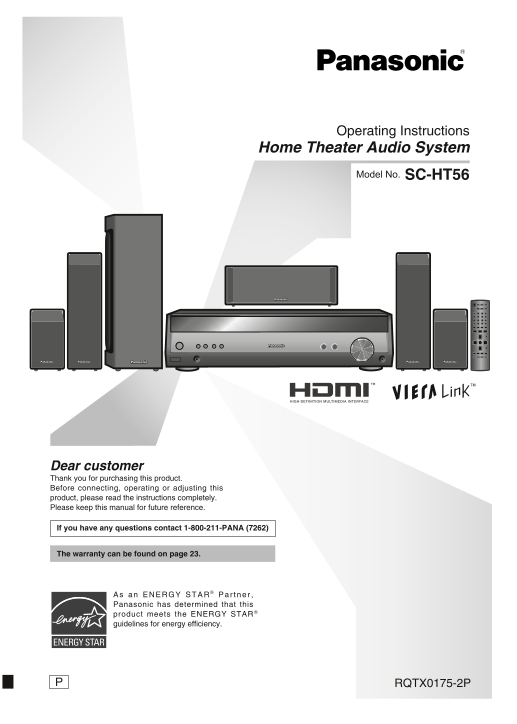
Operating Instructions Home Theater Audio System Model No. SC-HT56 Dear customer Thank you for purchasing this product. Before connecting, operating or adjusting this product, please read the instruct...
Page 2
IM IN IO IMPORTANT SAFETY INSTRUCTIONS Read these operating instructions carefully before using the unit. Follow the safety instructions on the unit and the applicable safety instructions listed below...
Page 3
System SC-HT56 Supplied accessories AV Control Receiver SA-HT56 Please check and identify the supplied accessories. Front speakers SB-HF56 Use numbers indicated in parentheses when asking for replacem...
Page 4
re te tr l/C tr l g id The remote control Aim at the sensor, avoiding obstacles, at a maximum range of 7 m (23 feet) directly in front of the unit. R6/LR6, AA Remote control signal sensor g Batteries ...
Page 5
Control guide Main unit [AUTO SPEAKER SETUP] Standby indicator [^] Flashes during Auto Speaker Setup. Lights when the setup When the unit is connected to the AC power supply, this finishes. indicator ...
Page 6
ea ke se tu Speaker setup Speaker cables 1 Speaker sticker sheet (3 short, 2 long) Supplied hc L TNORF hc R TNORF hc L DNUORRUS hc R DNUORRUS RETNEC BUS REFOOW accessories hc L TNORF hc R TNORF hc L D...
Page 7
Turn off all components before making any connections. Peripheral equipment and cables sold separately unless otherwise indicated. To connect equipment, refer to the appropriate operating instructions...
Page 8
th ea te co ec ti Home theater connections HDMI and VIERA Link “HDAVI Control TM” High-quality audio and video simply with HDMI connection The HDMI (High Definition Multimedia Interface) connection me...
Page 9
Turn off all components before making any connections. Peripheral equipment and cables sold separately unless otherwise indicated. To connect equipment, refer to the appropriate operating instructions...
Page 10
te an er ly ec ti Turn off all components before making any connections. Peripheral equipment and cables sold separately Antenna and AC power unless otherwise indicated. To connect equipment, refer to...
Page 11
Turn off all components before making any connections. Peripheral equipment and cables sold separately unless otherwise indicated. To connect equipment, refer to the appropriate Auto speaker setup ope...
Page 12
to ea ke se tu Turn off all components before making any connections. Peripheral equipment and cables sold separately unless otherwise indicated. Auto speaker setup To connect equipment, refer to the ...
Page 13
Settings Display Switch on. Change the settings to suit your equipment to the environment in which you are using it. Before making any changes, read the descriptions of the settings, note the factory ...
Page 14
et ti Display Settings Switch on. To reduce standby power consumption. HDMI STNBY •HDMI settings Choice for turning off the VIERA Link “HDAVI Control TM” (➡ page 8). Standby selection VIERA Link “HDAV...
Page 15
Basic operations Start play of the source. Select input. Switch on. The unit sets the sound TUNER FM TVTUNER AM mode to suit the input signal. Adjust the volume. BD/DVRDVD-P Adding surround effects to...
Page 16
er at io MENU operation Display This is an outline of the operations you can perform with the MENU. Press [-MENU] once. Sub menu 1 Sub menu 2 5Main menu Exit TUNER FM MODE AUTO The radio ➡ page 17 (TU...
Page 17
The radio Press [INPUT SELECTOR < or >] Select the frequency. to select “TUNER FM” or “TUNER Auto tuning starts if you press and AM”. hold the button. Direct tuning Manual presetting Input the f...
Page 18
fi el VOLUME Sound field SUBWOOFER SKIP SLOW/SEARCH STOP PAUSE PLAY qg DIRECT NAVIGATOR FUNCTIONS TOP MENU TUNER DIRECT TUNING SUB MENU RETURN S -EFFECT -LEVEL C.FOCUS -EFFECT -LEVEL TEST C.FOCUS TEST...
Page 19
Other functions Sleep timer Muting The SLEEP timer can turn the unit off after a set time. Remote control It does not control any other components. Press [MUTING]. Main unit To cancel 1. Use the menus...
Page 20
Remote control operation guide em te tr l o er at io id This remote control can operate Panasonic DVD recorders, DVD players, and televisions. Note that this remote control cannot operate some equipme...
Page 21
Remote control operation guide Changing the remote control code Change the code if you find the Change the main unit’s mode Change the remote control’s code remote control unintentionally also control...
Page 22
ro le sh ti id e/ ai te an ce Troubleshooting guide Before requesting service, make the following checks. If you are in doubt about any of the check points, or if the remedies indicated in the chart d...
Page 23
Limited Warranty Panasonic Consumer Electronics Company, Panasonic Puerto Rico, Inc. Division of Panasonic Corporation of North America Ave. 65 de Infantería, Km. 9.5 One Panasonic Way Secaucus, New J...
Page 24
CAUTION! Product Service DO NOT INSTALL OR PLACE THIS UNIT IN A BOOKCASE, BUILT-IN CABINET OR IN ANOTHER CONFINED SPACE. 1. Damage requiring service — The unit should be serviced by ENSURE THE UNIT IS...