# A B C D E F G H I J K L M N O P Q R S T U V W X Y Z

Panasonic SC-AK450 User Guide and Manual

Summary

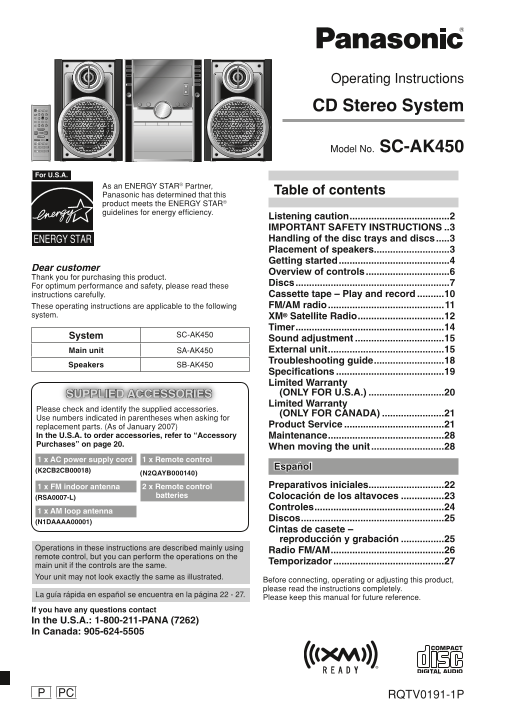
Enhance your home entertainment with the SC-AK450 CD Stereo System. This comprehensive operating manual provides thorough instructions for optimal performance and safe use of your system across multiple media types, including CDs, cassettes, FM/AM radio, and XM Satellite Radio. Designed for new users, the guide covers everything from initial setup and detailed control explanations to advanced features like timing and simple maintenance tips, ensuring a perfect listening experience every time.
📄 Preview 📖 Table of Contents Contents PAGE OF 28

Page 1 Text Content

Operating Instructions

CD Stereo System

Model No. SC-AK450

For U.S.A.

As an ENERGY STAR® Partner,

Table of contents

Panasonic has determined that this product meets the ENERGY STAR® guidelines for energy effi ciency.

Listening caution .....................................2 IMPORTANT SAFETY INSTRUCTIONS ..3 Handling of the disc trays and discs .....3 Placement of speakers ............................3 Getting started .........................................4

Dear customer

Overview of controls ...............................6

Thank you for purchasing this product.

Discs .........................................................7

For optimum performance and safety, please read these

instructions carefully. Cassette tape – Play and record ..........10 These operating instructions are applicable to the following FM/AM radio ...........................................11

system. XM® Satellite Radio ................................12

Timer .......................................................14

System SC-AK450

Sound adjustment .................................15 Main unit SA-AK450 External unit ...........................................15 Troubleshooting guide ..........................18

Speakers SB-AK450

Specifi cations ........................................19 Limited Warranty SUPPLIED ACCESSORIES (ONLY FOR U.S.A.) ............................20 Limited Warranty

Please check and identify the supplied accessories.

(ONLY FOR CANADA) .......................21

Use numbers indicated in parentheses when asking for

replacement parts. (As of January 2007) Product Service .....................................21

In the U.S.A. to order accessories, refer to “Accessory Maintenance ...........................................28 Purchases” on page 20.

When moving the unit ...........................28

1 x AC power supply cord 1 x Remote control

Español

(K2CB2CB00018)

(N2QAYB000140)

1 x FM indoor antenna 2 x Remote control Preparativos iniciales ............................22

(RSA0007-L) batteries Colocación de los altavoces ................23

Controles ................................................24

1 x AM loop antenna

Discos .....................................................25

(N1DAAAA00001)

Cintas de casete – reproducción y grabación ................25

Operations in these instructions are described mainly using

Radio FM/AM ..........................................26

remote control, but you can perform the operations on the

Temporizador .........................................27

main unit if the controls are the same. Your unit may not look exactly the same as illustrated.

Before connecting, operating or adjusting this product, please read the instructions completely.

La guía rápida en español se encuentra en la página 22 - 27.

Please keep this manual for future reference.

If you have any questions contact In the U.S.A.: 1-800-211-PANA (7262) In Canada: 905-624-5505

PC RQTV0191-1PP

RQTV0191-P_1EN.indd 1 2/16/07 10:24:50 AM

Page Summary Contents For Panasonic SC-AK450 User Guide and Manual

Page 1 Operating Instructions CD Stereo System Model No. SC-AK450 For U.S.A. As an ENERGY STAR® Partner, Table of contents Panasonic has determined that this product meets the ENERGY STAR® guidelines for ene...
Page 2 IS IS The socket outlet shall be installed near the equipment and easily accessible. The mains plug of the power supply cord shall remain readily operable. To completely disconnect this apparatus from...
Page 3 IMPORTANT SAFETY INSTRUCTIONS Handling of the disc trays and discs Not doing the following will cause damage to the unit. Removing the power plug • Press [y/I, POWER] to turn off the unit and remove t...
Page 4 IS IS Getting started Making the connections Connect the AC power supply cord only after all other connections have been made. Connect the speaker cords. Connect the left (L) Connect the XM Passport M...
Page 5 Optional antenna connections Use outdoor antenna if radio reception is poor. Note: Disconnect the outdoor antenna when the unit is not in use. Do not use the outdoor antenna during a lightning storm. ...
Page 6 IS IS Overview of controls Main unit Refer to the numbers in parentheses for page reference. Remote control signal sensor Display panel Disc tray open/close (3) Disc trays Multiple discs change (7) Di...
Page 7 Discs Play Mode function Basic play You can listen to specifi c discs and tracks. Press [0, OPEN/CLOSE] on the main unit to open the tray. Preparation The unit turns on, load a disc in the current tra...
Page 8 IS IS Discs (continued) Changing a single disc (SINGLE CHANGE) Press [DISC] and then [1] ~ [5] to select the disc. By main unit only Press [7, CLEAR]. While one disc is playing, you can change the dis...
Page 9 Press [ENTER]. Repeat play Press [4, REW/ ] or [¢, / FF] to search for previous or next match. You can repeat program play or other selected play mode. The matched title is displayed. Press [REPEAT]. ...
Page 10 IS IS Cassette tape – Play and record The buttons described for “Cassette tape - Play and Select the source to be recorded. record” are mainly for the main unit unless indicated Radio recording: other...
Page 11 FM/AM radio TUNER / TUNER / BAND Manual tuning BAND Memory preset Press [TUNER/BAND] to select “FM” or “AM”. 20 FM and 15 AM stations can be preset. Press [PLAY MODE] to select “MANUAL”. Preparation P...
Page 12 IS IS XM® Satellite Radio Introducing XM Satellite Radio XM Satellite Radio is the provider of satellite radio with Optimizing the XM signal reception more than 6 million subscribers. XM offers more t...
Page 13 ALBUM Displaying the XM channel XM CAT Selecting XM channels by category information The display mode setting can be changed to display XM channels are organized into categories such as Rock, informat...
Page 14 IS IS Timer To activate the timer Setting the clock Press [ ̊ PLAY/REC] repeatedly to turn on your desired timer. This is a 12-hour clock. ˚ PLAY ˚ REC Press [CLOCK/TIMER] to select “CLOCK”. no displa...
Page 15 Sound adjustment External unit Selecting sound effects Connecting to a portable audio equipment This feature enables you to enjoy music from a portable Preset EQ audio equipment. Press [PRESET EQ] rep...
Page 16 IS IS External unit (continued) Connecting the Universal Dock for i Pod OPTION Playing from the i Pod You can charge and play your i Pod by putting it in the Universal Dock for i Pod that is connected...
Page 17 MUSIC PORT Compatible i Pod Changing the main unit and remote control mode Name Memory Size The remote control and main unit are factory set to i Pod nano 2GB, 4GB, 8GB “REMOTE 1” mode. 2nd generation...
Page 18 IS IS Troubleshooting guide Before requesting service, make the following checks. If you are in doubt about some of the check points, or if the remedies indicated in the chart do not solve the problem...
Page 19 Disc trays Disc tray(s) cannot open. Press [y/I, POWER] to release the jammed tray(s) as the unit will switch off. Switch it on again and “CHGR ERR” is displayed. the tray(s) will initialize to the pr...
Page 20 IS IS Limited Warranty (ONLY FOR U.S.A.) Panasonic Consumer Electronics Company, Panasonic Puerto Rico, Inc. Division of Panasonic Corporation of North America Ave. 65 de Infantería, Km. 9.5 One Panas...
Page 21 Limited Warranty (ONLY FOR CANADA) Panasonic Canada Inc. PANASONIC PRODUCT – LIMITED WARRANTY Panasonic Canada Inc. warrants this product to be free from defects in material and workmanship and agrees...
Page 22 Referencia PA LA IS IS • Las conexiones del equipo descritas sirven en concepto de ejemplo. • Los equipos periféricos y los cables opcionales se venden por separado si no está indicado de otro modo. P...
Page 23 Preparando el mando a distancia ■ Pilas • Inserte los polos (+ y –) de la forma que se indica en el mando a distancia. AA/R6/LR6 • Retire las pilas si no va a utilizar el mando a distancia durante un ...
Page 24 PA LA IS IS Controles Aparato principal Los números entre paréntesis indican la página de referencia. Sensor de señal del mando a distancia Visualizador Abrir/cerrar bandeja de disco (25) Bandeja de d...
Page 25 Discos Función de modo de reproducción Reproducción básica Puede escuchar discos específi cos y pistas. Pulse [0, OPEN/CLOSE] en la unidad principal para abrir la bandeja. Preparación El aparato se en...
Page 26 PA LA IS IS Radio FM/AM (continuación)Cintas de casete – reproducción y grabación (continuación) Para sintonizar automáticamente Para Acción Mantenga pulsado [4, REW/ ] o [¢, / FF ] hasta que la frecu...
Page 27 Temporizador (continuación) Pulse los botones numéricos para seleccionar el Pulse [CLOCK/TIMER] para seleccionar el canal. temporizador deseado. Para los canales 10 a 20 pulse [h10] y luego los dos dí...
Page 28 Maintenance If the surfaces are dirty For a cleaner crisper sound (cassette deck) To clean this unit, wipe with a soft, dry cloth. Clean the heads regularly to assure good quality playback • Never use...

Manual Details

Brand Panasonic
Pages 28
File Size 3.55 MB
Published June 04, 2026
52 views

Enter the captcha to get the download link:

captcha

Frequently Asked Questions

What is the proper procedure for powering down the unit?

Press [y/I, POWER] to turn off the unit and only remove the power plug after all displays have disappeared.

How should I clean the system or cassette deck?

Wipe surfaces with a soft, dry cloth. Use a cleaning tape regularly and never use alcohol, paint thinner, or benzine.

What do I watch out for when handling CDs or disc trays?

Always press [0, OPEN/CLOSE] to open or remove a disc; do not pull the tray by hand as this can cause an accident.

If I set the timer, how does it activate if the unit powers off and on again?

The timing adjustment will not activate if you switch the unit off and back on while a timer is running.