Panasonic RC-CD300 User Manual
Summary
This user manual provides comprehensive operating instructions and critical safety guidelines for your CD Clock Radio. Designed for new owners, it ensures safe setup and optimal performance by detailing proper power connections, ideal placement requirements, and operational precautions. Reviewing these detailed steps is essential to maximize the longevity of your unit while preventing misuse or electrical hazard.
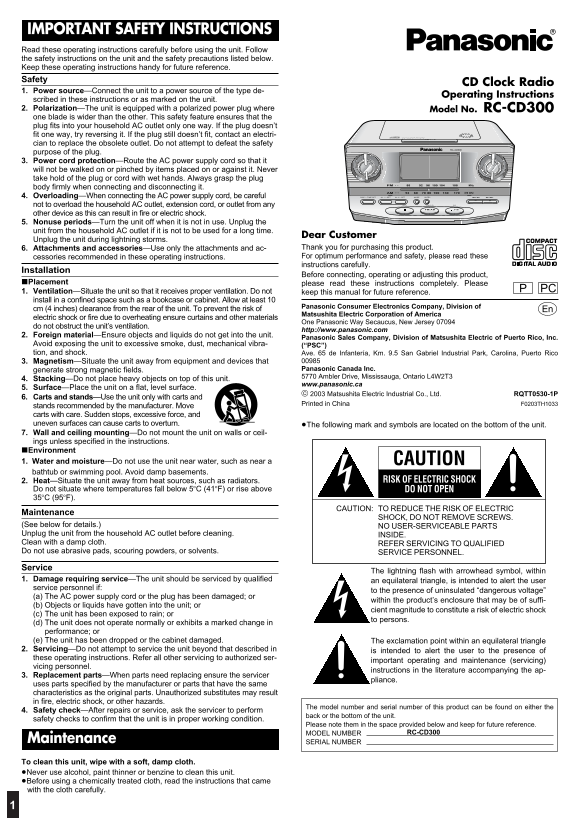
Page 1 Text Content
IMPORTANT SAFETY INSTRUCTIONS Read these operating instructions carefully before using the unit. Follow the safety instructions on the unit and the safety precautions listed below. Keep these operating instructions handy for future reference. Safety
CD Clock Radio
1. Power source—Connect the unit to a power source of the type de-
Operating Instructions
scribed in these instructions or as marked on the unit. 2. Polarization—The unit is equipped with a polarized power plug where Model No. RC-CD300 one blade is wider than the other. This safety feature ensures that the plug fits into your household AC outlet only one way. If the plug doesn’t fit one way, try reversing it. If the plug still doesn’t fit, contact an electri- CD CLOCK RADIO
cian to replace the obsolete outlet. Do not attempt to defeat the safety
RC-CD300
purpose of the plug. 3. Power cord protection—Route the AC power supply cord so that it will not be walked on or pinched by items placed on or against it. Never take hold of the plug or cord with wet hands. Always grasp the plug
FM MHz
body firmly when connecting and disconnecting it.
k Hz X10AM
4. Overloading—When connecting the AC power supply cord, be careful AL 1 / -SET AL 2 / -SET MODE SLEEPDISP / -TIME SET
not to overload the household AC outlet, extension cord, or outlet from any other device as this can result in fire or electric shock. 5. Nonuse periods—Turn the unit off when it is not in use. Unplug the unit from the household AC outlet if it is not to be used for a long time.
Dear Customer
Unplug the unit during lightning storms.
6. Attachments and accessories—Use only the attachments and ac- Thank you for purchasing this product. cessories recommended in these operating instructions. For optimum performance and safety, please read these instructions carefully.
Installation
Before connecting, operating or adjusting this product,
∫Placement please read these instructions completely. Please
1. Ventilation—Situate the unit so that it receives proper ventilation. Do not PC
keep this manual for future reference.
install in a confined space such as a bookcase or cabinet. Allow at least 10
Panasonic Consumer Electronics Company, Division of
cm (4 inches) clearance from the rear of the unit. To prevent the risk of p Matsushita Electric Corporation of America electric shock or fire due to overheating ensure curtains and other materials
One Panasonic Way Secaucus, New Jersey 07094
do not obstruct the unit’s ventilation.
http://www.panasonic.com
2. Foreign material—Ensure objects and liquids do not get into the unit.
Panasonic Sales Company, Division of Matsushita Electric of Puerto Rico, Inc.
Avoid exposing the unit to excessive smoke, dust, mechanical vibra- (“PSC”) tion, and shock. Ave. 65 de Infantería, Km. 9.5 San Gabriel Industrial Park, Carolina, Puerto Rico 3. Magnetism—Situate the unit away from equipment and devices that
generate strong magnetic fields. Panasonic Canada Inc. 5770 Ambler Drive, Mississauga, Ontario L4W2T3
4. Stacking—Do not place heavy objects on top of this unit.
www.panasonic.ca
5. Surface—Place the unit on a flat, level surface.
2003 Matsushita Electric Industrial Co., Ltd. RQTT0530-1P
6. Carts and stands—Use the unit only with carts and
Printed in China F0203TH1033
stands recommended by the manufacturer. Move carts with care. Sudden stops, excessive force, and uneven surfaces can cause carts to overturn. ≥The following mark and symbols are located on the bottom of the unit. 7. Wall and ceiling mounting—Do not mount the unit on walls or ceil- ings unless specified in the instructions. ∫Environment 1. Water and moisture—Do not use the unit near water, such as near a CAUTION bathtub or swimming pool. Avoid damp basements.
2. Heat—Situate the unit away from heat sources, such as radiators. RISK OF ELECTRIC SHOCK
Do not situate where temperatures fall below 5o C (41o F) or rise above DO NOT OPEN 35o C (95o F).
CAUTION: TO REDUCE THE RISK OF ELECTRIC
Maintenance
SHOCK, DO NOT REMOVE SCREWS.
(See below for details.) NO USER-SERVICEABLE PARTS Unplug the unit from the household AC outlet before cleaning. INSIDE. Clean with a damp cloth. REFER SERVICING TO QUALIFIED Do not use abrasive pads, scouring powders, or solvents. SERVICE PERSONNEL.
Service
The lightning flash with arrowhead symbol, within
1. Damage requiring service—The unit should be serviced by qualified an equilateral triangle, is intended to alert the user service personnel if:
to the presence of uninsulated “dangerous voltage”
(a) The AC power supply cord or the plug has been damaged; or
within the product’s enclosure that may be of suffi-
(b) Objects or liquids have gotten into the unit; or
cient magnitude to constitute a risk of electric shock
(c) The unit has been exposed to rain; or
to persons.
(d) The unit does not operate normally or exhibits a marked change in performance; or (e) The unit has been dropped or the cabinet damaged. The exclamation point within an equilateral triangle 2. Servicing—Do not attempt to service the unit beyond that described in is intended to alert the user to the presence of these operating instructions. Refer all other servicing to authorized ser-
important operating and maintenance (servicing)
vicing personnel.
instructions in the literature accompanying the ap-
3. Replacement parts—When parts need replacing ensure the servicer
pliance.
uses parts specified by the manufacturer or parts that have the same characteristics as the original parts. Unauthorized substitutes may result in fire, electric shock, or other hazards.
The model number and serial number of this product can be found on either the
4. Safety check—After repairs or service, ask the servicer to perform
back or the bottom of the unit.
safety checks to confirm that the unit is in proper working condition.
Please note them in the space provided below and keep for future reference.
MODEL NUMBER RC-CD300
Maintenance SERIAL NUMBER
To clean this unit, wipe with a soft, damp cloth. ≥Never use alcohol, paint thinner or benzine to clean this unit. ≥Before using a chemically treated cloth, read the instructions that came with the cloth carefully.
Page Summary Contents For Panasonic RC-CD300 User Manual
Manual Details
| Brand | Panasonic |
|---|---|
| Pages | 8 |
| File Size | 488.44 KB |
| Published | May 31, 2026 |
Enter the captcha to get the download link:
