Page 1
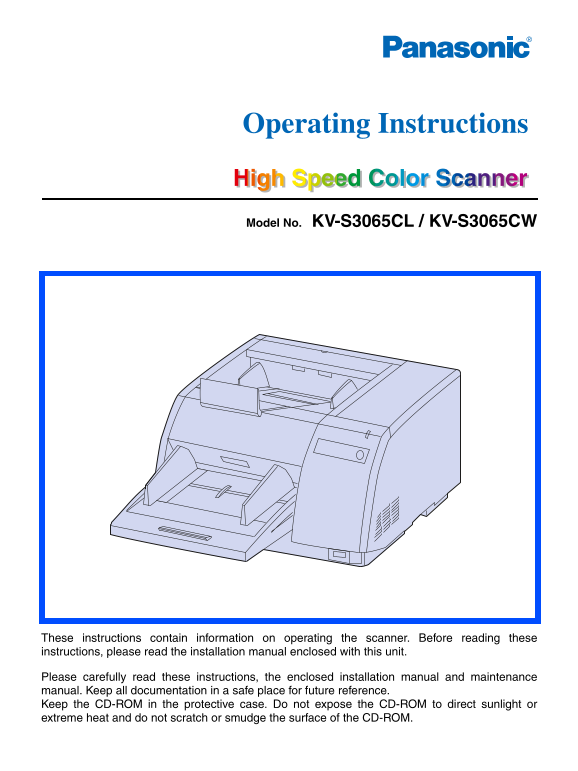
Model No. KV-S3065CL / KV-S3065CW These instructions contain information on operating the scanner. Before reading these instructions, please read the installation manual enclosed with this unit. Pleas...
Page 2
Thank you for purchasing a Panasonic “High Speed Color Scanner.” Panasonic supports your imaging needs with a reliable and easy to use document scanner. Panasonic has developed Panasonic Image Enhance...
Page 3
Table of Contents Notice . . . . . . . . . . . . . . . . . . . . . . . . . . . . . . . . . . . . . . . . . . . . . . . 4 Precautions. . . . . . . . . . . . . . . . . . . . . . . . . . . . . . . . . . ...
Page 4
Notice English WARNING: TO PREVENT FIRE OR SHOCK HAZARD, DO NOT EXPOSE THIS PRODUCT TO RAIN OR ANY TYPE OF MOISTURE. THE SOCKET-OUTLET MUST BE NEAR THIS EQUIPMENT AND MUST BE EASILY ACCESSIBLE. The pr...
Page 5
Notice (For United Kingdom only) For your safety please read the following text carefully. This appliance is supplied with a moulded three pin mains plug for your safety and convenience. A 5 amp. fuse...
Page 6
Notice Caution Labels
Page 7
Precautions The following precautions are recommended to extend the life of the unit: Prior to scanning, remove all sta- Do not place any liquids near the Do not place books, paper, or other ples and ...
Page 8
Precautions Operating Environment Do not place the unit in direct sunlight or in a cold draft. Do not operate or place the unit in a vertical position. Hot Cold Do not place the unit near a heating ap...
Page 9
Precautions CD-ROM To prevent the CD-ROMs from accidental damages: Do not touch or write on the surface Do not leave the disc out of its Do not leave the disc in direct of the disc. protective case. s...
Page 10
Component Identification Exit tray Exit substopper Exit document guide Exit extension tray Power indicator When the power is turned on, Exit stopper the green indicator lights. When an error occurs, t...
Page 11
Component Identification Power turn-on sequence Turn on the power of the scanner. The LED will now light. Turn on the power of the host computer after scanner’s LED stays green. In case of the USB con...
Page 12
Component Identification About the SCSI setting (Not required for USB connection) When connecting the scanner to a SCSI chain using a SCSI cable, perform the SCSI ID setting correctly. The scanner is ...
Page 13
Loading Documents Acceptable documents Document size: 48~297 mm (1.9~11.7 in.) 70~431 mm (2.75~17 in.) Paper thickness: Continuous paper feeding 40~157 g/m2 Single paper feeding 20~157 g/m2 Document s...
Page 14
Loading Documents When scanning multiple sheets Cautions: Please remove any staples from the document before scanning. Curled documents may cause a paper jam or damaging the unit, so please set the do...
Page 15
Loading Documents Place the documents on the hopper Portrait with the side to be scanned facing up. Then push them in the direction of the A4, LTR Fill indicator arrow until they stop. (Limit mark) Be...
Page 16
Loading Documents When using long paper, pull out the hopper extension tray from the hopper Exit extension tray and the exit stopper from the exit extension tray. You can also extend the exit extensio...
Page 17
Paper Feed Settings Selecting the paper path for scanned document To select a U-turn path pass through to the front, set the paper path selector to the upper side. To select a straight path pass throu...
Page 18
Others How to use the control sheet and separation sheet If the control sheet is used, the documents under the control sheet are scanned in Documents accordance with the code on the control sheet rega...
Page 19
Changing the Reference Plate Setting You can choose a background color to be scanned from white (black) to black (white). The scanner comes from fac- tory set to black. The reference plate (B) and ref...
Page 20
Changing the Reference Plate Setting Close the front door. Push both sides of the front door down slowly until it clicks into place.
Page 21
Clearing Paper Jams Torn documents, thin documents or documents that are creased on the top edge may cause paper jams. If a paper jam occurs, remove the jammed sheet according to the following procedu...
Page 22
Cleaning the Unit Outside of the scanner Clean the unit at least once a month. Turn the power off. Clean the cover with a soft cloth. The document insertion and exit slots get dirty easily. Make sure ...
Page 23
Cleaning the Unit Cleaning the rollers Turn the power off. Use your hand to pull the front door release towards you (1). Front door Then open the front door completely (2). Front door release (Inside ...
Page 24
Cleaning the Unit Use the roller cleaning paper For roller cleaning, pull the belt in the direction of (KV-SS03) to remove the dirt from the the arrow to rotate the rollers. surfaces of all rollers. W...
Page 25
Cleaning the Unit Close the front door. Push both sides of the front door down slowly until it clicks into place. Clear the roller cleaning counter with User Utility. Click [Clear Counter] button for ...
Page 26
Cleaning the Unit Clean the image sensor cover with the Waiting sensor roller cleaning paper. Skew sensor Double feed detector Then remove the dirt on the sensors, Starting sensor reflectors and doubl...
Page 27
Replacing Consumables Replacing paper feed roller module Turn the power off and unplug the power cord. Power switch ± : off position Use your hand to pull the front door release towards you (1). Front...
Page 28
Replacing Consumables Open the optional “Roller Exchange Kit (KV-SS017)”, and take out the new paper feed roller module. Install the new paper feed roller module with the gear on the left side and the...
Page 29
Replacing Consumables Replacing retard roller module Pull open the conveyor towards you by using the indent on the right side. When the conveyor is pulled towards you, the click-stop mechanism will be...
Page 30
Replacing Consumables Take out the new retard roller module in the optional “Roller Exchange Kit (KV-SS017)”. Pull the right side of the shaft in the direction of the arrow and hold it there. (1) Atta...
Page 31
Replacing Consumables Hold the conveyor using both hands, and close the conveyor by pushing it into the unit. When the conveyor is closed, the click- stop mechanism will operate. Caution: Indent If th...
Page 32
Shading Adjustment What is the purpose of the shading adjustment? The process whereby the variations in the distribution of the lamp’s light quantity are transformed into a fixed output within the sca...
Page 33
Repacking Instructions It is highly recommended that you keep the original carton and ALL packing materials. If you need to transport or ship your scanner, please follow these instructions. Please use...
Page 34
Specifications Model No. KV-S3065CL KV-S3065CW Scanning face Duplex scanning Front side : CIS (Contact Type Color Image Sensor) Scanning method Back side : CIS (Contact Type Color Image Sensor) Scanni...
Page 35
Specifications Model No. KV-S3065CL KV-S3065CW Operating Operating temperature and 15 °C to 30 °C (59 °F to 86 °F), 20% to 80% RH Environment humidity Storage Storage temperature and 0 °C to 35 °C (32...
Page 36
Troubleshooting If a problem occurs while the unit is being used, check the following items and check the scanner status with the User Utility. If the unit still malfunctions, turn it OFF, unplug the ...
Page 37
Troubleshooting Symptom Possible Cause Remedy The rollers are dirty. Clean all of the rollers. (See page 23.) Replace the paper feed roller module The rollers have reached their life and the retard ro...
Page 38
Index Page Page AC inlet . . . . . . . . . . . . . . . . . . . . . . . . . . . 10 Fan exhaust vent . . . . . . . . . . . . . . . . 10, 22 Acceptable documents . . . . . . . . . . . . . . . 13 Free rol...
Page 39
Index Page Page Operating environment . . . . . . . . . . . . . . . 35 SCSI connection . . . . . . . . . . . . . . . . . . . . Option . . . . . . . . . . . . . . . . . . . . . . . . . . . . 35 SCSI co...
Page 40
Panasonic Digital Document Company A Unit of Matsushita Electric Corporation of America Two Panasonic Way, Secaucus, New Jersey 07094 Panasonic Canada Inc. 5770 Ambler Drive, Mississauga, Ontario, L4W...