Page 1
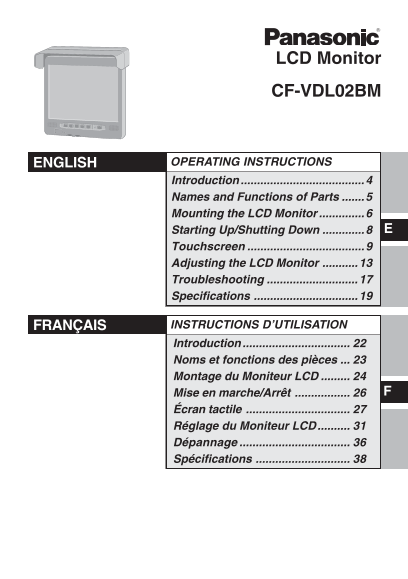
LCD Monitor CF-VDL02BM ENGLISH OPERATING INSTRUCTIONS Introduction Names and Functions of Parts .......5 Mounting the LCD Monitor ..............6 Starting Up/Shutting Down .............8 Touchscreen ....
Page 2
ENGLISH Used in Motor Vehicle For Used in Motor Vehicle Warning: A LCD monitor may be installed in a motor vehicle and visible to the driver only if used to support vehicle related functions such as v...
Page 3
Precautions When Car Washing Do not expose the LCD monitor to water or excessive moisture. This could cause electrical shorts, fire or other damage. When Parked Parking in direct sunlight can produce ...
Page 4
Introduction Thank you for purchasing the LCD Monitor for the Panasonic notebook computer series. This LCD monitor features a touchscreen function, which makes computer operation pos- sible by simply ...
Page 5
Names and Functions of Parts <Front> LCD LED Indicator Green : power on Function Buttons Orange : power on but no VGA Sig- Does the same operation as F1 na he through F5 of the keyboard. cable i...
Page 6
Mounting the LCD Monitor <Only for models without a display port, serial port, and sound port> Connect your computer to the port replicator Operating Instructions of the port replicator) Remove ...
Page 7
Attach the cover of the LCD Monitor Attach the four screws. Mount the Sun Shade Attach the two screws (included). Mount the LCD Monitor Use these M4 screw holes to mount the LCD Monitor. CAUTION When ...
Page 8
Starting Up/Shutting Down Starting Up Press the power switch of the LCD Monitor The LCD Monitor will turn on. Turn your computer on ( Operating Instructions of the computer) NOTE Some computers will t...
Page 9
Touchscreen The LCD Monitor is equipped with a touchscreen function allowing you to perform the same operations as the touch pad or mouse by touching the surface of the display with the finger or styl...
Page 10
Touchscreen CAUTION The touchscreen function can not be used when using the full screen in [Command Prompt]. When the operation of panning is performed, the touchscreen function will not work properly...
Page 11
Configuring the Touchscreen When needed, the touchscreen can be configured using the following steps. Windows XP Select from the taskbar and select [Adjust settings], or select [Settings] from [start]...
Page 12
Touchscreen Make necessary changes Select [OK] NOTE Adjustments can be made when double-click operations are assumed by the com- puter although single-click operations are intended, by clicking [Windo...
Page 13
Adjusting the LCD Monitor Fine adjustment on the display size, position, and so on, may be necessary since the signal timing differs depending on the computer. Press The OSD main menu is displayed. NO...
Page 14
Adjusting the LCD Monitor Select the icon by pressing or , then press (Brightness) The Brightness menu item is used to adjust the bright- Brightness ness. A slider indicating the current brightness va...
Page 15
(Position) The Position menu allows the adjustment of image po- Image Position sition in Analog input mode. H-Position Select the item by pressing or , then press . V-Position Auto Center H-Position H...
Page 16
Adjusting the LCD Monitor Auto Phase A confirmation box is displayed. The default selection is [Yes]. Press to adjust the phase automatically. If you want to cancel, select [No] and press . To save th...
Page 17
Troubleshooting When a problem occurs, refer to this page. If a problem appears to be related to a software application, read the software related manual. If you still cannot troubleshoot the problem,...
Page 18
Troubleshooting Unable to input by Check the cable connection to the LCD Monitor. touching the display Confirm that the [Serial Port] has not been set to [Dis- able] in the Setup Utility. Confirm that...
Page 19
Specifications Model No. CF-VDL02BM Input Interface Analog RGB Signal LCD Type 12.1 type TFT Color Active Matrix LCD Display Area 247.2 mm × 185.7 mm Resolution 1024 × 768 dots Color 262,144 (simulate...
Page 20
FRANÇAIS Pour L’utilisation Dans Un Véhicule Motorisé Avertissement : Le Moniteur LCD peut être installé dans un véhicule motorisé et dans le champ de vision du conducteur uniquement en tant que dispo...
Page 21
Précautions Lors du lavage du véhicule Ne pas exposer le Moniteur LCD à l’eau ou à une humidité excessive. Ceci pourrait provoquer des courts-circuits, un incendie ou d’autres dégâts. En stationnement...
Page 22
Introduction Nous vous remercions pour votre achat du Moniteur LCD de la série informatique Notebook de Panasonic. Ce Moniteur LCD comporte une fonction d’écran tactile qui permet d’actionner l’ordina...
Page 23
Noms et fonctions des pièces <Devant> LCD Témoin à DEL Vert : Appare en marche Orange : Apparei en marche mais Boutons de fonction absence de sig- Ces boutons ont la même fonction nal VGA ou de ...
Page 24
Montage du Moniteur LCD <Uniquement pour les modèles sans port d’écran, sans port série et sans port audio> Connectez l’ordinateur au duplicateur de port Instructions d’utilisation du duplicateu...
Page 25
Fixez le couvercle du Moniteur LCD Fixez les quatre vis. Montez le pare-soleil Fixez les deux vis (fourni). Montez le Moniteur LCD Montez le Moniteur LCD à travers ces trous pour vis M4. ATTENTION Lor...
Page 26
Mise en marche/Arrêt Mise en marche Appuyez sur le commutateur d’alimentation du Moniteur LCD Allumez l’ordinateur ( Instructions d’utilisation de l’ordinateur) REMARQUE Certains ordinateurs s’allumen...
Page 27
Écran tactile Le Moniteur LCD est doté d’une fonction d’écran tactile qui permet d’effectuer les mêmes opérations qu’en utilisant le clavier ou la souris en touchant la surface du moniteur avec le doi...
Page 28
Écran tactile ATTENTION La fonction d’écran tactile est inutilisable avec le plein écran sous [Invite de commandes]. La fonction d’écran tactile ne fonctionnera pas correctement si l’on utilise le pan...
Page 29
Configuration de l’écran tactile S’il y a lieu, vous pouvez configurer l’écran tactile comme suit: Windows XP Sélectionnez dans la barre des tâches et sélectionnez [Adjust settings], ou sélectionnez [...
Page 30
Écran tactile Effectuez les changements nécessaires Sélectionnez [OK] REMARQUE On peut procéder à des changements quand l’ordinateur suppose des opérations à double-cliquage alors que des opérations à...
Page 31
Réglage du Moniteur LCD Un réglage fin de la taille, la position, etc. du moniteur s’avérera peut-être nécessaire en raison des différences de synchronisation des signaux entre les ordinateurs. Appuye...
Page 32
Réglage du Moniteur LCD Sélectionnez l’icône en appuyant sur ou , puis appuyez sur (Brightness) Brightness L'option de menu Brillance sert à régler la brillance.Un curseur indique la valeur de brillan...
Page 33
(Position) Image Position Le menu Position permet de régler la position de l’image dans le mode d’entrée analogique. H-Position V-Position Sélectionnez l’option en appuyant sur ou , puis Auto Center a...
Page 34
Réglage du Moniteur LCD Clock Le réglage d’horloge sert à régler le nombre de signaux d’horloges à échantillonnage ADC par l igne (échantillons par ligne). Un curseur et la valeur en cours s’affichent...
Page 35
OSD Timeout Délai OSD sert à régler le temps d’inactivité autorisé de l’OSD. Si durant la période définie aucune action active, pression de touche ou configuration automatique ne se produit, le menu O...
Page 36
Dépannage En cas de problème, référez-vous à cette page. Si le problème semble lié à une application logicielle, lisez le manuel se rapportant au logiciel. Si vous n’arrivez toujours pas à remédier au...
Page 37
“Input Not Supported” Le mode non supporté a été sélectionné. s’affiche Réglez le mode d’affichage sur 640 × 480 60 Hz, 800 × 600 60 Hz ou 1024 × 768 60 Hz. Saisie impossible en Vérifiez la connexion ...
Page 38
Spécifications N° de modèle CF-VDL02BM Interface d’entrée Signal RGB (RVB) analogique Type d’affichage à cristaux liquides Écran LCD couleur à matrice active TFT de 12,1 pouces Surface d’affichage 247...
Page 40
© 2005 Matsushita Electric Industrial Co., Ltd. All Rights Reserved. Printed in Japan FJ0505-0 DFQX5547ZA