Page 1
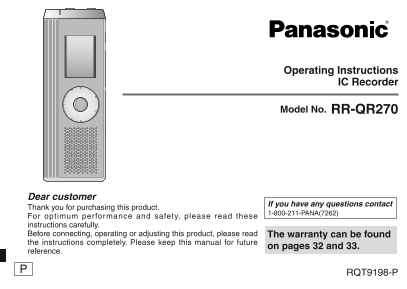
Operating Instructions IC Recorder RR-QR270Model No. Dear customer If you have any questions contact Thank you for purchasing this product. 1-800-211-PANA(7262) For optimum performance and safety, ple...
Page 2
Instruction flow chart Recording This unit For IC Recorder operation… Recording Page 12 Playing Page 16Playback
Page 3
Table of contents Preparation Playing ............................................................... While a file is being played Instruction flow chart ....................................... * Adju...
Page 4
Inserting batteries Before use AAA (LR03) batteries (not included) Make sure the batteries face the right directions. * Replace the batteries within 30 seconds to Remove the seal preserve the settings...
Page 5
Hold function * This function prevents accidental operation when you put the unit in your pocket or bag. It also prevents battery loss from accidental unit operation. Point 1 When you set Hold on Befo...
Page 6
Before use A new audio file is created each time Point 2 you record. Recordings become audio The created file is fi les and the MEETING stored in a folder. fi les are stored FOLDERS (A, B, C and S) in...
Page 7
MEETING RECORDING Using dif ferent combinations of Point 3 recording modes and microphone sensitivity levels, you can adjust Choose a audio quality according to recording To record a low-level sound r...
Page 8
Part names Display bm (during recording) Microphone sensitivity MIC(PLUG IN POWER) Recording mode Recording level Battery indicator Folder Recording elapsed time Hand strap hole 1Built-in microphone 4...
Page 9
How to use the quick search dial Basic operations In this manual A Dial: A: Turn [ Turn the dial to right or left to select an item. B Joystick: B: Press [q/ g] to confirm. Press to confirm the item. ...
Page 10
[ ] [ ]List of menus HOLD ERASE FOLDER STOP REC/PAUSE 1 Press and hold [*FOLDER/ MENU] for 1 second or longer (while stopped) to display menus. 2 Turn [ ] and press [q/ g] to confirm. Press [STOP] to ...
Page 11
Setting the time * When the year is flashing (e.g. “ ” on the display), begin from step 4. * The clock operates with the monthly Set Hold Display the menu Select “ ” error margin of off While stopped,...
Page 12
Recording HOLD ERASE FOLDER STOP REC/PAUSE Meeting recording Using different combinations of recording modes and microphone sensitivity levels, you can adjust audio quality according to recording situ...
Page 13
Dictation recording Confirming the remaining time As the dictation recording settings are all factory-set, dictation can be recorded quickly and simply. When you press [*FOLDER/ MENU] while recording,...
Page 14
Other recording methods g Listening to the recording in progress g Recording through an external microphone Connect earphones (not included). * When you attach an external microphone, the (Sounds are ...
Page 15
HOLD ERASE FOLDER STOP REC/PAUSE g Preventing unnecessary recording (VAS: Voice Activated System) Turn the function Recording is automatically paused if there is no sound for more than 3 seconds. off ...
Page 16
Playing HOLD ERASE FOLDER STOP REC/PAUSE Select the folder Select the file Play Press Turn [ Press [q/ g]. [*FOLDER/ MENU]. * When you press Each time you press: * Af ter se lect ion, [q/ g] again, in...
Page 17
Other playing methods g Searching points for listening (fast forward and fast backward) Quick search Turn[ ] while playing. * You can search forward/backward quickly without sound (except the operatio...
Page 18
Other playing methods HOLD ERASE FOLDER STOP REC/PAUSE g Playing files successively Files stored in the same folder are played successively. Display Select “ALL” Select “ ” the menu Press [q/ g]. Turn...
Page 19
Organizing files g Deleting (a file/ all files in a folder/ all folders except S/ all folders) Display the Select a file or folder Delete deleting menu Turn [ Press and hold Press [ERASE]. [ERASE] for...
Page 20
Security function HOLD ERASE FOLDER STOP REC/PAUSE This unit has a security function. MEMO Password Folder S and password * Folder S is used to secure files. Once set, a password is necessary for play...
Page 21
Playback using the password When the password matches Select folder S Select a file Enter the The password is temporarily to be played password released and the selected file in folder S is played. 1P...
Page 22
Recording to from a cassette tape Read the operating instructions for the connected equipment. g Recording to a cassette tape recorder etc. Select the file to copy and play Record Audio cable (not inc...
Page 23
Troubleshooting guide Before requesting service, make the following checks. If you are in doubt about some of the check points, or if the remedies indicated in the chart do not solve the problem, refe...
Page 24
Troubleshooting guide Symptom Checkpoints “FULL” appears. • There are 99 files in the folder. • There is no remaining recording time. -Delete unneeded files. ( page 19) No sound from the speaker. • Th...
Page 25
Symptom Checkpoints Files created through timer • VAS may be “On” ( page 15). recording are shorter than periods set with the timer. Cannot use a battery that can be • This unit considers the battery ...
Page 26
Specifications Power requirement: DC 3.0 V (2 AAA size/LR03 batteries) Speaker output: 300 m W (max.) Frequency response: 300 Hz to 5,000 Hz (HQ mode) 300 Hz to 3,400 Hz (FQ mode) 300 Hz to 2,700 Hz (...
Page 27
Maintenance Clean this unit with a dry and soft cloth. • If the unit becomes too dirty, wring a cloth moistened in water, wipe the dirt with it and clean with a dry cloth. • Do not use solvents includ...
Page 28
Care and use To reduce risk of radio interference caused by headphone-, earphone- or microphone cables, only use adequate accessories with the cable length less than 3 m (9.8 ft). g Unit • Avoid using...
Page 29
g Allergies Discontinue use if you experience discomfort with the earphones or any other parts that directly contact your skin. Continued use may cause rashes or other allergic reactions. g Listening ...
Page 30
Product Service 1. Damage requiring service – The unit should be serviced by qualified service personnel if: (a) Objects or liquids have gotten into the unit; or (b) The unit has been exposed to rain;...
Page 31
When shipping the unit carefully pack and send it prepaid, adequately insured and preferably in the original carton. Include a letter detailing the complaint and provide a day time phone number where ...
Page 32
Limited Warranty Panasonic Consumer Electronics Company, Panasonic Puerto Rico, Inc. Division of Panasonic Corporation of North America Ave. 65 de Infantería, Km. 9.5 One Panasonic Way Secaucus, New J...
Page 33
Limited Warranty Limits And Exclusions This warranty gives you specific legal rights and you may also This warranty ONLY COVERS failures due to defects in materials have other rights which vary from s...
Page 36
FCC Note: This equipment has been tested and found to comply with the limits for a Class B digital device, pursuant to Part 15 of the FCC Rules. These limits are designed to provide reasonable protect...