Netgear GS724TP - 24-Port Gigabit Ethernet PoE Smart Switch with 2 SFP Ports Installation Guide
Summary
Enhance your network infrastructure with this powerful Gigabit PoE Smart Switch, designed for reliable, scalable connectivity. This setup guide walks you through every step of utilizing the unit in a professional environment. The manual details thorough installation procedures, including configuring the switch via the included Smartwizard Discovery utility and setting the correct IP addressing (DHCP or Static) before linking it to your main network. It is essential reading for IT professionals, small businesses, or advanced users requiring streamlined device connectivity and robust power management solutions.
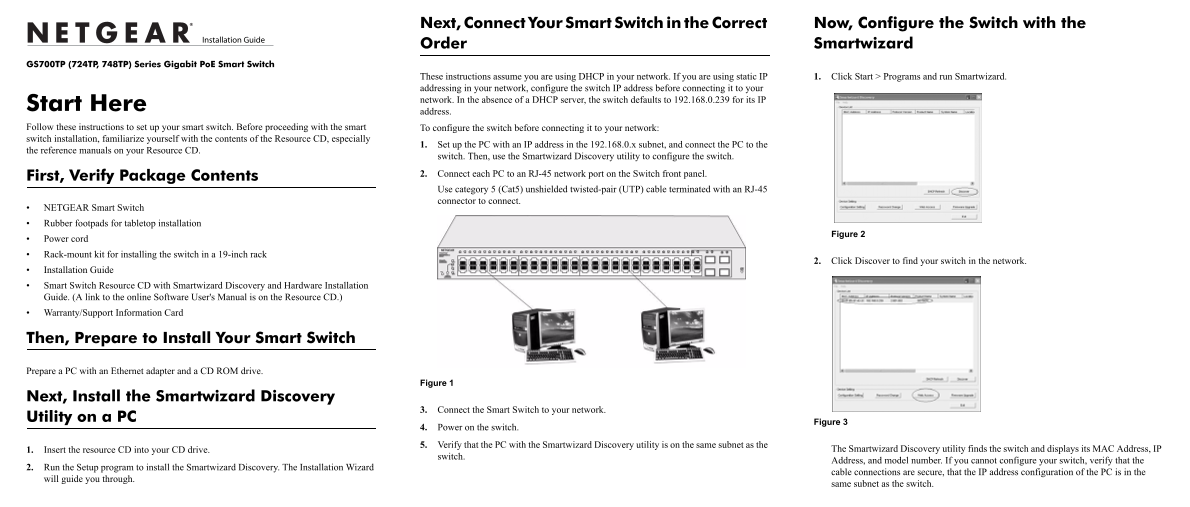
Page 1 Text Content
Next, Connect Your Smart Switch in the Correct Now, Configure the Switch with the Order Smartwizard
GS700TP (724TP, 748TP) Series Gigabit Po E Smart Switch
These instructions assume you are using DHCP in your network. If you are using static IP 1. Click Start > Programs and run Smartwizard. addressing in your network, configure the switch IP address before connecting it to your network. In the absence of a DHCP server, the switch defaults to 192.168.0.239 for its IP
Start Here
address.
Follow these instructions to set up your smart switch. Before proceeding with the smart To configure the switch before connecting it to your network: switch installation, familiarize yourself with the contents of the Resource CD, especially
1. Set up the PC with an IP address in the 192.168.0.x subnet, and connect the PC to the
the reference manuals on your Resource CD.
switch. Then, use the Smartwizard Discovery utility to configure the switch. 2. Connect each PC to an RJ-45 network port on the Switch front panel.
First, Verify Package Contents
Use category 5 (Cat5) unshielded twisted-pair (UTP) cable terminated with an RJ-45 connector to connect.
NETGEAR Smart Switch Rubber footpads for tabletop installation
Figure 2
Power cord Rack-mount kit for installing the switch in a 19-inch rack
2. Click Discover to find your switch in the network.
Installation Guide Smart Switch Resource CD with Smartwizard Discovery and Hardware Installation Guide. (A link to the online Software User's Manual is on the Resource CD.) Warranty/Support Information Card
Then, Prepare to Install Your Smart Switch
Prepare a PC with an Ethernet adapter and a CD ROM drive.
Figure 1
Next, Install the Smartwizard Discovery
3. Connect the Smart Switch to your network.
Utility on a PC
Figure 3
4. Power on the switch. 5. Verify that the PC with the Smartwizard Discovery utility is on the same subnet as the
1. Insert the resource CD into your CD drive. The Smartwizard Discovery utility finds the switch and displays its MAC Address, IP
switch.
Address, and model number. If you cannot configure your switch, verify that the
2. Run the Setup program to install the Smartwizard Discovery. The Installation Wizard
cable connections are secure, that the IP address configuration of the PC is in the
will guide you through.
same subnet as the switch.
Page Summary Contents For Netgear GS724TP - 24-Port Gigabit Ethernet PoE Smart Switch with 2 SFP Ports Installation Guide
Manual Details
| Brand | NETGEAR |
|---|---|
| Pages | 2 |
| File Size | 197.16 KB |
| Published | June 04, 2026 |
Enter the captcha to get the download link:

Frequently Asked Questions
What subnet must my PC use when setting up the switch?
The PC must be set with an IP address in the 192.168.0.x subnet.
What is the correct sequence for powering on the switch and computer?
First, turn off both; then turn on the smart switch and wait two minutes before turning on the computer.
How do I configure my switch using software?
Insert the Resource CD and follow the Setup program to install Smartwizard Discovery, then use it to find the switch's MAC Address.