EPSON Stylus Photo 1400 User's Guide
Summary
This guide provides comprehensive instructions for setting up and operating your Epson Stylus Photo 1400 inkjet printer. The manual details necessary steps, including loading paper, correctly installing ink cartridges (C, M, Y, K), powering the unit, and connecting to a computer. It is designed for new users who need a clear walkthrough of the initial setup and routine maintenance to ensure reliable high-quality photo printing.
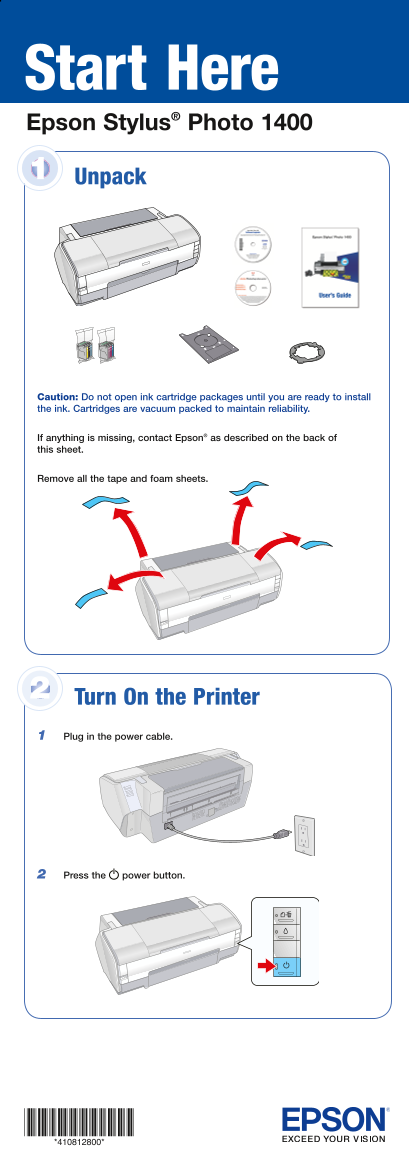
Page 1 Text Content
Start Here
7 Close the ink cartridge cover and press it down until it clicks. 3 Press in the release button and slide the edge guide to the left.
Install Ink Cartridges3
Epson Stylus® Photo 1400
Note: Don’t load paper before installing the ink cartridges.
1 Lift up the printer cover.
Unpack1
2 Open the cartridge cover.
8 Close the printer cover. Release button
4 Load paper against the right edge guide and behind the tab.
3 Unpack the ink cartridges.
Caution: Do not open ink cartridge packages until you are ready to install Tab
Larger papers
the ink. Cartridges are vacuum packed to maintain reliability.
9 Press the ink button to charge ink. Charging takes about
If anything is missing, contact Epson® as described on the back of
three minutes.
this sheet.
Remove all the tape and foam sheets.
4 Remove only the yellow tape from each cartridge.
Smaller papers
Caution: Don’t turn off the printer while the power light is flashing Caution: Don’t remove any other seals from the cartridges. or you’ll waste ink.
Note: The first time you install ink cartridges, the printer uses some ink to charge the printing system, so print yields may be lower with the first cartridges. Subsequent ink cartridges will last for their full rated life. Note: Don’t load paper sideways; always load it short edge first.
Turn On the Printer2
Load Paper
1 Plug in the power cable.
5 Insert the cartridges in the holder for each color. 1 Open the paper support and pull up its extensions.
5 Press in the release button and slide the left edge guide over.
Paper support
2 Press the power button. Larger papers
6 Press the cartridges down until they click.
2 Open the output tray and pull out its extension.
Smaller papers
Output tray
4108128 Rev.0 4108128 Rev.0 4108128 Rev.0 4108128 Rev.0 1-F C 1-F M 1-F Y 1-F K
Page Summary Contents For EPSON Stylus Photo 1400 User's Guide
Manual Details
| Brand | Epson |
|---|---|
| Pages | 8 |
| File Size | 3.55 MB |
| Published | May 30, 2026 |
Enter the captcha to get the download link:

Frequently Asked Questions
When should I install new ink cartridges?
Do not load paper before installing the ink cartridges.
What happens if I turn off the printer while the power light is flashing?
You may waste ink, so do not turn off the printer during this time.
How must I load paper into the unit?
When loading paper, always ensure it is loaded by its short edge first to prevent sideways loading.
What steps should I take if I need technical support for setup?
Call the dedicated customer service number provided for your region and have the product serial number ready.