Dell Studio 1536 Installation Diagrams
Summary
This legacy setup guide for a Dell laptop computer provides illustrated instructions for initial system configuration including connecting the AC adapter, connecting to a network, pressing the power button, and turning on wireless connectivity. It documents hardware features with numbered diagrams identifying components such as battery, air vents, Wi-Fi Catcher network locator, security cable slot, wireless switch, HDMI and video connectors, eSATA/USB ports, and audio connectors. Includes multilingual safety cautions and battery charging guidance. Designed for users from the 2007-2008 era.
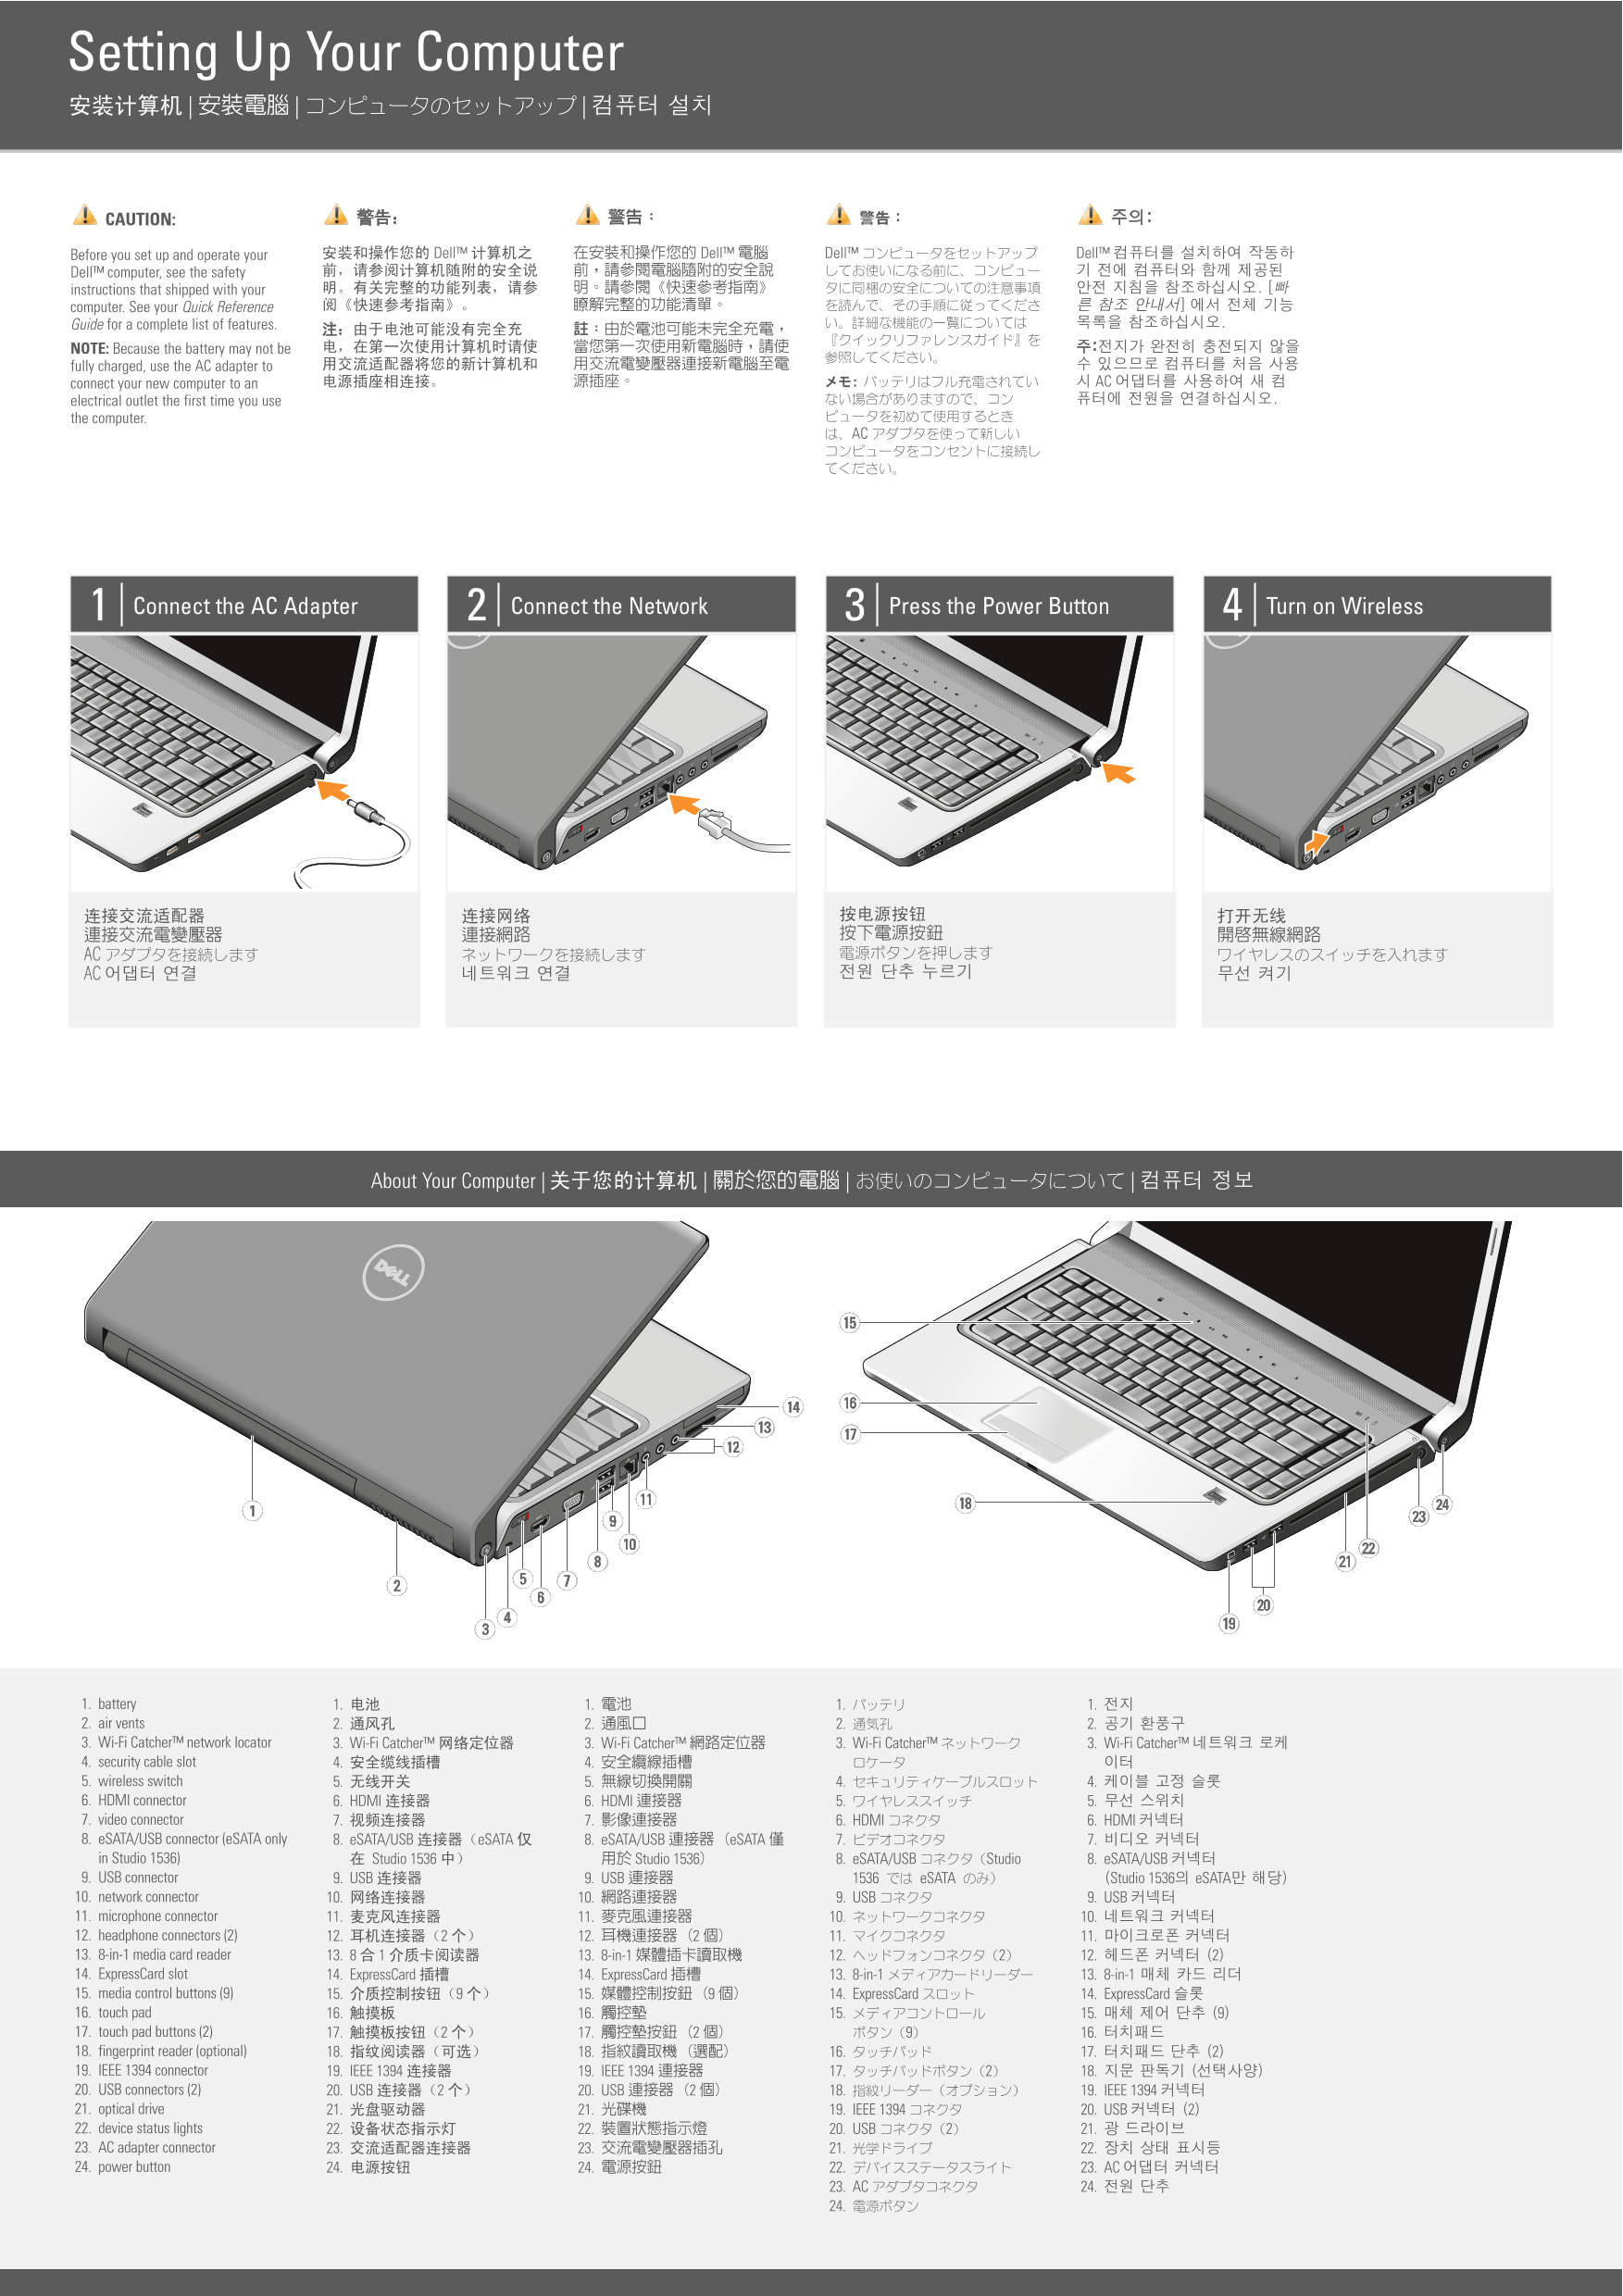
Page 1 Text Content
Setting Up Your Computer | | |
CAUTION:
Before you set up and operate your Dell™ Dell™ Dell™ Dell™
Dell™ computer, see the safety instructions that shipped with your computer. See your Quick Reference Guide for a complete list of features. NOTE: Because the battery may not be fully charged, use the AC adapter to
connect your new computer to an AC
electrical outlet the first time you use the computer.
Connect the AC Adapter Connect the Network Press the Power Button Turn on Wireless
| | | About Your Computer |
1. battery 1. 1. 1. 1. 2. air vents 2. 2. 2. 2. 3. Wi-Fi Catcher™ network locator 3. Wi-Fi Catcher™ 3. Wi-Fi Catcher™ 3. Wi-Fi Catcher™ 3. Wi-Fi Catcher™ 4. security cable slot 4. 4. 5. wireless switch 5. 5. 4. 4. 6. HDMI connector 6. HDMI 6. HDMI 5. 5. 7. video connector 7. 7. 6. HDMI 6. HDMI 8. e SATA/USB connector (e SATA only 8. e SATA/USB e SATA 8. e SATA/USB e SATA 7. 7. in Studio 1536) Studio 1536 Studio 1536 8. e SATA/USB Studio 8. e SATA/USB 9. USB connector 9. USB 9. USB e SATA Studio 1536 e SATA 10. network connector 10. 10. 9. USB 9. USB 11. microphone connector 11. 11. 10. 10. 12. headphone connectors (2) 12. 2 12. 2 11. 11. 13. 8-in-1 media card reader 13. 8 1 13. 8-in-1 12. 2 12. 2 14. Express Card slot 14. Express Card 14. Express Card 13. 8-in-1 13. 8-in-1 15. media control buttons (9) 15. 9 15. 9 14. Express Card 14. Express Card 16. touch pad 16. 16. 15. 15. 9 17. touch pad buttons (2) 17. 2 17. 2 16. 18. fingerprint reader (optional) 18. 18. 16. 17. 2 19. IEEE 1394 connector 19. IEEE 1394 19. IEEE 1394 17. 2 18. 20. USB connectors (2) 20. USB 2 20. USB 2 18. 19. IEEE 1394 21. optical drive 21. 21. 19. IEEE 1394 20. USB 2 22. device status lights 22. 22. 20. USB 2 21. 23. AC adapter connector 23. 23. 21. 22. 24. power button 24. 24. 22. 23. AC
23. AC 24. 24.
Page Summary Contents For Dell Studio 1536 Installation Diagrams
Manual Details
| Brand | Dell |
|---|---|
| Pages | 2 |
| File Size | 957.73 KB |
| Published | July 02, 2026 |
Enter the captcha to get the download link:

Frequently Asked Questions
How should I connect and power on the Wi-Fi Catcher for the first time?
First, use the AC adapter to plug it into an electrical outlet, then connect your new computer to the unit before pressing the Power Button.
What types of internet connections can this device support?
It supports various services including DSL using a cable or modem, connecting via a wireless router, or connecting directly to a desktop/portable computer with a network adapter.
What video and data connectors are available on the unit?
The device features multiple ports, including HDMI, a primary video connector, eSATA/USB connectors, a network connector, and an ExpressCard slot.