Dell EqualLogic PS4100 Setup Poster
Summary
This comprehensive guide is essential for IT professionals deploying a PS Series Storage Array into an enterprise environment. It meticulously covers the entire setup lifecycle, starting with physical installation—including racking, power connections, and network linking. The manual then transitions to detailed software configuration, walking users through running the Remote Setup Wizard, defining core IP parameters, establishing multi-member groups, and configuring the system for optimal Search Area Network (SAN) performance.
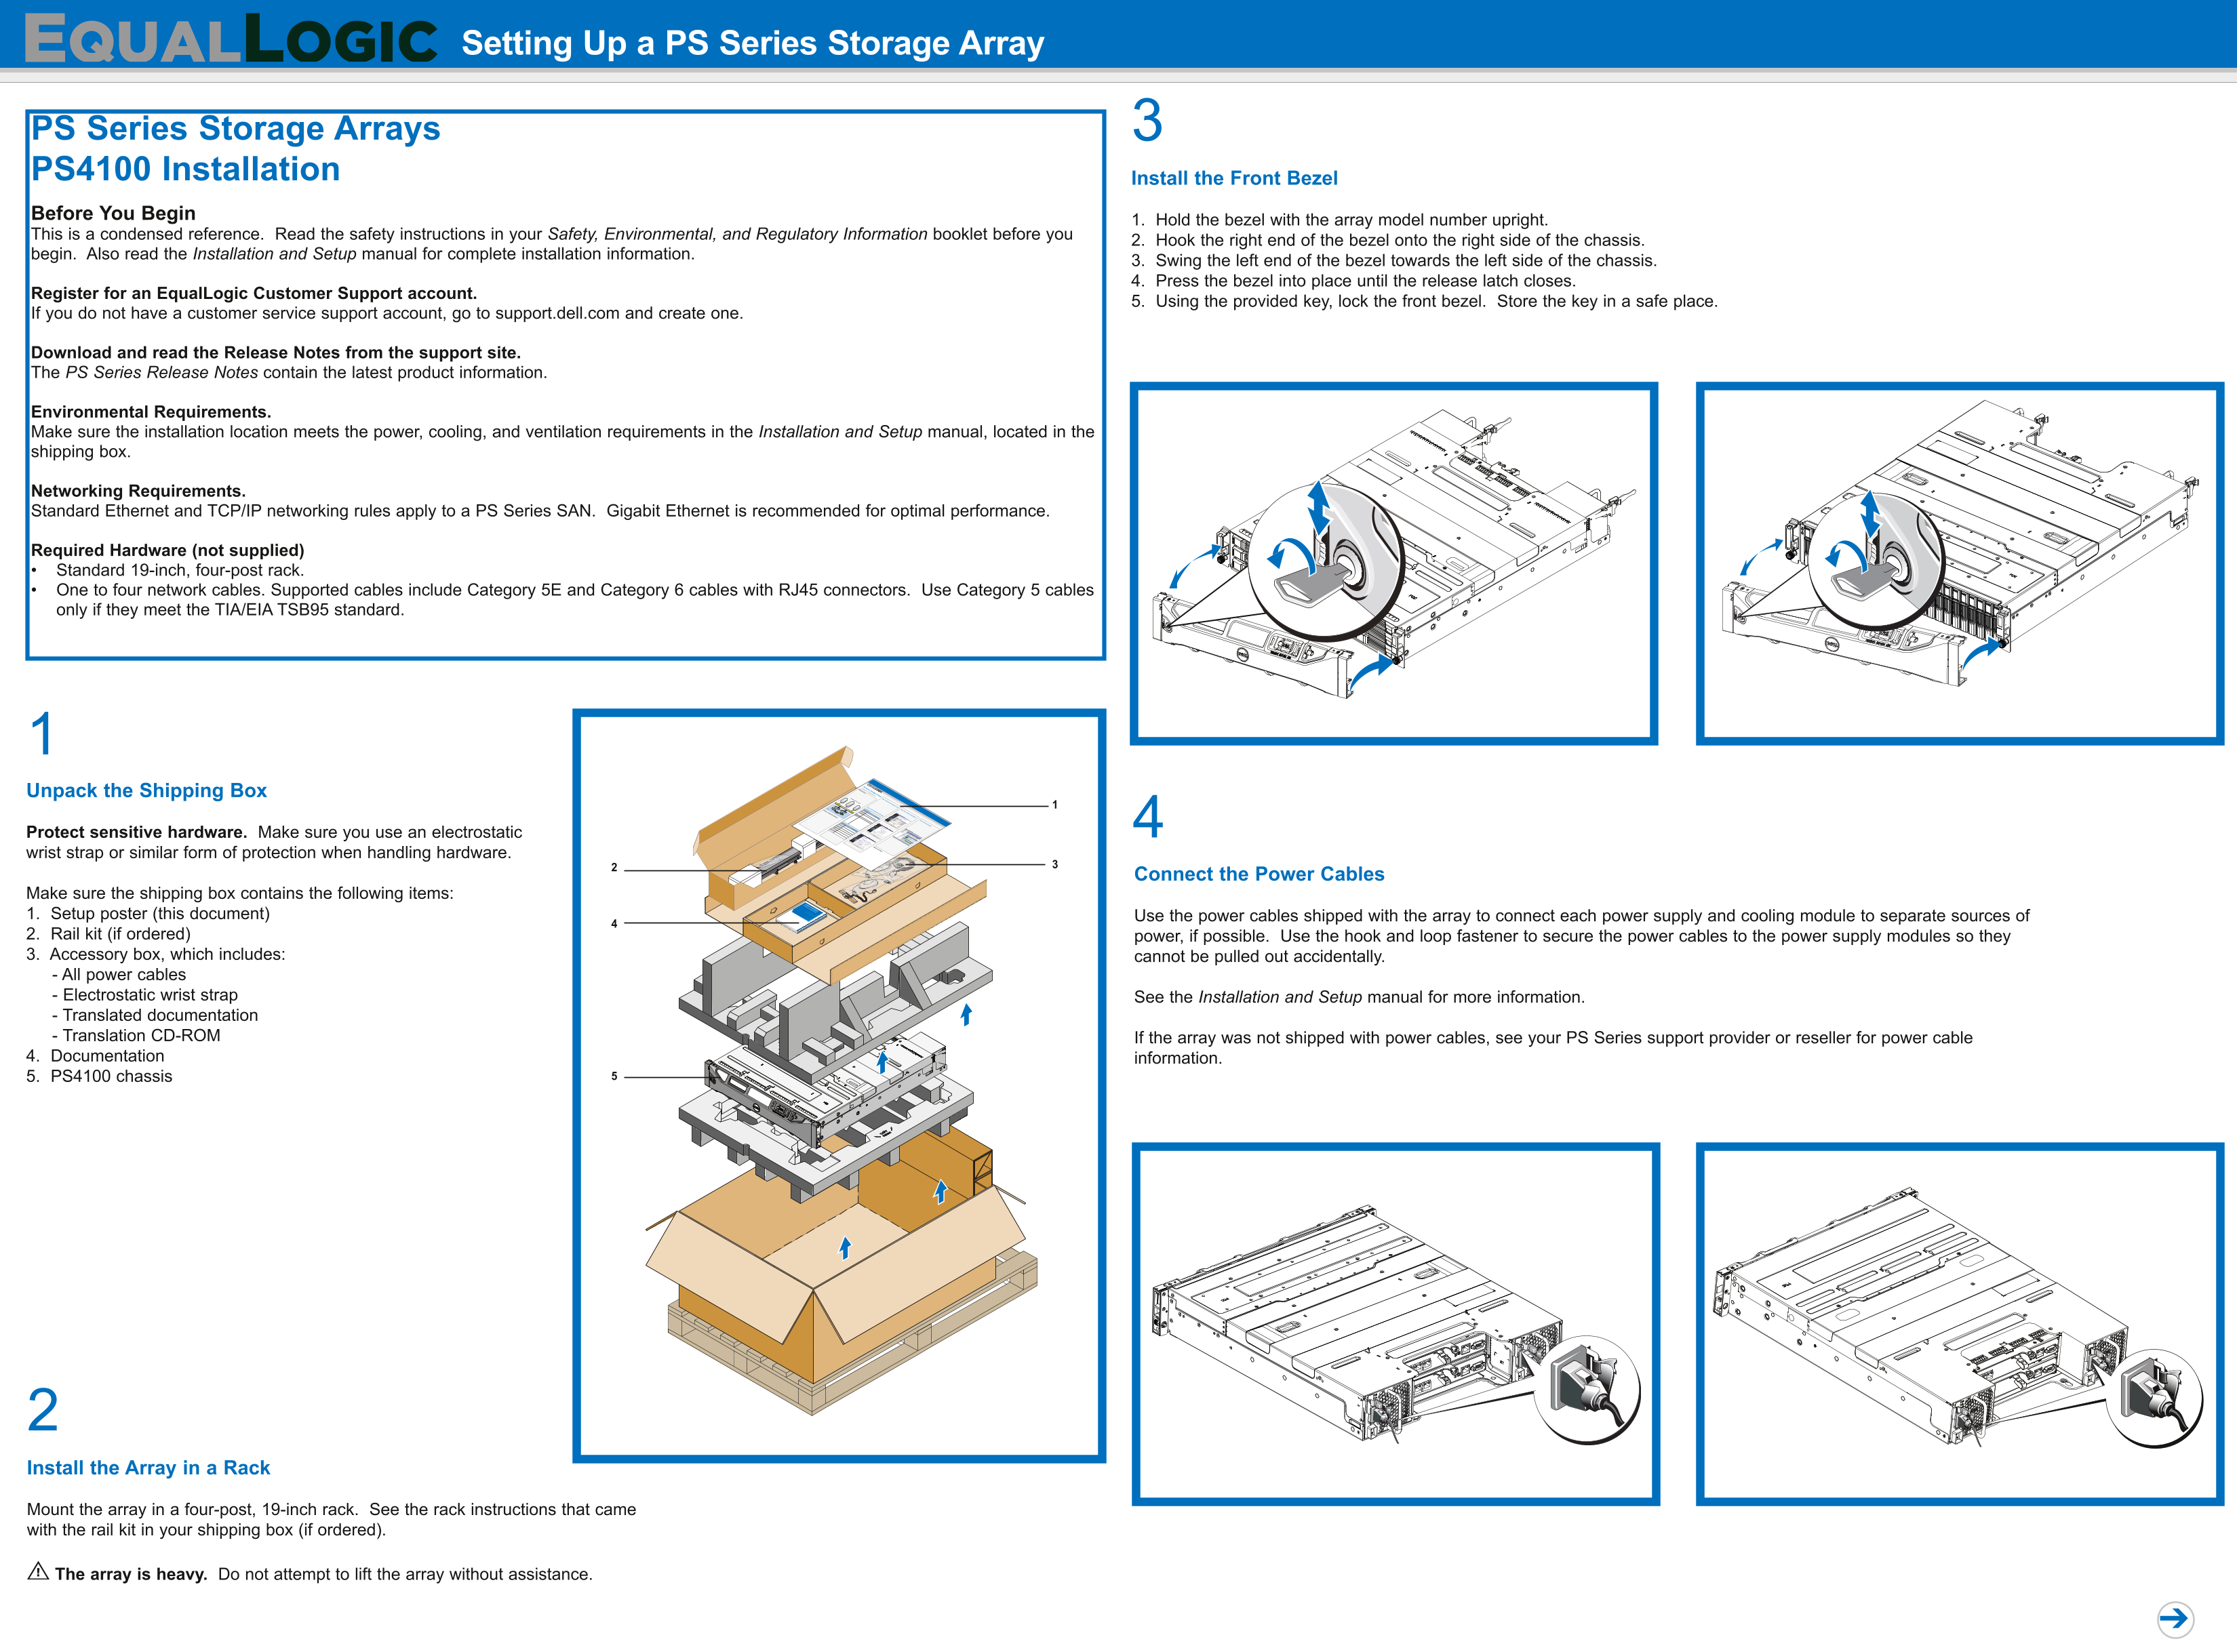
Page 1 Text Content
Setting Up a PS Series Storage Array
PS Series Storage Arrays PS4100 Installation Install the Front Bezel Before You Begin
1. Hold the bezel with the array model number upright.
This is a condensed reference. Read the safety instructions in your Safety, Environmental, and Regulatory Information booklet before you
2. Hook the right end of the bezel onto the right side of the chassis.
begin. Also read the Installation and Setup manual for complete installation information.
3. Swing the left end of the bezel towards the left side of the chassis. 4. Press the bezel into place until the release latch closes.
Register for an Equal Logic Customer Support account.
5. Using the provided key, lock the front bezel. Store the key in a safe place.
If you do not have a customer service support account, go to support.dell.com and create one.
Download and read the Release Notes from the support site. The PS Series Release Notes contain the latest product information.
Environmental Requirements. Make sure the installation location meets the power, cooling, and ventilation requirements in the Installation and Setup manual, located in the shipping box.
Networking Requirements. Standard Ethernet and TCP/IP networking rules apply to a PS Series SAN. Gigabit Ethernet is recommended for optimal performance.
Required Hardware (not supplied) Standard 19-inch, four-post rack. One to four network cables. Supported cables include Category 5E and Category 6 cables with RJ45 connectors. Use Category 5 cables only if they meet the TIA/EIA TSB95 standard.
PS Series Groups Software Configuration PS Series Storage Arrays
Unpack the Shipping Box Multi-Member PS Series Group Step 1: Install the Host Integration Tools Step 2: Collect Configuration Information
Software Configuration Methods Group1 Member name in the following tables. To configure the PS Series software, you need the information Step 3: Run the Remote Setup Wizard
RAID policy Default gateway Subnet mask Array IP address Array Configuration
Step 4: Start Using the SAN
Administration Group name Group IP address Membership Group Configuration
CHAP password CHAP user name password
Protect sensitive hardware. Make sure you use an electrostatic
Where to Go Next
wrist strap or similar form of protection when handling hardware.
Connect the Power Cables
Make sure the shipping box contains the following items:
Installation & Setup Manual PS SERIES STORAGE ARRAYS
1. Setup poster (this document) Use the power cables shipped with the array to connect each power supply and cooling module to separate sources of 2. Rail kit (if ordered) power, if possible. Use the hook and loop fastener to secure the power cables to the power supply modules so they 3. Accessory box, which includes: cannot be pulled out accidentally. - All power cables - Electrostatic wrist strap See the Installation and Setup manual for more information. - Translated documentation - Translation CD-ROM If the array was not shipped with power cables, see your PS Series support provider or reseller for power cable 4. Documentation information. 5. PS4100 chassis
Install the Array in a Rack
Mount the array in a four-post, 19-inch rack. See the rack instructions that came with the rail kit in your shipping box (if ordered).
The array is heavy. Do not attempt to lift the array without assistance.
Page Summary Contents For Dell EqualLogic PS4100 Setup Poster
Manual Details
| Brand | Dell |
|---|---|
| Pages | 2 |
| File Size | 3.65 MB |
| Published | June 23, 2026 |
Enter the captcha to get the download link:

Frequently Asked Questions
What type of cables are recommended for network connections?
Gigabit Ethernet is recommended for optimal performance, and the supported cables include Category 5E and Category 6 with RJ45 connectors.
Are there any specialized requirements for installing this array in a rack?
Yes, it requires a standard 19-inch, four-post rack. Do not attempt to lift the heavy array without assistance.
What is the recommended network configuration setup?
For high performance and availability, connect network cables to all interfaces and distribute connections across multiple network switches with interswitch links of sufficient bandwidth.
Before powering on the unit, what preparation should be done?
Allow sufficient time (e.g., overnight) for the array to adjust to ambient temperature and humidity before turning on power to both supply modules.