SHARP TM20 User Guide Operating Instructions
Summary
This comprehensive guide is essential for users managing data interactions between the Sharp TM-20 terminal and a personal computer (PC). It provides step-by-step instructions for setting up the PC interface, including necessary software installation and hardware connection details. The manual thoroughly covers critical operational procedures such as performing backups, restoring existing data onto the TM-20, and utilizing the Address Utility for efficient, accurate data entry and transfer between both systems. Ideal for administrators and staff needing reliable means to maintain and update records while ensuring system continuity.
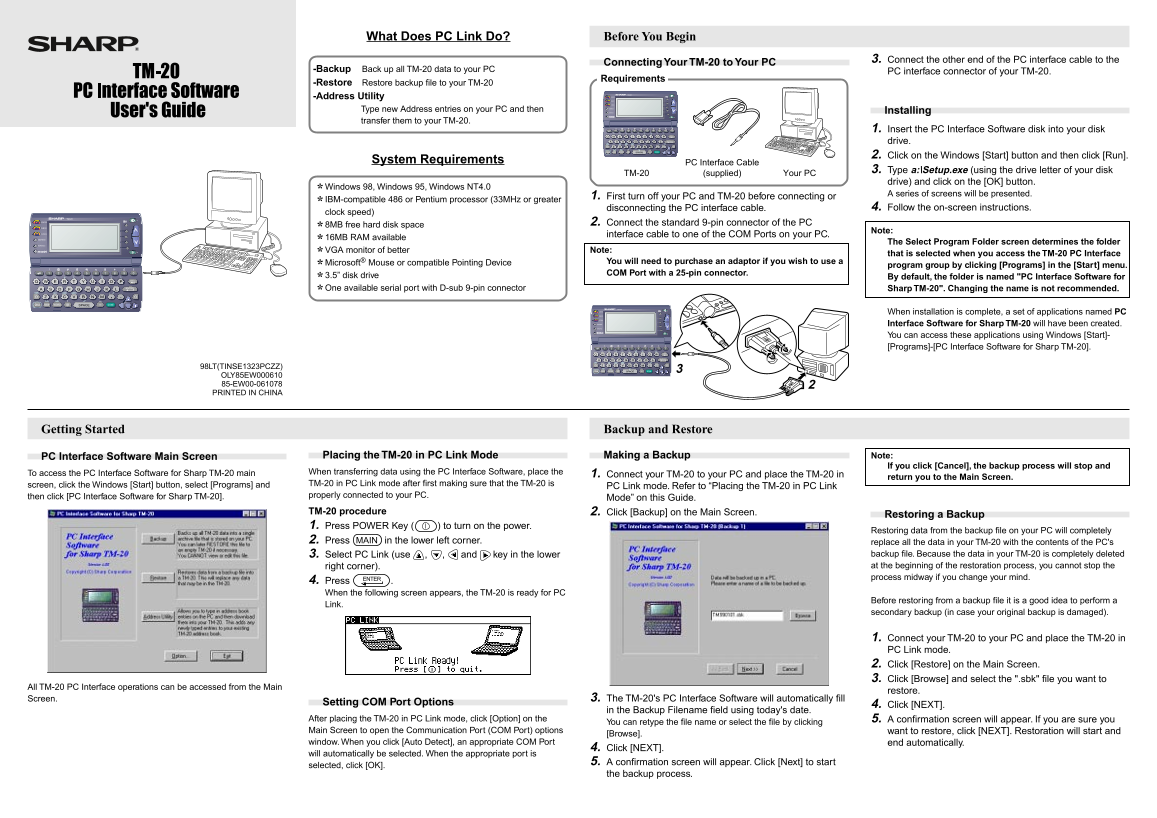
Page 1 Text Content
Before You Begin What Does PC Link Do?
3. Connect the other end of the PC interface cable to the
Connecting Your TM-20 to Your PC
-Backup Back up all TM-20 data to your PC
PC interface connector of your TM-20.
Requirements
-Restore Restore backup file to your TM-20
TM-20 MENU
-Address Utility
Type new Address entries on your PC and then Installing
PREFERENCES
transfer them to your TM-20.
1. Insert the PC Interface Software disk into your disk
ENTER drive.
CAPS CUT COPY PASTE
WORD -MAIN DONE
2. Click on the Windows [Start] button and then click [Run].
System Requirements PC Interface Cable
3. Type a:\Setup.exe (using the drive letter of your disk
TM-20 (supplied) Your PC
drive) and click on the [OK] button.
*Windows 98, Windows 95, Windows NT4.0
1. A series of screens will be presented.
First turn off your PC and TM-20 before connecting or
IBM-compatible 486 or Pentium processor (33MHz or greater
disconnecting the PC interface cable. 4. Follow the on-screen instructions.
clock speed)
TM-20
2. Connect the standard 9-pin connector of the PC
*8MB free hard disk space
Note:
interface cable to one of the COM Ports on your PC.
*16MB RAM available The Select Program Folder screen determines the folder
PREFERENCES *VGA monitor of better Note:
that is selected when you access the TM-20 PC Interface
You will need to purchase an adaptor if you wish to use a
*Microsoft® Mouse or compatible Pointing Device program group by clicking [Programs] in the [Start] menu.
COM Port with a 25-pin connector.
DEL *3.5” disk drive By default, the folder is named "PC Interface Software for
ENTER
*One available serial port with D-sub 9-pin connector Sharp TM-20". Changing the name is not recommended.
CAPS CUT COPY PASTE
WORD -MAIN DONE
TM-20 MENU
When installation is complete, a set of applications named PC Interface Software for Sharp TM-20 will have been created.
PREFERENCES
You can access these applications using Windows [Start]- [Programs]-[PC Interface Software for Sharp TM-20].
ENTER
CAPS CUT COPY PASTE
98LT(TINSE1323PCZZ) SMBL
WORD -MAIN DONE
OLY85EW000610 85-EW00-061078 PRINTED IN CHINA
Getting Started Backup and Restore
PC Interface Software Main Screen Placing the TM-20 in PC Link Mode Making a Backup Note:
If you click [Cancel], the backup process will stop and
To access the PC Interface Software for Sharp TM-20 main When transferring data using the PC Interface Software, place the 1.
Connect your TM-20 to your PC and place the TM-20 in
return you to the Main Screen.
screen, click the Windows [Start] button, select [Programs] and TM-20 in PC Link mode after first making sure that the TM-20 is
PC Link mode. Refer to “Placing the TM-20 in PC Link
then click [PC Interface Software for Sharp TM-20]. properly connected to your PC.
Mode” on this Guide.
TM-20 procedure 2. Click [Backup] on the Main Screen.
Restoring a Backup
1. Press POWER Key ( ) to turn on the power.
Restoring data from the backup file on your PC will completely
2. Press MAIN in the lower left corner. replace all the data in your TM-20 with the contents of the PC's
3. Select PC Link (use , , and key in the lower backup file. Because the data in your TM-20 is completely deleted right corner). at the beginning of the restoration process, you cannot stop the process midway if you change your mind.
4. Press ENTER When the following screen appears, the TM-20 is ready for PC
Before restoring from a backup file it is a good idea to perform a
Link.
secondary backup (in case your original backup is damaged).
1. Connect your TM-20 to your PC and place the TM-20 in PC Link mode. 2. Click [Restore] on the Main Screen. 3. Click [Browse] and select the ".sbk" file you want to
All TM-20 PC Interface operations can be accessed from the Main
restore.
Screen. 3. The TM-20's PC Interface Software will automatically fill
Setting COM Port Options 4.
Click [NEXT].
in the Backup Filename field using today's date.
After placing the TM-20 in PC Link mode, click [Option] on the 5. A confirmation screen will appear. If you are sure you
You can retype the file name or select the file by clicking
Main Screen to open the Communication Port (COM Port) options want to restore, click [NEXT]. Restoration will start and
[Browse].
window. When you click [Auto Detect], an appropriate COM Port end automatically.
4. Click [NEXT].
will automatically be selected. When the appropriate port is
5. A confirmation screen will appear. Click [Next] to start
selected, click [OK].
the backup process.
Page Summary Contents For SHARP TM20 User Guide Operating Instructions
Manual Details
| Brand | Sharp |
|---|---|
| Pages | 2 |
| File Size | 436.81 KB |
| Published | May 29, 2026 |
Enter the captcha to get the download link:

Frequently Asked Questions
How do I connect the TM-20 PC interface cable?
Connect the standard 9-pin connector of the PC interface cable to one of the COM Ports on your PC.
What operating systems are compatible with this software?
It supports Windows 98, Windows 95, and Windows NT4.0.
How do I perform a backup or restore data?
Place the TM-20 in PC Link mode, then use the PC Interface Software to access Backup (to save) or Restore (from a file).
Where can I find the Address Utility functions?
Click [Address Utility] on the Main Screen of the PC Interface Software.
Do changes made in the Address Entry fields get saved if the power turns off?
No, only entries selected and sent to the Waiting field are transferred; data in the Address Entry fields will be lost upon shutdown.