Page 1
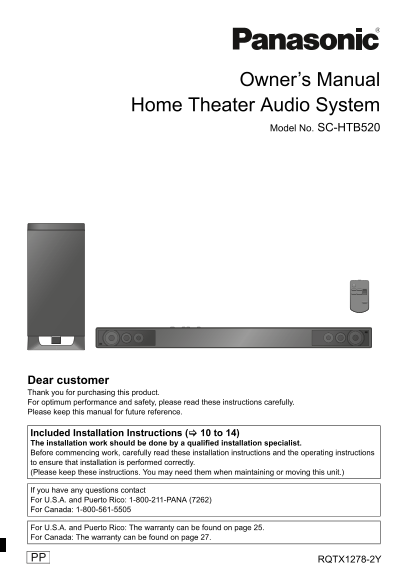
SC-HTB520PP_RQTX1278-Y.book Page 1 Friday, March 4, 2011 9:20 AM Owner’s Manual Home Theater Audio System Model No. SC-HTB520 Dear customer Thank you for purchasing this product. For optimum performan...
Page 2
SC-HTB520PP_RQTX1278-Y.book Page 2 Friday, February 11, 2011 11:25 AM WARNING: TO REDUCE THE RISK OF FIRE, ELECTRIC SHOCK OR PRODUCT DAMAGE, DO NOT EXPOSE THIS APPARATUS TO RAIN, MOISTURE, DRIPPING OR...
Page 3
SC-HTB520PP_RQTX1278-Y.book Page 3 Friday, March 4, 2011 9:20 AM IMPORTANT SAFETY INSTRUCTIONS Read these operating instructions carefully before using the unit. Follow the safety instructions on the ...
Page 4
SC-HTB520PP_RQTX1278-Y.book Page 4 Friday, February 11, 2011 11:25 AM Table of Contents IMPORTANT SAFETY INSTRUCTIONS ............................................................... Licenses ............
Page 5
SC-HTB520PP_RQTX1278-Y.book Page 5 Friday, February 18, 2011 8:48 AM Before connecting, operating or adjusting this product, please read the instructions completely. The illustrations shown may differ...
Page 6
SC-HTB520PP_RQTX1278-Y.book Page 6 Friday, February 11, 2011 11:25 AM Control reference guide This unit and active subwoofer (Front) ER LU IN T SELEC TO /D TS Standby/on switch (POWER Í/I) LED status ...
Page 7
SC-HTB520PP_RQTX1278-Y.book Page 7 Friday, February 11, 2011 11:25 AM Remote control Remove the insulation sheet A before using. To replace a button-type battery While pressing the stopper B, pull out...
Page 8
SC-HTB520PP_RQTX1278-Y.book Page 8 Friday, February 11, 2011 11:25 AM Step 1 Placement Caution This unit and the active subwoofer are to be used only as indicated in these instructions. Failure to do ...
Page 9
SC-HTB520PP_RQTX1278-Y.book Page 9 Friday, February 11, 2011 11:25 AM The active subwoofer Place the active subwoofer approx. 30 cm (1113/16z) away from the TV. ≥If the TV is Wifi compatible, place th...
Page 10
SC-HTB520PP_RQTX1278-Y.book Page 10 Friday, February 18, 2011 8:48 AM When placing the unit on a wall Safety Precautions Professional installation is required. The installation should never be done by...
Page 11
SC-HTB520PP_RQTX1278-Y.book Page 11 Friday, February 18, 2011 8:48 AM Use the measurements indicated below to identify the screwing positions on the wall. Position the unit with at least 50 mm (2q) of...
Page 12
SC-HTB520PP_RQTX1278-Y.book Page 12 Friday, February 18, 2011 8:48 AM Adjust the safety holder with the cord attached ( 11), to fit the projecting parts and screw the safety holder firmly into place. ...
Page 13
SC-HTB520PP_RQTX1278-Y.book Page 13 Friday, February 11, 2011 11:25 AM When placing the unit in a rack or on a table Follow the safety measure to prevent the unit from falling. The installation should...
Page 14
SC-HTB520PP_RQTX1278-Y.book Page 14 Friday, February 18, 2011 8:48 AM When the supplied leg stands are not used Attach a cord (not supplied) to 2 safety holders. Keep the safety holders out of reach o...
Page 15
SC-HTB520PP_RQTX1278-Y.book Page 15 Friday, February 11, 2011 11:25 AM Step 2 Connections ≥Turn off all equipment before connection and read the appropriate Owner’s Manuals. Do not connect the AC powe...
Page 16
SC-HTB520PP_RQTX1278-Y.book Page 16 Friday, February 11, 2011 11:25 AM Connection from an HDMI compatible device You can output the audio signal from the connected HDMI compatible Blu-ray player, DVD ...
Page 17
SC-HTB520PP_RQTX1278-Y.book Page 17 Friday, February 11, 2011 11:25 AM Step 3 AC power supply cord connection Connect only after all other connections are complete. AC IN AC IN AC power supply cord (s...
Page 18
SC-HTB520PP_RQTX1278-Y.book Page 18 Friday, February 11, 2011 11:25 AM Using this unit Preparation Turn on the TV. TV BD/DVD DTS PCMD To adjust the volume/ subwoofer level Press [i VOL j] to adjust th...
Page 19
SC-HTB520PP_RQTX1278-Y.book Page 19 Friday, March 4, 2011 9:20 AM 3D sound E.g., Image of 3D sound This unit provides a feeling that the sound and the image are as one. 3D Surround Even though there a...
Page 20
SC-HTB520PP_RQTX1278-Y.book Page 20 Friday, February 11, 2011 11:25 AM Linked operations with the TV (VIERA Link TM “HDAVI Control TM”) What is VIERA Link “HDAVI What you can do with Control”? “HDAVI ...
Page 21
SC-HTB520PP_RQTX1278-Y.book Page 21 Friday, February 11, 2011 11:25 AM Troubleshooting The unit is automatically switched to standby Before requesting service, make the following mode. checks. If you ...
Page 22
SC-HTB520PP_RQTX1278-Y.book Page 22 Friday, February 11, 2011 11:25 AM If operations become unstable when connected to The audio output cannot be changed from main a non-Panasonic HDMI compatible devi...
Page 23
SC-HTB520PP_RQTX1278-Y.book Page 23 Friday, February 11, 2011 11:25 AM There is no audio. The wireless link indicator lights red and green The power of the unit turns off automatically. alternately. T...
Page 24
SC-HTB520PP_RQTX1278-Y.book Page 24 Friday, February 11, 2011 11:25 AM Specifications GENERAL SPEAKER SECTION FRONT SPEAKERS (BUILT-IN) Power consumption: This unit: Type: 2 way, speaker system (Bass ...
Page 25
SC-HTB520PP_RQTX1278-Y.book Page 25 Friday, February 11, 2011 11:25 AM Limited Warranty (ONLY FOR U.S.A. AND PUERTO RICO) Panasonic Consumer Electronics Company, Division of Panasonic Corporation of N...
Page 26
SC-HTB520PP_RQTX1278-Y.book Page 26 Friday, February 11, 2011 11:25 AM Customer Services Directory (United States and Puerto Rico) Obtain Product Information and Operating Assistance; locate your near...
Page 27
SC-HTB520PP_RQTX1278-Y.book Page 27 Friday, February 11, 2011 11:25 AM Limited Warranty (ONLY FOR CANADA) Panasonic Canada Inc. 5770 Ambler Drive, Mississauga, Ontario L4W 2T3 PANASONIC PRODUCT - LIMI...
Page 28
SC-HTB520PP_RQTX1278-Y.book Page 28 Friday, March 4, 2011 9:20 AM THE FOLLOWING APPLIES ONLY IN THE U.S.A. FCC Note: This equipment has been tested and found to comply with the limits for a Class B di...