# A B C D E F G H I J K L M N O P Q R S T U V W X Y Z

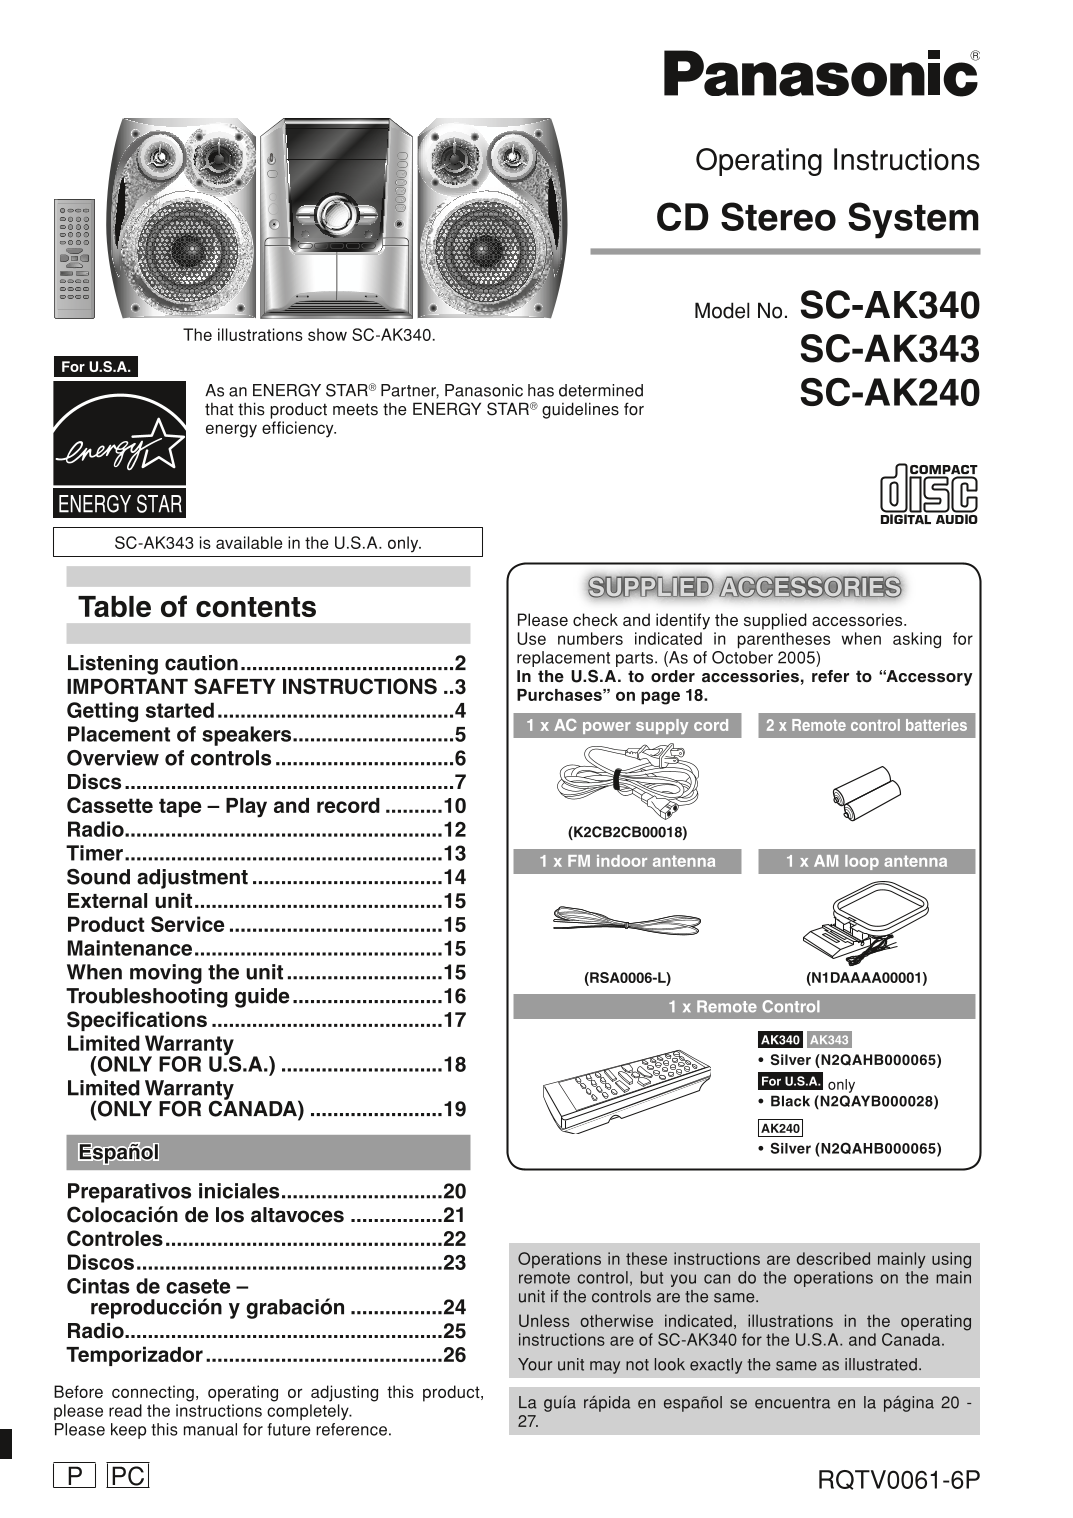
Panasonic Operating Instructions CD Stereo System Model Nos. SC-AK340, SC-AK343, SC-AK240 Owner's Manual - User Guide

Summary

This essential guide is designed for owners of advanced home stereo systems, including features like CD playback, cassette recording, FM/AM radio, and detailed timer functions. The comprehensive manual walks users through everything from initial setup and connecting accessories to operating complex functions like song adjustment and maintenance procedures. It serves as a complete resource for new and current users, ensuring safe and optimal enjoyment of your quality audio experience.
📄 Preview 📖 Table of Contents Contents PAGE OF 28

Page 1 Text Content

Operating Instructions

CD Stereo System

Model No. SC-AK340

The illustrations show SC-AK340.

SC-AK343

For U.S.A.

As an ENERGY STAR® Partner, Panasonic has determined SC-AK240 that this product meets the ENERGY STAR® guidelines for energy effi ciency.

SC-AK343 is available in the U.S.A. only.

SUPPLIED ACCESSORIES

Table of contents

Please check and identify the supplied accessories. Use numbers indicated in parentheses when asking for replacement parts. (As of October 2005)

Listening caution .....................................2

In the U.S.A. to order accessories, refer to “Accessory

IMPORTANT SAFETY INSTRUCTIONS ..3

Purchases” on page 18.

Getting started .........................................4

1 x AC power supply cord 2 x Remote control batteries

Placement of speakers ............................5 Overview of controls ...............................6 Discs .........................................................7 Cassette tape – Play and record ..........10 Radio .......................................................12 (K2CB2CB00018) Timer .......................................................13

1 x FM indoor antenna 1 x AM loop antenna

Sound adjustment .................................14 External unit ...........................................15 Product Service .....................................15 Maintenance ...........................................15 When moving the unit ...........................15 (RSA0006-L) (N1DAAAA00001) Troubleshooting guide ..........................16

1 x Remote Control

Specifi cations ........................................17

AK340 AK343

Limited Warranty

• Silver (N2QAHB000065)

(ONLY FOR U.S.A.) ............................18

For U.S.A. only

Limited Warranty

• Black (N2QAYB000028)

(ONLY FOR CANADA) .......................19

AK240 • Silver (N2QAHB000065)

Español Preparativos iniciales ............................20 Colocación de los altavoces ................21 Controles ................................................22

Discos .....................................................23 Operations in these instructions are described mainly using remote control, but you can do the operations on the main

Cintas de casete –

unit if the controls are the same.

reproducción y grabación ................24

Unless otherwise indicated, illustrations in the operating

Radio .......................................................25

instructions are of SC-AK340 for the U.S.A. and Canada.

Temporizador .........................................26

Your unit may not look exactly the same as illustrated.

Before connecting, operating or adjusting this product,

La guía rápida en español se encuentra en la página 20 -

please read the instructions completely.

Please keep this manual for future reference.

PC RQTV0061-6PP

RQTV0061-5P_1EN1.indd 1 5/9/06 1:22:46 PM

Page Summary Contents For Panasonic Operating Instructions CD Stereo System Model Nos. SC-AK340, SC-AK343, SC-AK240 Owner's Manual - User Guide

Page 1 Operating Instructions CD Stereo System Model No. SC-AK340 The illustrations show SC-AK340. SC-AK343 For U.S.A. As an ENERGY STAR® Partner, Panasonic has determined SC-AK240 that this product meets th...
Page 2 Dear customer Listening caution IS IS Thank you for purchasing this product. For optimum performance and safety, please read these instructions carefully. These operating instructions are applicable t...
Page 3 IMPORTANT SAFETY INSTRUCTIONS CAUTION: TO REDUCE THE RISK OF ELECTRIC SHOCK, DO NOT REMOVE SCREWS. NO USER-SERVICEABLE PARTS INSIDE. REFER SERVICING TO QUALIFIED SERVICE PERSONNEL. The lightning flash...
Page 4 Getting started IS IS Step 1 - Making the connections Connect the AC power supply cord only after all other connections have been made. 1 Connect the speaker cords. 2 Connect the AM loop antenna. AK34...
Page 5 Step 2 - Inserting batteries into the remote control ■ Batteries • Insert so the poles (+ and –) match those in the remote control. AA/R6/LR6 • Remove if the remote control is not going to be used for...
Page 6 Overview of controls IS IS Main unit Refer to the numbers in parentheses for page reference. AC supply indicator [AC IN] Remote control signal This indicator lights when the unit is connected sensor t...
Page 7 Discs skip tracks Press [4, REW / ] or [¢, / FF]. • During random play (\ see below, “Play Mode function”), you cannot skip to tracks which have been played. During 1-ALBUM and 1-ALBUM RANDOM mode, tr...
Page 8 Discs (Continued) IS IS Note: • When track number 25 or greater is playing, remaining play time display shows “– –:– –”. • When a title is longer than 9 characters, it will scroll across the display. ...
Page 9 To Action Album/Track title search check program Press [4, REW / ] or [¢, / FF] when This function enables you to search your desired album or contents “PGM” is displayed in the stop mode. track. Pres...
Page 10 Discs (Continued) IS IS Limitations on MP3 or WMA play NOTE on CDs • If you have recorded MP3 or WMA on the same disc as CD-DA, • This unit can access up to 99 tracks. only the format recorded in the ...
Page 11 Cassette tape – Play and record (Continued) Press [0 OPEN] for DECK 1 or [OPEN 0] for DECK 2 By remote control only and insert the cassette. record 1) Press [DISC] and then [1] ~ [5] to select specifi...
Page 12 Radio IS IS FM allocation setting By main unit only This system can also receive FM broadcasts allocated in 0.1 MHz steps. To change the step to 0.1 MHz Press and hold [TUNER, BAND]. After a few secon...
Page 13 Timer Repeat steps 2 to 3 to set the finishing time. Setting the clock This is a 12-hour clock. Press [CLOCK/TIMER] to select “CLOCK”. Each time you press the button: Finish time ➞CLOCK ˚ PLAY ˚ REC➞ ...
Page 14 Timer (Continued) Sound adjustment IS IS Selecting sound effects Preset EQ MUSIC Press [PRESET EQ] repeatedly to select your desired PORT setting. ➞HEAVY SOFT CLEAR➞ VOCAL➞ DISCO➞ FLAT (off) HALL LIVE...
Page 15 External unit Connecting to a portable audio equipment This feature enables you to enjoy music from a portable audio equipment. Portable audio equipment (not included) Audio cord (not included) Playin...
Page 16 Troubleshooting guide IS IS Before requesting service, make the following checks. If you are in doubt about some of the check points, or if the remedies indicated in the chart do not solve the problem...
Page 17 Specifi cations AMPLIFIER SECTION AK340 AK343 CASSETTE DECK SECTION SPEAKER SECTION AK240 FTC Output power Track system 4 track, 2 channel Type THD 10%, both channels driven Heads 2 way, 2 speaker sys...
Page 18 Limited Warranty (ONLY FOR U.S.A.) IS IS Panasonic Consumer Electronics Company, Panasonic Puerto Rico, Inc. Division of Panasonic Corporation of North America Ave. 65 de Infantería, Km. 9.5 One Panas...
Page 19 Limited Warranty (ONLY FOR CANADA) Panasonic Canada Inc. PANASONIC PRODUCT – LIMITED WARRANTY Panasonic Canada Inc. warrants this product to be free from defects in material and workmanship and agrees...
Page 20 Referencia PA LA IS IS • Las conexiones del equipo descritas sirven en concepto de ejemplo. • Los equipos periféricos y los cables opcionales se venden por separado si no está indicado de otro modo. P...
Page 21 Cuando el aparato se enchufe por primera vez puede aparecer en el visualizador una demostración de sus funciones. Si el ajuste de demostración está desactivado, usted podrá activarlo seleccionando “DE...
Page 22 Controles PA LA IS IS Aparato principal Los números entre paréntesis indican la página de referencia. Indicador de alimentación de CA [AC IN] Sensor de señal del Este indicador se encenderá cuando el ...
Page 23 Discos saltar pistas Pulse [4, REW / ] o [¢, / FF]. • Durante la reproducción aleatoria (\ ver abajo, “Función de modo de reproducción”), no se puede saltar a pistas que ya han sido reproducidas. Dura...
Page 24 Cintas de casete – reproducción y grabación PA LA IS IS Grabación Selección de las cintas para la grabación Use cintas de posición normal. Pueden usarse cintas de posición alta y de metal, pero el apa...
Page 25 Radio Sintonización manual Grabación de emisoras en memoria Se puede presintonizar un máximo de 15 emisoras en cada Pulse [TUNER, BAND] para seleccionar “FM” o “AM”. banda, FM y AM. Pulse [PLAY MODE] ...
Page 26 Temporizador PA LA IS IS Pulse [CLOCK/TIMER] para seleccionar el temporizador deseado. Cada vez que pulse el botón: ➞CLOCK ˚ PLAY ˚ REC➞ Visulización original ˚PLAY : para ajustar el temporizador de r...
Page 27 Otras operaciones básicas Nota: • El temporizador de reproducción se pondrá en marcha a la hora Para Acción programada y el volumen aumentará gradualmente hasta el nivel seleccionado. cambiar la Repet...
Page 28 Panasonic Puerto Rico, Inc. Panasonic Canada Inc. En Panasonic Consumer Electronics Sp Company, Division of Panasonic Ave. 65 de Infantería, Km. 9.5 5770 Ambler Drive Corporation of North America San ...

Manual Details

Brand Panasonic
Pages 28
File Size 9.52 MB
Published July 16, 2026
0 views

Enter the captcha to get the download link:

captcha

Frequently Asked Questions

What is the safe procedure for connecting the unit?

Connect the speaker cords and the AM loop antenna first; only connect the AC power supply cord after all other connections are made.

Can a user perform internal servicing on this stereo system?

No, do not remove screws. As noted, there are no user-serviceable parts inside, and servicing must be left to qualified service personnel.

How can I cancel or modify the timer settings?

If the timer is active, press and hold [– ˚PLAY/REC] until the indicator on the display confirms the cancellation of the time setting.

What precaution should be taken when powering down the unit after use?

Before turning off the system, please check that the correct tape or disc has been inserted into the appropriate player.

Which specific features are unique to certain models (SC-AK340 vs SC-AK240)?

The operating instructions specify which functions apply only to the SC-AK340, SC-AK343, or SC-AK240 system units.