# A B C D E F G H I J K L M N O P Q R S T U V W X Y Z

Panasonic KX-TGA939 User Guide

Summary

This installation manual documents the Panasonic KX-TGA939 additional digital cordless handset, designed for use with KX-TG9391 and KX-TG9392 base units. The manual covers the registration process required to pair the handset with the base unit before first use, along with setup steps including charger connection to a 120V AC 60Hz outlet using the supplied Panasonic AC adaptor (PQLV209 or PQLV219). Battery installation uses two supplied rechargeable batteries with an initial charge time of appro
📄 Preview PAGE OF 16

Page 1 Text Content

TGA939(e).fm Page 1 Friday, June 27, 2008 5:40 PM

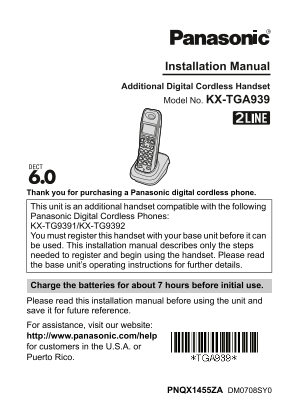
Installation Manual Additional Digital Cordless Handset Model No. KX-TGA939

Thank you for purchasing a Panasonic digital cordless phone.

This unit is an additional handset compatible with the following Panasonic Digital Cordless Phones: KX-TG9391/KX-TG9392 You must register this handset with your base unit before it can be used. This installation manual describes only the steps needed to register and begin using the handset. Please read the base unit’s operating instructions for further details.

Charge the batteries for about 7 hours before initial use. Please read this installation manual before using the unit and save it for future reference. For assistance, visit our website: http://www.panasonic.com/help for customers in the U.S.A. or Puerto Rico.

PNQX1455ZA DM0708SY0

Page Summary Contents For Panasonic KX-TGA939 User Guide

Page 1 TGA939(e).fm Page 1 Friday, June 27, 2008 5:40 PM Installation Manual Additional Digital Cordless Handset Model No. KX-TGA939 Thank you for purchasing a Panasonic digital cordless phone. This unit is ...
Page 2 TGA939(e).fm Page 2 Friday, June 27, 2008 5:40 PM Supplied accessories Accessory item/Order number Quantity Charger/PNLC1001YT AC adaptor for charger*1/PQLV209T or PQLV219Z Rechargeable batteries*2 Ha...
Page 3 TGA939(e).fm Page 3 Friday, June 27, 2008 5:40 PM LThe AC adaptor must remain connected at all times. (It is normal for the adaptor to feel warm during use.) Battery installation and battery charge Im...
Page 4 TGA939(e).fm Page 4 Friday, June 27, 2008 5:40 PM Attention: A nickel metal hydride battery that is recyclable powers the product you have purchased. Please call 1-800-8-BATTERY (1- 800-822-8837) for ...
Page 5 TGA939(e).fm Page 5 Friday, June 27, 2008 5:40 PM Wall mounting Drive the screws (not supplied) into the wall. Mount the charger (A), then slide it down (B) and to the right (C) until it is secure. 25...
Page 6 TGA939(e).fm Page 6 Friday, June 27, 2008 5:40 PM For your safety To prevent severe injury and loss of life/property, read this section carefully before using the product to ensure proper and safe ope...
Page 7 TGA939(e).fm Page 7 Friday, June 27, 2008 5:40 PM Battery LWe recommend using the supplied batteries or additional/replacement batteries noted in the base unit’s operating instructions for replacement...
Page 8 TGA939(e).fm Page 8 Friday, June 27, 2008 5:40 PM Notice for product disposal, transfer, or return LThis product can store your private/confidential information. To protect your privacy/confidentialit...
Page 9 TGA939(e).fm Page 9 Friday, June 27, 2008 5:40 PM CAUTION: Any changes or modifications not expressly approved by the party responsible for compliance could void the user’s authority to operate this d...
Page 10 TGA939(e).fm Page 10 Friday, June 27, 2008 5:40 PM Compliance with TIA-1083 standard: Compatible with Telephone handsets identified with this logo have Hearing Aid T-Coil reduced noise and interferenc...
Page 11 TGA939(e).fm Page 11 Friday, June 27, 2008 5:40 PM If you need assistance with setup or operation Visit our website: http://www.panasonic.com/help Contact us via the web at: http://www.panasonic.com/c...
Page 12 TGA939(sp).fm Page 1 Friday, June 27, 2008 4:06 PM Manual de instalación Auricular Inalámbrico Digital Adicional Modelo N° KX-TGA939 Gracias por adquirir un teléfono inalámbrico digital Panasonic. Est...
Page 13 TGA939(sp).fm Page 2 Friday, June 27, 2008 4:06 PM Accesorios incluidos Accesorio/Número de pedido Cantidad Cargador/PNLC1001YT Adaptador de corriente para el cargador*1/PQLV209T o PQLV219Z Baterías r...
Page 14 TGA939(sp).fm Page 3 Friday, June 27, 2008 4:06 PM Nota: LUse sólo el adaptador de corriente Panasonic PQLV209 o PQLV219 incluido. El adaptador de corriente debe permanecer conectado todo el tiempo. (...
Page 15 TGA939(sp).fm Page 4 Friday, June 27, 2008 4:06 PM Nota: Si las baterías se cargaron por completo pero su tiempo de funcionamiento parece ser más corto, limpie los extremos de las mismas (S, T) y los ...
Page 16 TGA939(sp).fm Page 5 Friday, June 27, 2008 4:06 PM Montaje en la pared Inserte los tornillos (no incluidos) en la pared. Monte el cargador (A) y deslícelo hacia abajo (B) y a la derecha (C) hasta que ...

Manual Details

Brand Panasonic
Pages 16
File Size 534.31 KB
Published June 18, 2026
4 views

Enter the captcha to get the download link:

captcha

Frequently Asked Questions

How do I handle the initial battery charging process?

Place the handset on the charger for about 7 hours before its first use.

What batteries should be used and which ones must be avoided?

Use only rechargeable Ni-MH AAA (R03) size batteries, and never use Alkaline/Manganese/Ni-Cd batteries.

How do I troubleshoot a short operating time?

If the batteries are fully charged but the run time is shorter, clean both the battery ends (S, T) and the charge contacts with a dry cloth.

What steps are needed to register an additional handset?

On the base unit, press {LOCATOR} for 5 seconds; then place the handset on the charger until a long beep sounds.