Page 1
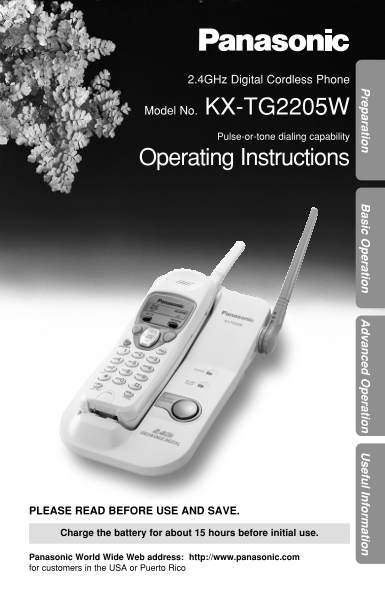
rep aratio asic O eratio van ced eratio sefu l In fo rm atio 2.4GHz Digital Cordless Phone Model No. KX-TG2205W Pulse-or-tone dialing capability Operating Instructions PLEASE READ BEFORE USE AND SAVE....
Page 2
Before Initial Use Please read IMPORTANT SAFETY INSTRUCTIONS on page 26 before use. Read and understand all instructions. Thank you for purchasing your new Panasonic cordless telephone. Attach your pu...
Page 3
For Best Performance Battery Charge A rechargeable Ni-Cd battery powers the handset. Charge the battery for about 15 hours before initial use (p. 8). Base Unit Location/Noise Calls are transmitted bet...
Page 4
Contents Preparation Useful Information Location of Controls Belt Clip ....................................19 Settings Optional Headset .....................19 Connections Wall Mounting .................
Page 5
rep aratio Location of Controls Handset Back side Antenna Receiver (p. 13) Speaker (p. 13)� RECHARGE Indicator (p. 9) TALK/MUTE Indicator (PROGRAM) Button RECHARGE (p. 10, 15) TALK/ PROGRAM (MUTE) But...
Page 6
Location of Controls Base unit �Antenna (p. 3, 7) Hook (p. 20, 21) Charge Contacts (p. 9) KX-TG2205 CHARGE HOLD IN USE HANDSETLOCATOR CHARGE Indicator (p. 8) IN USE/HOLD Indicator (p. 13, 16) (HANDSET...
Page 7
rep aratio Settings Connections Single-Line Telephone Jack (RJ11C) Fasten the cords to prevent it Telephone Line Cord from being disconnected. Hooks Power Outlet (AC 120 V, 60 Hz) AC Adaptor Raise the...
Page 8
Settings Installing the Battery in the Handset Insert the battery into the handset as shown (#), matching the correct polarity. Press the battery down until it places into the compartment ($). When fi...
Page 9
rep aratio Recharge When the RECHARGE indicator flashes or the unit beeps intermittently while it is use, place the handset on the base unit to recharge the battery for 15 hours. •If you DO NOT rechar...
Page 10
Settings Dialing Mode You can program the dialing mode using the handset near the base unit. If you have touch tone service, set to TONE. If rotary or pulse service is used, set to PULSE. Your phone c...
Page 11
rep aratio Ringer Volume You can program the handset ringer volume to HIGH, LOW or OFF. If set to OFF, the handset will not ring. Your phone comes from the factory set to HIGH. Make sure the unit is n...
Page 12
Making Calls Press . Back side •The TALK/MUTE indicator lights. Dial a phone number. Speaker To hang up, press (OFF) or place the handset on the base unit. •The indicator light goes out. •If an alarm ...
Page 13
asic O eratio If noise interferes with the conversation Press Ü to select a clearer channel in the talk mode, or move closer to the base unit. To redial the last number dialed on the handset Press or ...
Page 14
Answering Calls When a call is received, the unit rings and the IN USE/HOLD indicator on the base unit flashes quickly. If the handset is off the base unit; Press . •You can also answer a call by pres...
Page 15
van ced eratio Speed Dialer Storing Phone Numbers You can store up to 10 phone numbers in the handset. The dialing buttons ((0) to (9)) function as memory stations. Make sure the unit is not being use...
Page 16
Special Features TALK/MUTE Indicator (MUTE) (OFF) (TONE) �IN USE/HOLD Indicator (REDIAL/PAUSE) (FLASH/CALL!WAIT) (HANDSET!LOCATOR) Automatic Security Code Setting Each time you place the handset on th...
Page 17
van ced eratio Temporary Tone Dialing (For Rotary or Pulse Service Users) Press (TONE) before entering access numbers which require tone dialing. •The dialing mode changes to tone. You can enter numbe...
Page 18
Special Features FLASH Button Pressing (FLASH/CALL!WAIT) allows you to use special features of your host PBX such as transferring an extension call or accessing special telephone services (optional) s...
Page 19
sefu l In fo rm atio Belt Clip You can hang the handset on your belt or pocket using the belt clip. To attach the belt clip To remove the belt clip Optional Headset Plugging an optional headset into t...
Page 20
Wall Mounting This unit can be mounted on a wall phone plate. Push the hook and turn it around. Turn the hook until a click is heard. Connect the AC adaptor. To Power Outlet Tuck the telephone line co...
Page 21
sefu l In fo rm atio Connect the telephone line cord. Mount the unit, then slide down. •Raise the antenna. •Fasten the telephone line cord to prevent it from being disconnected. Hooks To charge the ha...
Page 22
Battery Replacement If the RECHARGE indicator flashes after being fully charged, replace the battery with a new Panasonic P-P511 (PQPP511SVC) battery. To order, call the accessories telephone number o...
Page 23
sefu l In fo rm atio Adding Another Phone This unit will not function during a power failure. To connect a standard telephone on the same line, use the Panasonic T-adaptor KX-J66. To order, call the a...
Page 24
Troubleshooting Problem Remedy The unit does not work. •Check the settings (p. 7–11). •Charge the battery fully (p. 8). •Clean the charge contacts and charge again (p. 9). •Install the battery properl...
Page 25
sefu l In fo rm atio Problem Remedy While storing a phone •To answer the call, press or . number, the unit starts to Start again from the beginning after ring. hanging up. You cannot page the •The han...
Page 26
Important Safety Instructions When using this unit, basic safety precautions should always be followed to reduce the risk of fire, electric shock, or personal injury. 11. Read and understand all instr...
Page 27
sefu l In fo rm atio CAUTION: To reduce the risk of fire or injury to persons, read and follow these instructions. 1. Use only the battery(ies) specified. 2. Do not dispose of the battery(ies) in a fi...
Page 28
FCC and Other Information If requested by the telephone company, inform them as follows: Registration No. ....................................................(found on the bottom of the unit) Ringer E...
Page 29
sefu l In fo rm atio CAUTION: Any changes or modifications not expressly approved by the party responsible for compliance could void the user’s authority to operate this device. Note: This equipment h...
Page 30
FCC and Other Information •Environment — do not place the unit in a room where the temperature is less than 5°C (41°F) or greater than 40°C (104°F). Allow 10 cm (4") clearance around the unit for...
Page 31
sefu l In fo rm atio Index Accessories................................... Location of controls................... 5, 6 Answering calls Making Calls.................................12 Automatic Securit...
Page 32
For product service •Call 1-800-211-PANA(7262) for the location of an authorized servicenter. •Panasonic’s e-mail address for customer inquiries: [email protected] for customers in the US...