Page 1
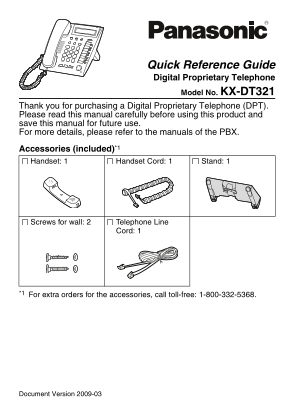
Quick Reference Guide Digital Proprietary Telephone Model No. KX-DT321 Thank you for purchasing a Digital Proprietary Telephone (DPT). Please read this manual carefully before using this product and s...
Page 2
Location of Controls Location of Controls 2 Document Version 2009-03
Page 3
Location of Controls LCD (Liquid Crystal HOLD: Used to place a call Display) with Backlight on hold. AUTO DIAL/STORE: Used SP-PHONE for System/Personal Speed (Speakerphone): Used for Dialing or storin...
Page 4
Settings Settings Speaker volume While in a hands-free conversation Handset/Headset While using the handset or volume*1 headset Press Up to Ringer volume While on-hook or receiving a increase or Down ...
Page 5
Features List Features List Icon Meanings = Flexible button = Off-hook = On-hook (CO) = Feature number = Talk = Confirmation Tone C. Tone Making Calls Calling To an extension To an outside party exten...
Page 6
Features List Personal Speed Dialing To store personal speed desired phone no.* dial no. (2 digits) (max. 32 digits) C. Tone * Enter CO line access number before outside phone number. To dial AUTO DIA...
Page 7
Features List Useful Features Multiple Party Conversation To add other parties during a conversation (i.e., conference) assigned as a desired Conference (Conference) C. Tone phone no. Talk to the butt...
Page 8
Features List Before Leaving Your Desk Call Forwarding Both Calls Outside Calls Intercom Calls All calls extension no. Busy OR No answer CO line outside C. Tone access no. phone no. Busy/ No answer Ca...
Page 9
Features List Leaving a message VPS extension no. From your own extension Mailbox Password* From someone else’s extension mailbox no. Mailbox Password* * If you have no password, you can skip the last...
Page 10
Connection Connection Note: In the illustration below, the telephone line cords are routed for wall mounting. When using the stand, refer to "Attaching the Stand" and "Cabling" on ...
Page 11
Stand Usage Stand Usage Attaching the Stand Place the catches ( ) of the stand into hooks located in the unit. Gently push the stand in the direction indicated until it locks into place. The stand wil...
Page 12
Stand Usage Adjusting from High to Low Position Hold the stand with both hands as shown and rotate the stand in the direction indicated until it locks into the low position ( Adjusting from Low to Hig...
Page 13
Wall Mounting Wall Mounting 1. Remove the stand if it is attached. For information on removing the stand, refer to page 11. 2. Drive the 2 screws (included) into the wall either 83 mm (3-1/4 in) or 10...
Page 14
Important Information Important Information When using a KX-DT321 DPT, keep the following conditions in mind. If you are having problems making calls, unplug the extension line and connect a known wor...
Page 15
Important Information WARNING: TO PREVENT POSSIBLE FIRE OR ELECTRIC SHOCK, DO NOT EXPOSE THIS UNIT TO RAIN OR MOISTURE. THIS HANDSET EARPIECE IS MAGNETIZED AND MAY RETAIN SMALL FERROUS OBJECTS. THE US...
Page 16
Important Information Important Safety Instructions When using this unit, basic safety precautions, including those below, should always be followed to reduce the risk of fire, electric shock and inju...
Page 17
Important Information FCC and Other Information F.C.C. REQUIREMENTS AND RELEVANT INFORMATION This equipment has been tested and found to comply with the limits for a Class B digital device, pursuant t...
Page 18
Important Information Customer Information This equipment complies with Part 68 of the FCC rules and the requirements adopted by the ACTA. On the bottom of the cabinet of this equipment is a label tha...
Page 19
One screw here for base unit 83 m (3-1/4 in) WALL MOUNTING TEMPLATE 100 m (3-15/16 in) 1. Drive the screws into the wall as indicated. 2. Hook the unit onto the screw heads. Note: Make sure to set the...
Page 20
Panasonic Consumer Electronics Company, Division of Panasonic Corporation of North America One Panasonic Way Secaucus, New Jersey 07094 http://www.panasonic.com/csd Copyright: This material is copyrig...