Page 1
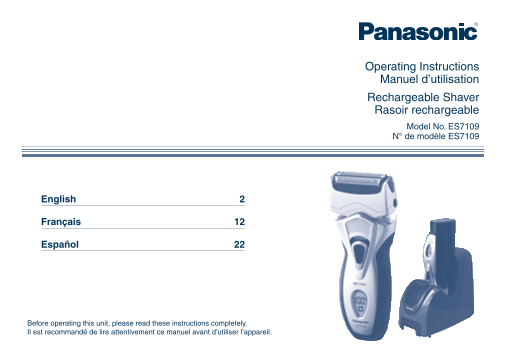
Operating Instructions Manuel d’utilisation Rechargeable Shaver Rasoir rechargeable Model No. ES7109 N° de modèle ES7109 English Français Español Before operating this unit, please read these instruct...
Page 2
. Use this appliance only for its intended use as IMPORTANT SAFETY INSTRUCTIONS described in this manual. Do not use When using an electrical appliance, basic attachments not recommended by the precau...
Page 3
Cleaning the shaver Important Warning - Disconnect the power cord from the shaver before cleaning it to prevent electric shock. Before use Keep both the inner blades inserted. If only one of the inner...
Page 4
Self-cleaning recharger Clean lamp Parts identification (Referred to as the Dry lamp “Recharger”.) Charge lamp Detergent cartridge Status lamp Water tank Select button Socket Clean...
Page 5
Thoroughly wipe off any drops of water on or around the recharger so that it is dry before charging it. Attach the detergent Pull up the arm until it cartridge and the clicks. water tank to the Remove...
Page 6
Reading the LCD panel Using the shaver Shav The LCD panel shows the remaining battery capacity from 0% to 100%, in �0% increments. 10 minutes after After charging is While charging charging is complet...
Page 7
Preparing the self-cleaning recharger Remove the shaver and the appliance plug from the self-cleaning recharger. Remove the water Pour tap water into Peel off the seals Attach the detergent tank and t...
Page 8
Cleaning the shaver Insert the appliance Pull up the arm. Press [select] to select the course. plug. Each time you press [select], the course changes from Plug in the adaptor. Remove the protective “C...
Page 9
Cleaning with the self-cleaning recharger (continued)1 1 Follow the steps outlined below if the status lamp blinks or glows Cleaning the shaver without the self-cleaning during the “Clean/Dry/Charge” ...
Page 10
Replacing the system outer foil and the inner Cleaning the self-cleaning recharger blades Beard trimmings may become attached to the cleaning tray of the self-cleaning recharger. Follow the steps belo...
Page 11
When the water does not drain from the cleaning Removing the built-in rechargeable batteries Beard trimmings may clog the drain at the bottom of the ATTENTION: cleaning tray. A nickel metal hydride ba...
Page 12
3. N’utilisez jamais cet appareil si le cordon ou la CONSIGNES DE SÉCURITÉ IMPORTANTES fiche est endommagé, s’il ne fonctionne pas Lors de l’utilisation d’un appareil électrique, il faut correctement,...
Page 13
Il convient de placer l’adaptateur à la verticale ou sur le plancher. Important Nettoyage du rasoir Avertissement - Déconnectez le cordon d’alimentation du rasoir avant Avant utilisation de nettoyer c...
Page 14
Cordon d’alimentation Couvercle du réservoir d’eau Identification des pièces Fiche de l’appareil Témoin de nettoyage (clean) Chargeur autonettoyant Témoin de séchage (dry) (Appelé “Chargeu...
Page 15
ment Chargement à l’aide du chargeur autonettoyant Charge Essuyez avec soin toute trace d’eau sur ou à proximité du chargeur afin qu’il soit bien sec avant le démarrage du chargement. Fixez la cartouc...
Page 16
À propos du panneau ACL ser Utilisation du rasoir Se ra Le panneau ACL indique la charge restante de la pile, allant de 0% à 100%, par pas de 20%. Pendant le Une fois le 10 minutes après la fin charge...
Page 17
ien Nettoyage à l’aide du chargeur autonettoyant Entret Préparation du chargeur autonettoyant Retirez le rasoir et la prise de l’appareil du chargeur autonettoyant. Retirez le réservoir Versez de l’ea...
Page 18
Nettoyage du rasoir Insérez la prise dans Tirez le bras vers le haut. Appuyez sur [select] pour sélectionner l’appareil. l’utilisation souhaitée. Chaque fois que vous appuyez sur [select], l’utilisati...
Page 19
Nettoyage à l’aide du chargeur autonettoyant (suite)1 1 Effectuer les opérations suivantes si le témoin d’état clignote ou Nettoyage du rasoir sans le chargeur autonettoyant s’allume pendant l’utilisa...
Page 20
Remplacement de la grille de protection du système Nettoyage du chargeur autonettoyant et des lames intérieures Des poils peuvent se fixer sur le plateau de nettoyage du chargeur autonettoyant. Suivez...
Page 21
Ne forcez pas en tirant sur le protecteur de lame en caoutchouc situé Retrait des batteries rechargeables intégrées en bas du plateau de nettoyage. Le caoutchouc pourrait se détacher si vous tirez tro...
Page 22
recomendado por el fabricante. INSTRUCCIONES DE SEGURIDAD IMPORTANTES 3. Nunca utilice el dispositivo si tiene el cordón o el Al utilizar un dispositivo eléctrico, deben seguirse enchufe dañado, si no...
Page 23
posición vertical o en el suelo. Importante Limpieza de la afeitadora Advertencia - Desconecte el cable de alimentación de la afeitadora antes Antes de utilizarlo de limpiarla para evitar descargas el...
Page 24
Recargador de limpieza Tapa del depósito de agua Identificación de las partes automática Lámpara de limpieza (Al que nos referiremos como el Lámpara de secado “Recargador”.) Lámpara de carga...
Page 25
Carga con el recargador de limpieza automática Carg Frote cuidadosamente las gotas de agua que puedan quedar en o alrededor del recargador para que quede seco antes de cargarlo. Instale el cartucho de...
Page 26
Acerca del panel LCD tad Utilización de la afeitadora El panel LCD muestra la capacidad restante de la batería desde 0% a Afei 100%, en incrementos de 20%. 10 minutos después Durante la carga Cuando l...
Page 27
Limpieza con el recargador de limpieza automática Cuidad Preparación del recargador de limpieza automática Retire el enchufe de la afeitadora y el dispositivo del recargador de limpieza automática. Re...
Page 28
Limpieza de la afeitadora Inserte el enchufe del Tire del brazo. Pulse [select] para seleccionar el programa. dispositivo. Cada vez que pulse [select], el programa cambiará de “Limpiar/Secar/ Enchufe ...
Page 29
Limpieza con el recargador de limpieza automática (continuación)1 1 Realice estas acciones si la lámpara de estado parpadea o se ilumina Limpieza de la afeitadora sin el recargador de durante el progr...
Page 30
Sustitución de la lámina exterior del sistema y las Limpieza del recargador de limpieza automática cuchillas internas Los recortes de la barba pueden quedarse adheridos a la bandeja de limpieza del re...
Page 31
Cuando el agua no se vacía de la bandeja de limpieza Eliminación de las baterías recargables integradas Los recortes de barba pueden atascar la salida de agua de la parte inferior de la bandeja de lim...
Page 32
IN USA CONTACT: Panasonic Consumer Electronics Company One Panasonic Way �F-3 Secaucus, NJ 07094 IN PUERTO RICO CONTACT: Panasonic Puerto Rico, Inc. San Gabriel Industrial Park 65th Infantry Avenue KM...