Page 1
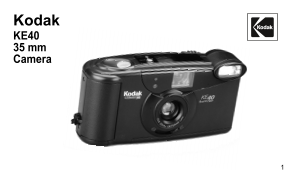
Kodak KE40 35 mm Camera
Page 2
This device complies with part 15 of the FCC Rules. Operation is subject to the following two conditions: (1) This device may not cause harmful interference, and (2) this device must accept any interf...
Page 3
Getting to Know Your Camera 3GHT ANGL21 LEFT
Page 4
FT ANGEL 12 RIGHT ANGEL
Page 5
Contents Need Help with Your Camera? Camera Identification Specifications Attaching the Camera Strap Loading the Batteries Loading the Film Taking Pictures Taking Flash Pictures Selecting the Flash Mo...
Page 6
Need Help with Your Camera? Call: Kodak (USA only) toll free from 9:00 a.m. to 7:00 p.m. (Eastern time) Monday through Friday at 1 (800) 242-2424. Kodak (Canada only) from 8:30 a.m. to 5:00 p.m. (East...
Page 7
Camera Identification (see inside front cover for diagrams) Shutter Button Tripod Socket Mode-Selector Button Film-Guide Rails Film-Rewind Button Film Chamber LCD Panel Film Door Flash Film Window Vie...
Page 8
Specifications Type: 35 mm fixed-focus, easy-load camera Lens: 29 mm, f/5.6 hybrid Flash Unit: KODAK SENSALITE ™ Flash with automatic power down to conserve battery power Viewfinder: Reverse-Galilean ...
Page 9
Attaching the Loading the Batteries Camera Strap This camera uses 2 AA-size alkaline batteries. Thread the short loop of the strap 1. Slide the BATTERY-DOOR LATCH (15) under the STRAP POST (9). Put th...
Page 10
Low-Battery Indicator Battery Tips It’s time to replace the batteries Remember to keep spare batteries when— with you at all times. • the BATTERY SYMBOL (28) “blinks” Read and follow all warnings and ...
Page 11
2. Insert the film leader into the slot Loading the Film in the back of the camera If in sunlight, turn your back to the between the FILM-GUIDE sun and load the film in the shade of RAILS (17). your b...
Page 12
3. Push the film cartridge down into 4. Close the film door to start the the FILM CHAMBER (18) until it fits auto-film advance. The LCD securely into place. Do not force PANEL (4) will show the first ...
Page 13
5. Slide the LENS-COVER SWITCH (8) Taking Pictures completely open to uncover the LENS (7) and to turn the 1. Slide the LENS-COVER SWITCH (8) camera on. completely open to uncover the LENS (7) and to ...
Page 14
2. For a sharp picture stand at least 4. Hold the camera steady and 4 ft (1.2 m) from your subject. gently press the SHUTTER BUTTON (1) to take the picture. 4 ft. After you take the picture, the film ...
Page 15
Tips for Better Pictures Add interest to your picture by Keep your pictures simple. Move framing it with a tree branch, a close enough to your subject so it window, or even the rails of a fills the vi...
Page 16
3. Keep the subject within the Taking Flash Pictures distance range for the speed of film in your camera. Don’t take In dim light, such as indoors or pictures beyond the maximum outdoors in heavy shad...
Page 17
Press the MODE-SELECTOR BUTTON (2) Selecting the Flash until the desired indicator appears on Modes and Self-timer the LCD PANEL (4). Besides the auto-flash mode, you can select manual fill flash, fla...
Page 18
Manual Fill Flash Flash Off Bright light indoors or outdoors from When you do not want to use the backlit subjects can create dark flash, especially indoors where flash shadows (especially on faces) i...
Page 19
Nighttime-View Mode 2. Press and hold the SHUTTER with Flash BUTTON (1) for 12 seconds without lifting your finger. In this mode, the camera balances the flash and existing light exposure NOTE: If you...
Page 20
Nighttime-View Mode 2. Press and hold the SHUTTER without Flash BUTTON (1) for 12 seconds without lifting your finger. In this mode, you can capture the natural existing light of city-night NOTE: If y...
Page 21
Self-Timer with 3. Frame your subject within the Auto Flash VIEWFINDER EYEPIECE (13). Use this feature to include yourself 4. Press the SHUTTER BUTTON (1) in pictures. The electronic self-timer comple...
Page 22
the film cartridge. Wait for the motor Unloading the Film to stop running before you open the film door. The FILM PRESENCE The camera automatically rewinds INDICATOR (26) on the LCD PANEL (4) the film...
Page 23
Troubleshooting What happened Probable cause Solution Camera will Lens cover closed Open the lens cover completely not operate Batteries improperly Insert batteries as shown loaded in camera on batter...
Page 24
What happened Probable cause Solution Shutter button cannot No film in camera Load film into the camera be released Lens cover closed Open the lens cover completely Film-door latch does Film is not re...
Page 25
For Owners of the Quartz (b) SELECT (c)(a) Date Back Model MODE SET Setting the Date and Time The date and time feature enables you to record the date in a choice of three formats,(month/day/year, day...
Page 26
Setting Data 3. Press the Set Button (c) to 1. Press the Mode Button (a) to change the blinking display. select the desired data type. 2. Use the Select Button (b) to move between different parts of t...
Page 27
Consumer Imaging EASTMAN KODAK COMPANY Rochester, NY 14650 © Eastman Kodak Company, 1997 Pt. No. 916 8261 Kodak and Sensalite are trademarks. Printed in U.S.A.