Page 1
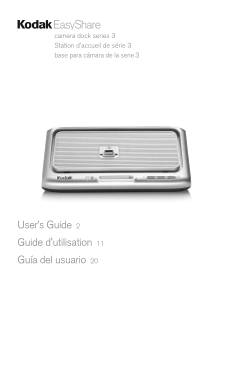
Easy Share camera dock series 3 Station d'accueil de série 3 base para cámara de la serie User’s Guide 2 Guide d'utilisation 11 Guía del usuario 20
Page 2
Attach the camera insert Attach the custom camera insert included with your camera. Provides a perfect fit for your camera. Contact your regional technical support for a replacement insert. Load recha...
Page 3
Charge battery3 Turn off camera; place on Connect power. dock. Charging Lights Low, or battery check Partially charged Charging complete Charging takes up to 3 hours. Transfer Light Steady green = Cam...
Page 4
Transfer Dock camera, turn on computer, and press the Transfer button. Charging stops during transfer; resumes when transfer is complete and camera powers Transfer off. button Transfer Light Blinking ...
Page 5
ENConnect to Pict Bridge enabled printer6 NOTE: Your camera and printer must be Pict Bridge enabled. Turn on the printer, then the docked camera, and press the Transfer button. Follow the menu selecti...
Page 6
Refresh Ni-MH battery pack LOW BATTERY If you are getting fewer than 20 pictures per charge: Press and hold 5 seconds. Discharging Charging Takes up to 8 hours. Best to refresh overnight. Free softwar...
Page 7
Specifications and notes Specifications: Communication with USB (cable included with computer/printer: Kodak Easy Share camera dock, series 3) DC Voltage Input: 5 V DC at 2.0 Amps AC Voltage: 110 V to...
Page 8
Troubleshooting continued? Problem and Cause Solution AC adapter or USB cable is not Check the connections. securely connected. Too many applications running Close all software applications on compute...
Page 9
Need more help?? www.kodak.com/go/support www.kodak.com/go/howto for interactive tutorials For telephone support, see your camera user’s guide. www.kodak.com/go/accessories WARRANTY Limited Warranty K...
Page 10
Your Rights Some states or jurisdictions do not allow exclusion or limitation of incidental or consequential damages, so the above limitation or exclusion may not apply to you. Some states or jurisdic...
Page 11
Installation du logement d'insertion Installez le logement d'insertion personnalisé livré avec votre appareil photo. Il s'adapte parfaitement votre appareil photo. Pour remplacer votre logement d'inse...
Page 12
Chargement de la batterie3 Eteignez l'appareil photo ; Branchez la station placez-le d'accueil sur le secteur. sur la station d'accueil. Témoins de chargement Chargement faible ou vérification Chargem...
Page 13
Transfert Installez l'appareil sur la station d'accueil, allumez l'ordinateur, puis appuyez sur le bouton de transfert. Le chargement s'arrête durant le transfert, puis reprend une fois le transfert t...
Page 14
FRConnexion une imprimante compatible Pict Bridge6 REMARQUE : l'appareil photo et l'imprimante doivent être compatibles Pict Bridge. Mettez l'imprimante, puis la station de l'appareil photo sous tensi...
Page 15
Rafraîchissementdespiles Ni-MH PILE FAIBLE Si vous obtenez moins de vingt photos par charge : Maintenez le bouton enfoncé pendant 5 secondes. Déchargement Chargement L'opération peut prendre jusqu'à h...
Page 16
Caractéristiques et remarques Caractéristiques : Communication avec USB (câble inclus avec l'ordinateur/l'imprimante avec la station d'accueil Kodak Easy Share série 3) Tension c.c. d'entrée : 5 V c.c...
Page 17
Dépannage suite? Problème et cause Solution L'adaptateur secteur ou le câble USB Vérifiez les connexions. n'est pas connecté correctement. Trop d'applications sont en cours Fermez toutes les applicati...
Page 18
Vous avez besoin d'aide ?? www.kodak.com/go/support www.kodak.com/go/howto pour consulter des didacticiels interactifs Pour une assistance par téléphone, consultez le guide d'utilisation de votre appa...
Page 19
Vos droits Certains Etats ou juridictions ne reconnaissent pas les exclusions ou les limitations à l'égard des dommages consécutifs ou fortuits et les limitations ou exclusions susmentionnées peuvent ...
Page 20
Instalación de la pieza de enganche Inserte la pieza de enganche específica que viene con la cámara. Permite un ajuste perfecto para la cámara. Comuníquese con el servicio de asistencia técnica de su ...
Page 21
Cargue la pila3 Apague la cámara y colóquela Conecte a la en la base. alimentación. Luces de carga Baja o comprobar pila Carga parcial Carga completa Cargar la pila toma unas 3 horas. Luz de transfere...
Page 22
Transferencia Acople la cámara, encienda el ordenador y pulse el botón de transferencia. La carga se detiene durante la transferencia y se reanuda al finalizarla y apagar la Botón de cámara. transfere...
Page 23
ESConecte a una impresora compatible con Pict Bridge6 NOTA: la cámara y la impresora deben ser compatibles con la tecnología Pict Bridge. Encienda la impresora, la cámara acoplada y pulse el botón de ...
Page 24
Regenere el paquete de pilas Ni-MH PILA BAJA Si obtiene menos de 20 fotografías por carga: Mantenga pulsado por segundos. Descargar Cargar Cargar la pila lleva unas 8 horas. Es mejor regenerar durante...
Page 25
Especificaciones y notas Especificaciones: Comunicación con el USB (cable incluido con la base ordenador/impresora para cámara Kodak Easy Share de la serie 3) Voltaje de entrada de CC 5 VCC a 2,0 amps...
Page 26
Solución de problemas (continuación)? Problema y causa Solución El adaptador de CA o el cable Compruebe las conexiones. USB no están conectados correctamente Hay demasiadas aplicaciones Cierre todas l...
Page 27
¿Necesita más ayuda?? www.kodak.com/go/support www.kodak.com/go/howto para cursos interactivos Para asistencia telefónica, consulte la guía del usuario de la cámara. www.kodak.com/go/accessories GARAN...
Page 28
Derechos del usuario En algunos estados o jurisdicciones no se permite la exclusión o limitación de garantías ante daños indirectos o emergente. En tales casos, la limitación o exclusión anteriores no...
Page 30
REGULATORY INFORMATION Kodak Easy Share camera dock, series 3 FCC compliance and advisory This equipment has been tested and found to comply with the limits for a Class B digital device, pursuant to P...