Page 1
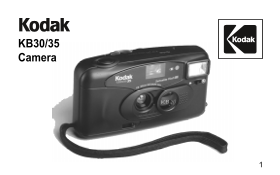
KB30/35 Camera
Page 2
Getting to Know Your Camera
Page 4
Contents Need Help with Your Camera? Camera Identification Specifications Loading the Batteries Loading the Film Taking Pictures Taking Flash Pictures Unloading the Film Troubleshooting For Owners of ...
Page 5
Need Help with Your Camera? Call: Kodak (USA only) toll free from 9:00 a.m. to 7:00 p.m. (Eastern time) Monday through Friday at 1 (800) 242-2424. Kodak (Canada only) from 8:30 a.m. to 5:00 p.m. (East...
Page 6
Camera Identification (see inside front cover for diagrams) Shutter Button Film-Rewind Button Picture Counter Flash-Ready Light Viewfinder Viewfinder Eyepiece Red-Eye-Reduction/Self-Timer Lamp Film-Sp...
Page 7
Specifications Lens: 30 mm, 2-element aspheric lens Shutter Speed: Fixed of 1/100 second Aperture: f/8.0 for flash/daylignt Film Speed: DX (ISO) 100, 200, or 400 Focus Range: Daylight: 4 ft (1.2 m) to...
Page 8
Battery Tips Loading the Batteries Remember to keep spare This camera uses 2 AA-size batteries with you at all times. alkaline batteries. Read and follow all warnings 1. Load the batteries as shown. a...
Page 9
2. Insert the flat end of the film Loading the Film cartridge over the FILM For excellent all-around results SPINDLE . Push the other for indoor and outdoor picture- end of the film cartridge down tak...
Page 10
3. Pull out the film leader until the If the end of the film extends tip reaches the FILM-LOAD past the film-load mark, gently MARK . Lay the film flat push the excess back into the between the film-g...
Page 11
4. Close the film door and check 5. Slide the LENS COVER the FILM WINDOW (you completely open to uncover the should see the film information LENS and to turn the through the window). Do not FLASH on. ...
Page 12
6. Press the SHUTTER NOTE: The picture counter starts BUTTON three times or until at “S,” and each dot within the the PICTURE COUNTER increments of 5 represents one shows “1.” (If the picture picture....
Page 13
Taking Pictures 2. For a sharp picture stand at least 4 ft (1.2 m) from your 1. Slide the LENS COVER subject. completely open to uncover the 4 ft. LENS and to turn the FLASH on. 3. Look through the VI...
Page 14
4. Hold the camera steady and 5. Close the lens cover when you gently press the SHUTTER finish taking pictures. BUTTON to take the picture. After you take the picture, the film automatically advances ...
Page 15
Using the Self-Timer 4. Press the SHUTTER 1. Use a tripod (TRIPOD BUTTON to start the timer. SOCKET ) or place the The self-timer will run for camera on another firm approximately 8 seconds support. b...
Page 16
Tips for Better Pictures • Add interest to your picture by • Keep your pictures simple. Move framing it with a tree branch, a close enough to your subject so window, or even the rails of a it fills th...
Page 17
Taking Flash Pictures 2. Take the picture when the FLASH-READY LIGHT glows. In dim light, such as indoors or outdoors in heavy shade, or on dark overcast days, you need flash. Your camera features an ...
Page 18
3. Keep the subject within the 4. Hold the camera steady and distance range for the speed of gently press the SHUTTER film in your camera. Don’t take BUTTON to take the picture. pictures beyond the ma...
Page 19
Red-Eye Reduction 3. Have your subject look directly Some people‘s eyes (and some at the red-eye-reduction lamp pets’) can reflect flash with a red before you take the picture. glow. To minimize red e...
Page 20
or in dim lighting situations. Use a 3. While still holding the switch in tripod or place the camera on desired position, press the another firm support, and for best SHUTTER BUTTON to take results, u...
Page 21
Wait until the motor stops Unloading the Film before you open the film The film will not advance when door. you reach the end of the roll. 2. Open the FILM DOOR and You must rewind the film remove the...
Page 22
Troubleshooting What happened Probable cause Solution Camera will Lens cover closed Open the lens cover not operate completely Batteries improperly Insert batteries as loaded in camera shown on batter...
Page 23
What happened Probable cause Solution Flash-ready light Flash not turned on Open the lens cover fails to glow completely within 30 seconds Batteries weak or dead Replace with 2 fresh AA-size alkaline ...
Page 24
For Owners of the Date and Time Imprinting Press the Mode Button (a) to Quartz Date Back select the desired data type; then Model take the picture. Following the exposure, the Print Indicator (d) Sett...
Page 25
Mode Selection 2. Use the Select Button (b) to Use the Mode Button (a) to move between different parts change the data display as of the displayed data. With the shown. data displayed, pressing the MM...
Page 26
3. Press the Adjust Button (c) to Replacing the change the blinking display. Date Battery 1. Open the film door. Remove the screw from the battery cover using a small screw driver.
Page 27
2. Remove the battery cover and 3. Replace the battery cover and insert a new 3-volt lithium reattach the screw. Reset the CR 2025 (+ side down) battery. date and time. Date back subject to minor appe...
Page 28
Consumer Imaging EASTMAN KODAK COMPANY Rochester, NY 14650 Pt. No. 916 5127 Kodak and Sensalite are trademarks. Printed in U.S.A.