HP PageWide XL 3920 Multifunction Printer Assembly Guide - Series Printers
Summary
Get your HP PageWide XL Printer Series up and running with this comprehensive, international assembly guide. This manual provides step-by-step instructions for proper installation and setup, detailing how to integrate core components like printheads, maintenance cartridges, and waste baskets. It is essential reading for both end-users and technical professionals who need accurate guidelines for initial setup and complex two-phase installations.
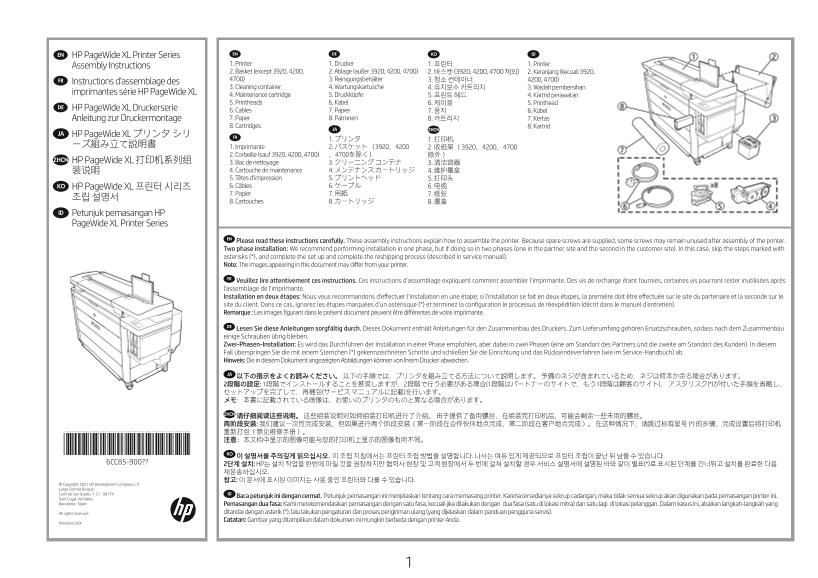
Page 1 Text Content
EN EN DE KO ID
HP Page Wide XL Printer Series
1. Printer 1. Drucker 1. 프린터 1. Printer
Assembly Instructions
2. Basket (except 3920, 4200, 2. Ablage (außer 3920, 4200, 4700) 2. 바스켓 (3920, 4200, 4700 제외) 2. Keranjang (kecuali 3920, FR 4700) 3. Reinigungsbehälter 3. 청소 컨테이너 4200, 4700)
Instructions d’assemblage des
3. Cleaning container 4. Wartungskartusche 4. 유지보수 카트리지 3. Wadah pembersihan
imprimantes série HP Page Wide XL
4. Maintenance cartridge 5. Druckköpfe 5. 프린트 헤드 4. Kartrid perawatan 5. Printheads 6. Kabel 6. 케이블 5. Printhead
DE HP Page Wide XL Druckerserie
6. Cables 7. Papier 7. 용지 6. Kabel Anleitung zur Druckermontage 7. Paper 8. Patronen 8. 카트리지 7. Kertas 8. Cartridges 8. Kartrid
JA ZHCN
JA HP Page Wide XL プリンタ シリ
ーズ組み立て説明書 1. Imprimante 2. バスケット (3920、4200
2. Corbeille (sauf 3920, 4200, 4700) 、4700を除く) 除外)
ZHCN HP Page Wide XL 打印机系列组
3. Bac de nettoyage 3. クリーニング コンテナ 3. 清洁容器 装说明 4. Cartouche de maintenance 4. メンテナンス カートリッジ 4. 维护墨盒 5. Têtes d’impression 5. プリントヘッド 5. 打印头 KO HP Page Wide XL 프린터 시리즈 6. Câbles 6. ケーブル 6. 电缆 7. Papier 7. 用紙 7. 纸张
8. Cartouches 8. カートリッジ 8. 墨盒
ID Petunjuk pemasangan HP Page Wide XL Printer Series
EN Please read these instructions carefully. These assembly instructions explain how to assemble the printer. Because spare screws are supplied, some screws may remain unused after assembly of the printer. Two phase installation: We recommend performing installation in one phase, but if doing so in two phases (one in the partner site and the second in the customer site). In this case, skip the steps marked with asterisks (*), and complete the set up and complete the reshipping process (described in service manual). Note: The images appearing in this document may differ from your printer.
FR Veuillez lire attentivement ces instructions. Ces instructions d’assemblage expliquent comment assembler l’imprimante. Des vis de rechange étant fournies, certaines vis pourront rester inutilisées après l’assemblage de l’imprimante. Installation en deux étapes: Nous vous recommandons d’effectuer l’installation en une étape; si l’installation se fait en deux étapes, la première doit être effectuée sur le site du partenaire et la seconde sur le site du client. Dans ce cas, ignorez les étapes marquées d’un astérisque (*) et terminez la configuration le processus de réexpédition (décrit dans le manuel d’entretien). Remarque : Les images figurant dans le présent document peuvent être différentes de votre imprimante.
DE Lesen Sie diese Anleitungen sorgfältig durch. Dieses Dokument enthält Anleitungen für den Zusammenbau des Druckers. Zum Lieferumfang gehören Ersatzschrauben, sodass nach dem Zusammenbau einige Schrauben übrig bleiben. Zwei-Phasen-Installation: Es wird das Durchführen der Installation in einer Phase empfohlen, aber dabei in zwei Phasen (eine am Standort des Partners und die zweite am Standort des Kunden). In diesem Fall überspringen Sie die mit einem Sternchen (*) gekennzeichneten Schritte und schließen Sie die Einrichtung und das Rücksendeverfahren (wie im Service-Handbuch) ab. Hinweis: Die in diesem Dokument angezeigten Abbildungen können von Ihrem Drucker abweichen.
JA 以下の指示をよくお読みください。 以下の手順では、プリンタを組み立てる方法について説明します。 予備のネジが含まれているため、ネジは何本か余る場合があります。 2段階の設定: 1段階でインストールすることを推奨しますが、2段階で行う必要がある場合(1段階はパートナーのサイトで、もう1段階は顧客のサイト)、 アスタリスク(*)が付いた手順を省略し、 セットアップを完了して、再梱包(サービス マニュアルに記載)を行います。 メモ:本書に記載されている画像は、お使いのプリンタのものと異なる場合があります。
ZHCN 请仔细阅读这些说明。 这些组装说明对如何组装打印机进行了介绍。 由于提供了备用螺丝,在组装完打印机后,可能会剩余一些未用的螺丝。
*6CC85-90017*
KO 이 설명서를 주의깊게 읽으십시오. 이 조립 지침에서는 프린터 조립 방법을 설명합니다. 나사는 여유 있게 제공되므로 프린터 조립이 끝난 뒤 남을 수 있습니다.
6CC85-900?? 2단계 설치: HP는 설치 작업을 한번에 마칠 것을 권장하지만 협력사 현장 및 고객 현장에서 두 번에 걸쳐 설치할 경우 서비스 설명서에 설명된 바와 같이 별표(*)로 표시된 단계를 건너뛰고 설치를 완료한 다음
© Copyright 2021 HP Development Company, L.P. Large Format Division
Camí de Can Graells 1-21 · 08174 ID Baca petunjuk ini dengan cermat. Petunjuk pemasangan ini menjelaskan tentang cara memasang printer. Karena tersedianya sekrup cadangan, maka tidak semua sekrup akan digunakan pada pemasangan printer ini.
Sant Cugat del Vallès Barcelona · Spain Pemasangan dua fasa: Kami merekomendasikan pemasangan dengan satu fasa, kecuali jika dilakukan dengan dua fasa (satu di lokasi mitra) dan satu lagi di lokasi pelanggan. Dalam kasus ini, abaikan langkah-langkah yang
All rights reserved ditandai dengan asterik (*), lalu lakukan pengaturan dan proses pengiriman ulang (yang dijelaskan dalam panduan pengguna servis). Catatan: Gambar yang ditampilkan dalam dokumen ini mungkin berbeda dengan printer Anda.
Printed in XXX
Page Summary Contents For HP PageWide XL 3920 Multifunction Printer Assembly Guide - Series Printers
Manual Details
| Brand | HP |
|---|---|
| Pages | 24 |
| File Size | 9.09 MB |
| Published | June 16, 2026 |
Enter the captcha to get the download link:

Frequently Asked Questions
How should I install the printer if I do it in two phases?
Skip steps marked with an asterisk (*) and complete setup/reshipping process as described in the service manual.
What are potential hardware discrepancies when using this guide?
The images shown may differ from your actual printer model.
Are specific tools required for assembly?
Yes, include an electric screwdriver (T10, T15, T20) and an electric nut driver number 17.