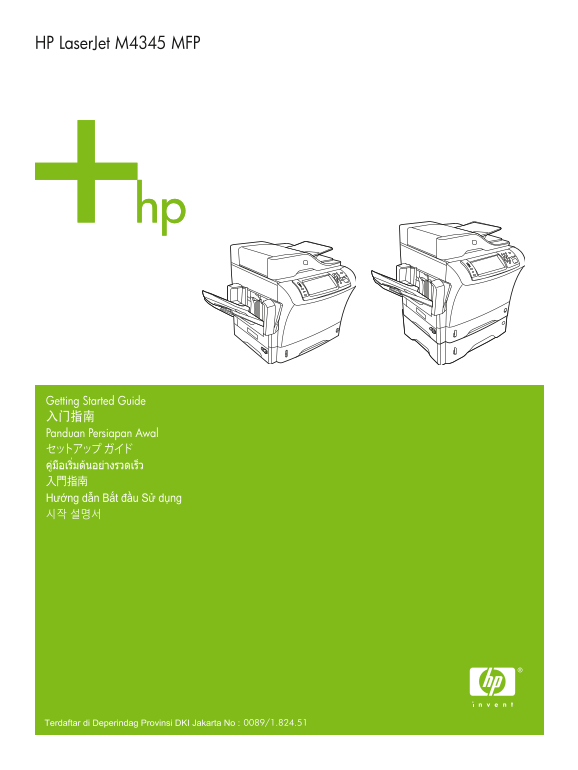
Page 1
HP Laser Jet M4345 MFP Getting Started Guide 入门指南 Panduan Persiapan Awal セットアップ ガイド คูมือเริ่มตนอยางรวดเร็ว 入門指南 Hướng dẫn Bắt đầu Sử dụng 시작 설명서 0089/1.824.51Terdaftar di Deperindag Provinsi DKI J...
Page 2
Copyright and License 版权和许可证 © 2006 Copyright Hewlett-Packard Development Company, L.P. © 2006 版权所有 Hewlett-Packard Development Company, L.P. Reproduction, adaptation or translation without prior writ...
Page 3
•Overview •概览 •Tinjauan Umum •概要 •ภาพรวม •概述 •Tổng quan •개요 •Prepare the site. •准备放置位置。 •Mempersiapkan lokasi. •設置場所の用意 •การจัดเตรียมสถานที่ •準備放置㆞點。 •Chuẩn bị trang. •장소 준비 •Unpack the device. •拆除设备包...
Page 4
•Prepare the site •准备放置位置 •Mempersiapkan lokasi •設置場所の用意 •การจัดเตรียมสถานที่ •準備放置㆞點。 •Chuẩn bị trang •장소 준비 •Select a well-ventilated, dust-free area to position the device. •选择一个通风良好的无尘区域来放置设备。 •Pi...
Page 5
•Unpack the device. •拆除设备包装。 •Membuka kemasan perangkat. •プリンタの開梱 •การแกะกลองผลิตภัณฑ์ •解開裝置包。 •Mở bao bì cho máy. •장치 포장 풀기 •Use this guide for the full accessory installation. Disregard the individ...
Page 6
•Unpack the MFP. •打开 MFP 包装。 •Buka kemasan MFP. •本体の箱を開けます。 •นํา MFP ออกมาจากกลอง •解開 MFP。 •Mở bao bì cho MFP. •MFP 포장을 풉니다. •Remove the packaging. •拆除包装材料。 •Keluarkan perangkat dari kemasan. •梱包材を取り...
Page 7
•Remove the shipping tape. •撕下装运带。 •Lepaskan pita pengiriman. •搬送用テープを取り外します。 •แกะเทปทั้งหมดที่ติดมากับผลิตภัณฑ์ออก •撕㆘膠帶。 •Gỡ băng dán vận chuyển. •포장용 테이프를 제거합니다. •Install the output bin. •安装出纸槽。 •P...
Page 8
•You are done unpacking the device. Now proceed to the next step: Preparing the hardware. •您已完成拆除设备包装的操作。现在请继续进行下一步:准备硬件。 •Anda telah selesai membuka kemasan perangkat. Lanjutkan ke langkah berikutnya...
Page 9
•Prepare the hardware. •准备硬件。 •Mempersiapkan perangkat keras. •ハードウェアの準備 •การจัดเตรียมฮาร์ดแวร์ •準備硬體。 •Chuẩn bị phần cứng. •하드웨어 준비 •Attach the control panel overlay (if necessary). •贴上控制面板贴面(如有必要)。 ...
Page 10
•Lift the cartridge door and remove the foam. •抬起碳粉盒盖并取出泡沫。 •Angkat pintu kartrid dan keluarkan gabusnya. •カートリッジのドアを開け、梱包材を取り除きます。 •ยกชองใสตลับหมึกพิมพ์ขึ้น และดึงโฟมออก •打開碳粉匣擋門,並取㆘泡棉。 •Nhấc cửa n...
Page 11
•Open tray 2. •打开纸盘 2。 •Buka baki 2. •トレイ 2 を開けます。 •เปดถาดกระดาษ 2 •打開紙匣 2。 •Mở khay 2. •용지함 2를 엽니다. •Remove the cardboard. •取出厚纸板。 •Keluarkan kardusnya. •ボール紙を取り除きます。 •ดึงกระดาษแข็งออก •拆㆘厚紙板。 •Gỡ m...
Page 12
•Close tray 2. •关闭纸盘 2。 •Tutup baki 2. •トレイ 2 を閉じます。 •ปดถาดกระดาษ 2 •關閉紙匣 2。 •Đóng khay 2. •용지함 2를 닫습니다. •Connect the network cable to the device. •将网络电缆连接至设备。 •Hubungkan kabel jaringan ke perangkat....
Page 13
•You are done preparing the hardware. Proceed with: Set up the control panel. •您已完成准备硬件的工作。继续下一步:设置控制面板。 •Anda telah selesai mempersiapkan perangkat keras. Lanjutkan dengan: Mengatur panel kontrol. •こ...
Page 14
•Set up the control panel. •设置控制面板。 •Mengatur panel kontrol. •コントロール パネルのセットアップ •การตั้งคาแผงควบคุม •設定控制面板。 •Cài đặt bảng điều khiển. •제어판 설정 • Set language, date, time, and fax settings (if necessa...
Page 15
• Find the IP address . On the control panel, touch Network Address , and then touch Print to print the Jetdirect configuration page. The IP address is on the Jetdirect page, under “TCP/IP”. Note: You...
Page 16
• Configure the IP address (if necessary) . On the control panel, touch Administration . Scroll to and touch Initial Setup , and then touch Networking and I/O . Touch Embedded Jetdirect , touch TCP/IP...
Page 17
•You are done with the setup of the control panel. Now move to your computer and proceed with: Install the software. •您已完成控制面板的设置。现在请转到您的计算机,然后继续下一步:安装软件。 •Anda telah selesai mengatur panel kontrol. S...
Page 18
•Install the software. •安装软件。 •Menginstal perangkat lunak. •ソフトウェアのインストール •การติดตั้งซอฟต์แวร์ •安裝軟體。 •Cài đặt phần mềm. •소프트웨어 설치 •For Windows® software installation instructions, go to step 27. •有关 ...
Page 19
• Install software. 1) Insert the CD that came with the printer. 2) On the welcome screen, click Install Printer . The Setup Wizard appears. 3) Follow the on screen instructions. Note: If the welcome ...
Page 20
• 2) Place the CD in the CD-ROM drive and run the installer. Complete an easy install. • 2) 将 CD 放入 CD-ROM 驱动器并运行安装程序。完成简易安装。 • 2) Masukkan CD ke dalam drive CD-ROM lalu jalankan installer. Selesaikan...
Page 21
• 3) From Apple System Preferences (available on the Apple pull-down menu or in the dock), click the Print & Fax icon and then click the Printing tab at the top of the window. 4) To add your new p...
Page 22
• 5) From the Printer Browser window, select the HP printer. For Mac OS X V10.4: If HP software is installed, the printer software should be automatically configured. 6) Click Add to create a printer ...
Page 23
• Congratulations! The device is ready to use. The user guide is located on the CD and in the HP Easy Printer Care Software. Note: Save the boxes and the packing material in case you need to transport...
Page 24
•You are done installing your software. Congratulations! You are ready to use your HP printer. •您已完成软件安装。恭喜!您现在可以使用 HP 打印机了。 •Anda telah selesai menginstal perangkat lunak Anda. Selamat! Anda siap unt...
Page 25
•Install the send fax driver. •安装发送传真驱动程序。 •Menginstal driver pengiriman faks. •ファックス送信ドライバのインストール •การติดตั้งไดรเวอร์สงโทรสาร •安裝傳送傳真驅動程式。 •Cài đặt chương trình gửi fax. •팩스 전송 드라이버 설치 • Install sen...
Page 26
•Set up the digital send features. •设置数字发送功能。 •Mengatur fitur pengiriman digital. •デジタル送信機能のセットアップ •ตั้งคาคุณสมบัติการสงแบบดิจิตอล •設定數位傳送功能。 •Cài đặt các tính năng gửi bằng kỹ thuật số. •디지털 전송 기능 ...
Page 27
• 5) On the left navigation menu, select E-mail Settings . Input the SMTP server address, use the default From and Subject fields. Note: If you are using an ISP (Internet Service Provider) for interne...
Page 28
• 7) To scan a document to your PC or network share folder, use the Send To Folder option (on the left navigation bar) to set up one or more folder destinations. For more information on configuring Se...
Page 29
•Troubleshooting. •故障排除。 •Mengatasi masalah. •Area •Symptom •区域 •症状 •Area •Gejala •機能 •症状/要求 •สวนที่เกิดปญหา •ลักษณะอาการ •區域 •問題 •Vùng •Triệu chứng •구역 •증상 •Control-panel display. •Blank. •Make sur...
Page 30
•Buttons appear grey. •Make sure that the scanner lock is in the unlock position. •Turn off the device, and then turn it on again. •See page 7 for more information. •Tombol terlihat abu-abu. •Pastikan...
Page 31
•不列㊞。 •檢查網路或 USB 纜線。 •如果您要在網路㆖列㊞,請列㊞組態頁並確定 IP 位址正確。 •重新安裝列㊞驅動程式。 •Không in. •Kiểm tra mạng hay cáp USB. •Nếu bạn đang in qua mạng, in một trang cấu hình và bảo đảm đúng địa chỉ IP . •Cài lại chương tr...
Page 32
•Blank pages. •Make sure that the pull tape is removed from the print cartridge. •Halaman kosong. •Pastikan pita tarik telah dilepaskan dari kartrid cetak. •Các trang trắng. •Bảo đảm miếng băng kéo đư...
Page 33
•No fax icon on the control-panel display. •Make sure that the fax card is installed in the formatter correctly, and that none of the pins are bent. •Print a configuration page and check the modem sta...
Page 34
•Fax configured but not sending fax (phone line not •Make sure to use the phone cord that came with the device. connected). •Make sure that the phone cord is connected securely to the device and to an...
Page 35
•Fax configured but not receiving fax. •Make sure that a line splitter or surge-protection device is not being used. •Make sure that voice mail or an answering machine is not receiving the incoming fa...
Page 36
•E-mail. •Digital sending tab in the embedded Web server (EWS) does •An administrative password might be configured. Select Log On in the not appear. upper right corner of the EWS. •电子邮件。 •E-mail. •在嵌...
Page 37
•當嘗試傳送電子郵件時,控制面板顯示螢幕㆖出現 電子郵件 •1) SMTP 閘道位址可能不正確。請聯絡您的 IT 管理員以取得正確位址。 閘道沒㈲反應 。 2) 如果您使用的是電子郵件的網際網路服務提供者 (ISP),請聯絡您的 ISP 提供者以取得 SMTP 閘道 (要求完整網域㈴稱 (FQDN),而非 IP 位址) 的 主機㈴稱。 3) 請確認輸入的 SMTP 認證使用者㈴稱與密碼是否正確。 ...
Page 38
•You want to scan and send-to-email in black and white TIFF •Use the EWS to change the default image file format by selecting Digital format. Sending , Send to E-mail , and Advanced . •您要以黑白的 TIFF 格式进...
Page 39
•文書をスキャンして電子メールへ送信すると、ジョブの失敗を •1) 電子メールをテスト送信して、宛先のアドレスが正しいことを確認しま 通知するメッセージが受信される。 す。 2) スキャンした文書が SMTP ゲートウェイの添付ファイルの許容サイズを 上回っていないことを確認します。上回っていた場合は、EWS で [デジタル送 信] 、 [電子メールへの送信] を選択して、サイズを変更します。 •...
Page 40
© 2006 Hewlett-Packard Development Company, L.P. www.hp.com *CB425-90962* *CB425-90962* CB425-90962