# A B C D E F G H I J K L M N O P Q R S T U V W X Y Z

Honeywell VisionPRO TH8000 Series Installation Guide

Summary

The VisionPRO series programmable thermostat offers advanced climate control for diverse HVAC systems, including heat pumps, conventional cooling/heating, and multi-zone setups. This comprehensive manual is an essential resource detailing step-by-step installation, wiring diagrams, and electrical guidelines for skilled technicians. Whether managing complex 2H/2C or simple single-stage systems, the guide ensures proper power connection and optimal performance, making it indispensable for HVAC professionals seeking reliable setup and configuration advice.
📄 Preview 📖 Table of Contents Contents PAGE OF 24

Page 1 Text Content

Installation Guide

Vision PRO® TH8000 Series Touch-screen Programmable Thermostat

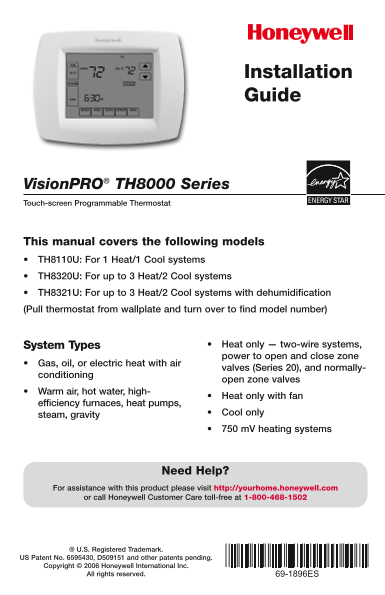
This manual covers the following models TH8110U: For 1 Heat/1 Cool systems TH8320U: For up to 3 Heat/2 Cool systems TH8321U: For up to 3 Heat/2 Cool systems with dehumidification (Pull thermostat from wallplate and turn over to find model number)

System Types Heat only — two-wire systems, power to open and close zone

Gas, oil, or electric heat with air

valves (Series 20), and normally-

conditioning

open zone valves

Warm air, hot water, high-

Heat only with fan

efficiency furnaces, heat pumps,

steam, gravity Cool only 750 m V heating systems

Need Help?

For assistance with this product please visit http://yourhome.honeywell.com or call Honeywell Customer Care toll-free at 1-800-468-1502

® U.S. Registered Trademark.

US Patent No. 6595430, D509151 and other patents pending. Copyright © 2006 Honeywell International Inc.

All rights reserved.

Page Summary Contents For Honeywell VisionPRO TH8000 Series Installation Guide

Page 1 Installation Guide Vision PRO® TH8000 Series Touch-screen Programmable Thermostat This manual covers the following models TH8110U: For 1 Heat/1 Cool systems TH8320U: For up to 3 Heat/2 Cool systems TH...
Page 2 Installation Guide Wallplate installation Separate wallplate from Grasp top and bottom of wallplate and pull to remove from thermostat. thermostat. Mount thermostat as shown below. Drill 3/16” holes f...
Page 3 Vision PRO® TH8110 / TH8320 / TH8321 Power options For 24VAC primary power, connect common Insert supplied batteries for side of transformer to “C” terminal. primary or backup power. Wiring Remove fac...
Page 4 Installation Guide Wiring Wiring guide — conventional systems Shaded areas below apply only to TH8320/TH8321 1H/1C System (1 transformer) 1H/1C System (2 transformers) Rc Power [1] Rc Power (cooling t...
Page 5 Vision PRO® TH8110 / TH8320 / TH8321 Wiring Wiring guide — heat pump systems Shaded areas below apply only to TH8320/TH8321 1H/1C Heat Pump (no auxiliary heat) 2H/2C Heat Pump (no auxiliary heat) Rc P...
Page 6 Installation Guide Remove tab and mount thermostat Remove tab. Align pins on back of thermostat with slots in wallplate, then push gently until thermostat snaps into place. Set date and time Press Pre...
Page 7 Vision PRO® TH8110 / TH8320 / TH8321 Installer setup Function Setting DONE DONE Press to Press to Press DONE to exit & save settings. select function change setting Setup functions Settings & ...
Page 8 Installation Guide Installer setup Setup functions Settings & Options (factory default in bold) Shaded areas below apply only to TH8320/TH8321 First stage heat Gas or oil furnaces of less than 90%...
Page 9 Vision PRO® TH8110 / TH8320 / TH8321 Installer setup Setup functions Settings & Options (factory default in bold) Furnace filter Off change reminder 10-day run time (about 1 month) 30-day run time...
Page 10 Installation Guide Installer system test Test System During installer setup, press number status repeatedly until “Test” appears TEST DONE Press to Press to select test change status Press DONE to ter...
Page 11 Vision PRO® TH8110 / TH8320 / TH8321 Special functions Shaded areas below apply only to TH8320/TH8321 Auto Changeover (Setup Function 0300): When set to Auto, the thermostat automatically selects heat...
Page 12 Specifications Temperature Ranges Electrical Ratings Heat: 40° to 90°F (4.5° to 32°C) Cool: 50° to 99°F (10° to 37°C) Terminal Voltage (50/60Hz) Running Current W Heating 20-30 Vac 0.02-1.0 A Operatin...
Page 13 Guía de instalación Vision PRO® TH8000 Series Termostato programable con pantalla activada por tacto Este manual cubre los siguientes modelos TH8110U: Para sistemas 1 de calefacción/1 de refrigeración...
Page 14 Guía de instalación Instalación de la placa de montaje 1 Separe la placa de montaje del Sujete la parte superior y la inferior de la placa de montaje y hale para separarla del termostato. termostato. ...
Page 15 Vision PRO® TH8110 / TH8320 / TH8321 Opciones de alimentación de energía Para la alimentación de energía primaria 24VCA. Inserte las baterías provistas para Conectar el lado común del transformador al...
Page 16 Guía de instalación Cableado Guía para el cableado — sistemas convencionales Las áreas sombreadas corresponden únicamente al modelo TH8320/TH8321 Sistema 1H/1C (1 transformador) Sistema 1H/1C (2 trans...
Page 17 Vision PRO® TH8110 / TH8320 / TH8321 Cableado Guía para el cableado — sistemas de bombeo de calefacción Las áreas sombreadas corresponden únicamente al modelo TH8320/TH8321 1H/1C Bomba de calefacción ...
Page 18 Guía de instalación Retire la lengüeta y arme el termostato Retire la lengüeta. Alinee las espigas de la parte de atrás del termostato con las ranuras de la placa de montaje, luego presione suavemente...
Page 19 Vision PRO® TH8110 / TH8320 / TH8321 Configuración del instalador Función Ajuste DONE DONE Oprima para Oprima para Oprima DONE para salir y guardar seleccionar la función cambiar los ajustes los ajust...
Page 20 Guía de instalación Configuración del instalador Función Ajustes y opciones (configuración de fábrica en negritas) Las áreas sombreadas corresponden únicamente al modelo TH8320/TH8321 Frecuencia del c...
Page 21 Vision PRO® TH8110 / TH8320 / TH8321 Configuración del instalador Función Ajustes y opciones (configuración de fábrica en negritas) Recordatorio de Off cambio del filtro Tiempo de funcionamiento de 10...
Page 22 Guía de instalación Prueba del sistema del instalador Número Estado del Durante la configuración del instalador, oprima de prueba sistema repetidamente hasta que aparezca “Test” en pantalla TEST DONE ...
Page 23 Vision PRO® TH8110 / TH8320 / TH8321 Funciones especiales Las áreas sombreadas corresponden únicamente al modelo TH8320/TH8321 Cambio automático (Función de configuración 0300): Cuando el sistema se f...
Page 24 Especificaciones Rangos de temperatura Regímenes eléctricos Calefacción: 40° a 90°F (4.5° a 32°C) Refrigeración: 50° a 99°F (10° a 37°C) Terminal Tensión (50/60Hz) Corriente W Calefacción 20-30 VCA 0,...

Manual Details

Brand Honeywell
Pages 24
File Size 616.85 KB
Published May 22, 2026
131 views

Enter the captcha to get the download link:

captcha

Frequently Asked Questions

Who should install this thermostat?

This unit must be installed by a trained, experienced technician. Failure to follow instructions can cause damage or hazardous conditions.

What happens if I replace an old control with mercury?

Do not place the old control in the trash; contact your local waste management authority for recycling and proper disposal instructions.

How do I power the unit with 24VAC primary power?

Connect the common wire from the secondary side of the transformer to the 'C' terminal. Batteries can provide backup power (S) on the side of the transformer.

What is the range for cooling operations?

The recommended operating range for cooling systems is 50° to 99°F (10° to 37°C).