Page 1
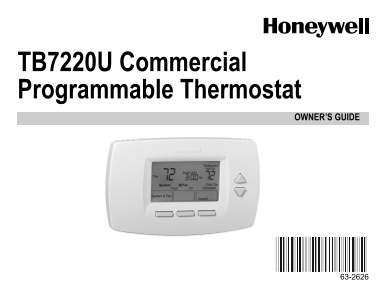
TB7220U Commercial Programmable Thermostat OWNERS GUIDE
Page 2
CONTENTS Features ........................................................................... Main Screen Selections and Display ................................ Programming Heating and Cooling Schedu...
Page 3
FEATURES Large, Clear Display with Backlightingcurrent temperature, set temperature and time are easy-to-read and all are displayed on the main screen. Menu Driven ProgrammingProvides guidance throu...
Page 4
Main Screen Selections and Display CURRENT DAY TEMPERATURE OF WEEK SETTING CURRENT TIME Aux Heat On System Auto Fan Auto Occupied System & Fan Override More CURRENT INDICATES SYSTEM SETTING THERMO...
Page 5
Programming Heating and Cooling Schedule IMPORTANT Keep in mind that the up and down keys change the flashing number or word. When multiple items are flashing, changes affect only one of the items. Th...
Page 6
Editing Schedule 1. Press MORE. 2. Press SCHEDULE. 3. Press EDIT. Mon Tue 4. Use The Up and Down keys to Wed Thu Fri change the flashing day. Sat 5. Select any combination of days. Select Day Next Can...
Page 7
7. Use the Up and Down keys DAYS SCHEDULE HEAT OR COOL to change the flashing SELECTED PERIOD TEMPERATURES schedule period. 8. Press NEXT. UP ARROW Period CHANGES TIME Mon Occupied1 Unocc1 NOTE: The s...
Page 8
10. When complete, press DONE. Saved appears on the screen to indicate changes are saved to the day(s) Tue Saved Wed indicated. Thu Fri Sat NOTE: To schedule remaining days of the week, repeat steps...
Page 9
Setting Time 1. Press MORE. 2. Press CLOCK 3. Use arrows to set current time. 4. Press DONE. IMPORTANT The current day of the week should already be Go Back Done set correctly. If not, see the Advance...
Page 10
SETTING FAN Fan selections vary based on the HVAC system type. ONfan runs continuously. Use this setting for improved air circulation or for more efficient central air cleaning. AUTOfan is controlle...
Page 11
NOTE: The ability to change settings remains for approximately seven seconds. Once neither the temperature nor the time continue to flash, you must restart at step 1 to make changes. 4. Use the Up and...
Page 12
OVERRIDE Changes temperature setting until the next period takes effect. For use during Unoccupied periods. 1. Press OVERRIDE. The override settings default to those contained in the next Occupied per...
Page 13
5. Use the Up and Down keys to change the number of days desired for the thermostat to override the schedule. 6. Press DONE. NOTE: During a holiday, the word Holiday flashes. 7. To cancel the Holida...
Page 14
Replacing Batteries With proper power and connections, the thermostat does not require batteries. Thermostats with batteries provide a warning when the batteries run low. This warning flashes on the m...
Page 15
Replace the batteries as follows: 1. Remove the thermostat from the base by pulling it straight out. 2. Install two new AA alkaline batteries with proper polarization. NOTES: Always use AA alkaline ba...
Page 16
3. Place the thermostat back on BATTERY HOLDERBATTERIES (2) its base: a. Align the terminal screw blocks with the pins on the back of the thermostat. b. Push the thermostat straight onto the base. NOT...
Page 17
Reading Remote Indoor Temperature If connected to an installed remote indoor temperature sensor, the REMOTE INDOOR thermostat displays the indoor TEMPERATURE READING temperature from the remote sensor...
Page 18
Reading Outdoor Temperature If connected to an outdoor sensor, the thermostat displays the Outside temperature. VIEW OUTSIDE TEMPERATURE The Outside temperature is located in the lower right corner of...
Page 19
Keys Locked Some key control can be fully or partially locked. When the Locked thermostat displays Locked, key control is either fully or partially locked. System Auto Fan Auto Occupied NOTE: In ord...
Page 20
PARTIAL LOCKOUT 1 This mode locks all keys except HOLIDAY, OVERRIDE, Up and Down. Standard procedures are used to incorporate the temporary changes made with these keys. See the Setting Temperature Ov...
Page 21
Temperature Recovery The thermostat is equipped with a feature to eliminate guesswork when setting a schedule. That is, the user need not know the amount of time for the HVAC system to Tue bring the s...
Page 22
Setting Calendar This thermostat is designed to, under normal use, automatically keep the current time and day in the memory for up to ten years once the calendar is set. There are two ways to set the...
Page 23
SETTING CALENDAR AFTER THERMOSTAT IS ALREADY FACTORY SETTING FUNCTIONING SETUP NUMBER AM See the Steps (1 through 4), in the CHANGE Advanced Settings section, to set THE FACTORY year, month and day. V...
Page 24
Advanced Settings The thermostat has many advanced settings to match the HVAC system. These settings can be adjusted to match specific needs: 1. From the main screen, press SYSTEM & FAN. Fan Auto ...
Page 25
Step 1. User Setup Number 0120: First Two Digits of Current Calendar Year. To change the current setting, use the Up and Down keys. Options: 20 for years 20xx. 21 for years 21xx. Step 2. User Setu...
Page 26
Step 4. User Setup Number 0150: Current Calendar Date. To change the current setting, use the Up and Down keys. Options: 1 through 31 for first of a month to 31st of a month. Step 5. User Setup Numb...
Page 27
Step 8. User Setup Number 0540: Number of Programmable Periods per Day. To change the current setting, use the Up and Down buttons. Options: 2 2 periods per day. 4 4 periods per day. Step 9. User ...
Page 28
Frequently Asked Questions and Answers Q: When making changes, the wrong setting is being changed; Why? A: Whatever is flashing on the screen is the item that the up and down buttons affect. Q: The ke...
Page 29
Limited Five-Year Warranty Honeywell warrants this product, excluding battery, to be free from defects in the workmanship or materials, under normal use and service, for a period of five (5) years fro...
Page 30
If you have any questions concerning this warranty, please write Honeywell Customer Relations, 1985 Douglas Dr, Golden Valley, MN 55422 or call 1-800-468-1502, Monday- Friday, 7:00 a.m. to 5:30 p.m., ...
Page 32
Automation and Control Solutions Honeywell International Inc. Honeywell Limited-Honeywell Limitée 1985 Douglas Drive North 35 Dynamic Drive Golden Valley, MN 55422 Scarborough, Ontario M1V 4Z9 yourhom...