Page 1
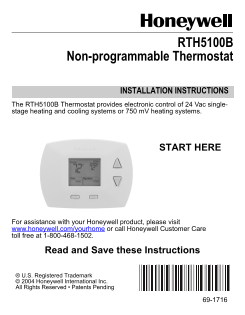
RTH5100B Non-programmable Thermostat INSTALLATION INSTRUCTIONS The RTH5100B Thermostat provides electronic control of 24 Vac single- stage heating and cooling systems or 750 m V heating systems. START...
Page 2
Contents Prepare for Installation..................................................3 Follow Important Instructions........................................5 Remove Old Thermostat..........................
Page 3
Step 1. Prepare for Installation 1. Check that the following items are included: Inside WALLPLATE Setting Cool Fan THERMOSTAT Auto System Cool On MOUNTING SCREWS (2) AND WALL ANCHORS (2) OPERATING INS...
Page 4
Step 1. Prepare for Installation (Cont) 2. Check that you have everything required for the installation: Two AAA alkaline batteries No. 2 Phillips screwdriver and standard pocket screwdriver Drill Dri...
Page 5
Step 2. Follow Important Instructions 1. Do not connect the wires to the new thermostat based on wire color because damage can occur to the heating and/or cooling system. These Installation Instructio...
Page 6
Step 3. Remove Old Thermostat 1. Turn off power at the heating and/or cooling system or fuse/circuit breaker panel. 2. Remove the cover from the old thermostat. 3. Remove the old thermostat from the w...
Page 7
Step 4. Follow Special Instructions 1. If you have C and/or C1 wire(s) connected to your old thermostat, do not connect them to your new thermostat. 2. Disconnect the C and/or C1 wire(s). Make sure th...
Page 8
Step 4. Follow Special Instructions (Cont) 4. Most installations have two to five wires connected to the old thermostat. If six or more wires are connected to your old thermostat (not counting the C o...
Page 9
Step 4. Follow Special Instructions (Cont) 5. If you find any wires not connected to your old thermostat, do not connect them to your new thermostat. 6. Wrap the end of the wires that are not connecte...
Page 10
Step 5. Label Old Thermostat Wires 1. As you disconnect each wire, use the enclosed wire labels to wrap a wire label around each wire that matches the letter designation. Do not allow the wires to fal...
Page 11
Step 6. Mount New Wallplate to Wall 1. Separate the wallplate from the thermostat as shown. THERMOSTAT WALLPLATE WIRE HOLE
Page 12
Step 6. Mount New Wallplate to Wall (Cont) 2. Pass the labeled wires through the wire hole on the wallplate. WALL OPENING WALLPLATE WIRE HOLE NOT USED LABELED WIRES M22043
Page 13
Step 6. Mount New Wallplate to Wall (Cont) 3. Position the wallplate on the wall with the arrow pointing up. Level the wallplate (for appearance only) and mark the two mounting holes with a pencil. LE...
Page 14
Step 6. Mount New Wallplate to Wall (Cont) 4. Move the wallplate aside and drill holes at the locations marked on the wall. Drill 3/16 in. holes for drywall or 7/32 in. holes for plaster. 5. Tap the w...
Page 15
Step 7. Connect Wires to New Wallplate 1. Match the labeled wires to the letter designations on the wallplate. 2. If wires are to be connected to both Rc and R, loosen the Rc and R screw terminals and...
Page 16
Step 7. Connect Wires to New Wallplate (Cont) 4. Loosen the screw terminals. Insert the labeled wires into the holes on the right side of the terminal block that match the letter designations. Tighten...
Page 17
Step 7. Connect Wires to New Wallplate (Cont) 6. Compare letter designations on your old and new thermostats. New Possible letter designations Thermostat on the labeled wires RC or R or RH, 4, VR or Y...
Page 18
Step 7. Connect Wires to New Wallplate (Cont) NOTES If wires will be connected to both RC and R on the new thermostat, remove metal jumper between RC and R. Leave metal jumper in place if only one of ...
Page 19
Step 7. Connect Wires to New Wallplate (Cont) 7. Push excess wire back into the wall opening. Keep wires in the shaded area. WALLPLATE NOT USED WALL OPENING WIRE SHADED AREA
Page 20
Step 8. Install Batteries 1. Install two fresh AAA alkaline batteries on the back of the thermostat as marked on the battery holder. BACK OF THERMOSTAT BATTERY HOLDER BATTERIES After the thermostat is...
Page 21
Step 9. Attach New Thermostat to Wallplate 1. Align the four tabs on the wallplate with the four slots on the back of the thermostat. WALLPLATE SLOTS ON NOT BACK OF O/B W THERMOSTAT 2. Push the thermo...
Page 22
Step 10. Configure Installer Setup 1. Use the Installer Setup Menu to match your new thermostat to your heating and/or cooling system. Follow the steps in this section to set up your thermostat. 2. En...
Page 23
10. Configure Installer Setup (Cont) 4. Press the Up or Down button to select your setting for Installer Setup Number 1 in the table below. 5. After you select your setting, press the Next button to g...
Page 24
Configure Installer Setup (Cont) 6. If you do not have a number 2 on the left side of your display, go to the next page. 7. If you have a number 2 on the left side of your display, press the Up or Dow...
Page 25
Step 10. Configure Installer Setup (Cont) 9. If you do not have a number 3 on the left side of your display, go to the next page. 10. If you have a number 3 on the left side of your display, press the...
Page 26
Step 10. Configure Installer Setup (Cont) 12. If you do not have a number 5 on the left side of your display, go to the next page. 13. If you have a number 5 on the left side of your display, press th...
Page 27
Step 10. Configure Installer Setup (Cont) 15. Press the Up or Down button to select your setting for Installer Setup Number 14 in table below. 16. After you select your setting, press the Done button ...
Page 28
Customer Assistance For assistance with your Honeywell product please visit www.honeywell.com/yourhome or call Honeywell Customer Care toll free at 1-800-468-1502. Before calling, please have the ther...
Page 29
Limited One-Year Warranty Honeywell warrants this product, excluding battery, to be free from defects in the workmanship or materials, under normal use and service, for a period of one (1) year from t...
Page 30
Limited One-Year Warranty (Cont) THIS WARRANTY IS THE ONLY EXPRESS WARRANTY HONEYWELL MAKES ON THIS PRODUCT. THE DURATION OF ANY IMPLIED WARRANTIES, INCLUDING THE WARRANTIES OF MERCHANTABILITY AND FIT...
Page 32
Automation and Control Solutions Honeywell International Inc. Honeywell Limited-Honeywell Limitée 1985 Douglas Drive North 35 Dynamic Drive Golden Valley, MN 55422 Scarborough, Ontario 69-1716 G.H. 5-...