Page 1
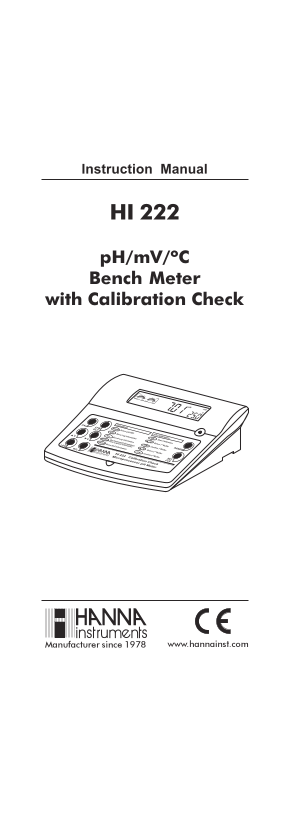
Instruction Manual HI 222 p H/m V/ºC Bench Meter with Calibration Check POOR GOOD SLOW FAST CAL Functions GLP CFM RANGE Select p H/ORP LOG Store RCL p H Calibration SET/CLR Recall Log CAL Clear Set In...
Page 2
Dear Customer, Thank you for choosing a Hanna Instruments product. Please read this instruction manual carefully before using the instrument. This manual will provide you with the necessary informatio...
Page 3
PRELIMINARY EXAMINATION Remove the instrument from the packing material and examine it carefully to make sure that no damage has occurred during shipping. If there is any damage, notify your Dealer or...
Page 4
FUNCTIONAL DESCRIPTION Electrode Electrode Front Panel Primary LCD Condition Response Secondary LCD GOOD1 SLOW FASTPOOR Functions p H Calibration Select p H/ORPRANGE Start Calibration CAL CAL CFM LOG ...
Page 5
HI222 SPECIFICATIONS Range -2.00 to 16.00 p H ±699.9 m V / ±2000 m V -20.0 to 120.0 °C Resolution 0.01 p H Accuracy ±0.01 p H (@20°C/68°F) ±0.2 m V / ±1 m V p H Calibration 1 or 2-point, automatic, wi...
Page 6
OPERATIONAL GUIDE POWER CONNECTION Plug the 12 VDC adapter into the power supply socket. Note: These instruments use non volatile memory to retain the p H, m V, temperature calibrations and all other ...
Page 7
The p H is displayed on the primary LCD and the temperature on the secondary LCD. GOOD SLOW FASTPOOR The p H reading is out of range, the closest full-scale value will be displayed blinking on the pri...
Page 8
• The instrument automatically defaults to the ORP measurement mode if HANNA P type ORP electrode is detected. • Submerge the ORP electrode tip (4 cm/1½”) into the sample. Allow a few minutes for the ...
Page 9
PROCEDURE The user has a choice of 7 memorized buffers: p H 1.68, 3.00, 6.86, 7.01, 9.18, 10.01 and 12.45. It is always recommended to perform a two-point calibration. The instrument however allows a ...
Page 10
Press the ARROW keys to select a different buffer value, if necessary. • When the reading is stable and close to the selected buffer, the “CFM” tag will blink and if enabled, an audible signal will so...
Page 11
ENHANCED CALIBRATION MESSAGES The stored calibration history to used issue error and warning messages during calibration to help ensure the highest accuracy. As electrode aging is normally a slow proc...
Page 12
ELECTRODE This message appears if the cleaning procedure performed as a result of the above two messages is found by the instrument to be unsuccessful. Replace the electrode. CAL ATC p H BUFFER ELECTR...
Page 13
a result of unacceptable offset variation or in the second calibration buffer as a result of unacceptable slope variation. This variation may result from dirt on the electrode or contaminated buffer. ...
Page 14
Also, when the instrument cannot evaluate the electrode response or p H 1.68 or p H 12.45 buffer were used as calibration buffer, the response gauge will be empty. If the electrode is in a very poor c...
Page 15
The date (mm.dd). The year (yyyy). The p H calibration offset. The p H calibration slope in m V/p H normalized to 25 °C. Note: If you calibrate using electrodes with pin the electrode condition and re...
Page 16
The calibration Alarm Time-Out status: if disabled or the number of days until the calibration alarm will be displayed or if expired (7 days ago) Press the GLP key at any time and the instrument will ...
Page 17
LOGGING Up to 100 LOG samples can be stored in memory. LOGGING THE CURRENT DATA To store the current reading into memory press the LOG key while in measur- ing mode. The instrument will display the cu...
Page 18
Otherwise the instrument will display log data on the primary LCD and the last stored record number on the secondary LCD, along with the “LOG” and the “RCL” tags. Note: The “LOG” and “RCL” tags remain...
Page 19
•The date on the primary LCD and the “d At E” message on the secondary LCD. •The year on the primary LCD and the “YEAr” message on the secondary LCD. •The calibration offset on the primary LCD and the...
Page 20
•The “d EL” message on the primary LCD and the selected record or date on the secondary LCD. The “CFM” and the ”DEL” tags will blink: Press SET key to select the current record, the records from the s...
Page 21
SETUP Setup mode allows viewing and modification of the following parameters: Calibration Alarm Time Out Instrument ID Current Time (hour & minute) Current Date (month & day) Current Year Beep...
Page 22
Press the ARROW keys to change the instrument ID value. Press the CFM key to save the modified instrument ID value or press the CAL key to cancel without saving the instrument ID. Note: The instrument...
Page 23
CURRENT YEAR SET Press the CAL key when the current year is displayed. The year will begin blinking. Press the ARROW keys to change the year. Press the CFM key to save the modified value or press the ...
Page 24
SERIAL COMMUNICATION BAUD RATE SET Press the CAL key when the baud rate is displayed. The baud rate (600, 1200, 2400, 4800 or 9600) will begin to blink. Press the ARROW keys to change the baud rate. P...
Page 25
TEMPERATURE CALIBRATION (for technical personnel only) The instruments are factory calibrated for temperature. Hanna’s temperature probes are interchangeable and temperature calibra- tion is not neces...
Page 26
The “ ” tag will blink until the reading has stabilized. Use the ARROW keys to set the reading on the secondary LCD to that of the hot water bath. When the reading is stable and close to the selected ...
Page 27
m V CALIBRATION (for technical personnel only) All instruments are factory calibrated for m V. Hanna’s p H and ORP electrodes are interchangeable and m V calibration is not needed when replaced. If m ...
Page 28
Note: Press the CAL key to leave the calibration mode at any time. If the measured value is not close to the calibration point, the “WRONG“ tag will start to blink. In this case, check if the value se...
Page 29
SIMPLE COMMANDS RNG Is equivalent to pressing the RANGE key CAL Is equivalent to pressing the CAL key CFM Is equivalent to pressing the CFM/GLP key UPC Is equivalent to pressing the UP arrow key DWC I...
Page 30
p H VALUES AT DIFFERENT TEMPERATURES Temperature has an effect on p H. The calibration buffer solutions are affected by temperature changes to a lesser degree than normal solutions. During calibration...
Page 31
ELECTRODE CONDITIONING & MAINTENANCE PREPARATION Remove the protective cap. DO NOT BE ALARMED IF SALT DEPOSITS ARE PRESENT. This is normal with electrodes. They will disappear when rinsed with wat...
Page 32
For Refillable Electrodes: If the filling solution (electrolyte) is more than 2½ cm (1") below the fill hole, add HI 7082 or HI 8082 3.5M KCl Electrolyte Solution for double junction or HI 7071 o...
Page 33
IMPORTANT: After performing any of the cleaning procedures, rinse the electrode thoroughly with distilled water, refill the reference chamber with fresh electrolyte (not necessary for gel-filled elect...
Page 34
Symptoms Problem Solution Amp Hel electrodes do The battery is run down. Replace the electrode. not respond to p H changes. The meter fails to cali- Broken p H electrode. Replace the p H electrode. br...
Page 35
TEMPERATURE CORRELATION FOR p H SENSITIVE GLASS The resistance of glass electrodes partially depends on the temperature. The lower the temperature, the higher the resistance. It takes more time for th...
Page 36
ACCESSORIES p H CALIBRATION SOLUTIONS HI 50003P p H 3.00 Buffer Solution, 20 m L sachet, 25 pcs HI 70004P p H 4.01 Buffer Solution, 20 m L sachet, 25 pcs HI 70007P p H 7.01 Buffer Solution, 20 m L sac...
Page 37
REFILLING ELECTROLYTE SOLUTIONS HI 7071 3.5M KCl + Ag Cl Electrolyte, 4x30 m L, for single junction electrodes HI 7072 1M KNO Electrolyte, 4x30 m L HI 7082 3.5M KCl Electrolyte, 4x30 m L, for double j...
Page 38
HI 1131P; Use: general purpose. Glass-body, single junction, refillable, combination p H electrode. 9.5mm DIA mm 0.37" 0.5" mm "S" VERSION 4.7" HI 1083P; Use: biotechnology, m...
Page 39
HI 76405Electrode holder HI 8427 p H and ORP electrode simulator with 1 m (3.3') coaxial cable ending in female BNC connectors HI 931001 p H and ORP electrode simulator with LCD and 1 m (3.3') coaxial...
Page 40
HANNA SALES AND TECHNICAL SERVICE Australia: Tel. (03) 9769.0666 • Fax (03) 9769.0699 China: Tel. (10) 88570068 • Fax (10) 88570060 Egypt: Tel. & Fax (02) 2758.683 Germany: Tel. (07851) 9129-0 • F...