EXTECH INSTRUMENTS PH50 PH60 PH Waterproof Meter User Guide
Summary
Measure pH, acidity, and alkalinity with high accuracy using the durable Digital pH Meter (PH50/PH60). Designed for professionals in water quality testing and laboratory analysis, this IP67 waterproof device provides precise readings across a wide range. The user guide offers comprehensive instructions covering everything from initial setup and essential calibration procedures to advanced operation, troubleshooting, and proper electrode maintenance, ensuring reliable results whenever you need them.
Page 1 Text Content
Operation Specifications
User Guide
p H Measurements Model PH50 PH60 1. Remove the protective cap and the electrode cap Display Single LCD Dual LCD
p H Waterproof Meter 2. Insert the electrode into the sample. PH Range and Accuracy 2.0 to 12.0 0.0 to 14.0
3. Press the PWR key to turn the meter on and slowly stir until the reading settles. PH resolution/accuracy 0.1p H / ± 0.3p H 0.1p H / ± 0.2p H
Models PH50 & PH60
The decimal point will blink while the meter is measuring. Temperature Range — 32 to 122o F (0 to 50o C)
Description Temperature resolution/accuracy — 0.5o / ± 1.8o F / 1o C
p H Calibration (1, 2, or 3 points)
A two point calibration with a buffer of 7 plus 4 or 10 (whichever is nearest to the Automatic Temperature — Yes
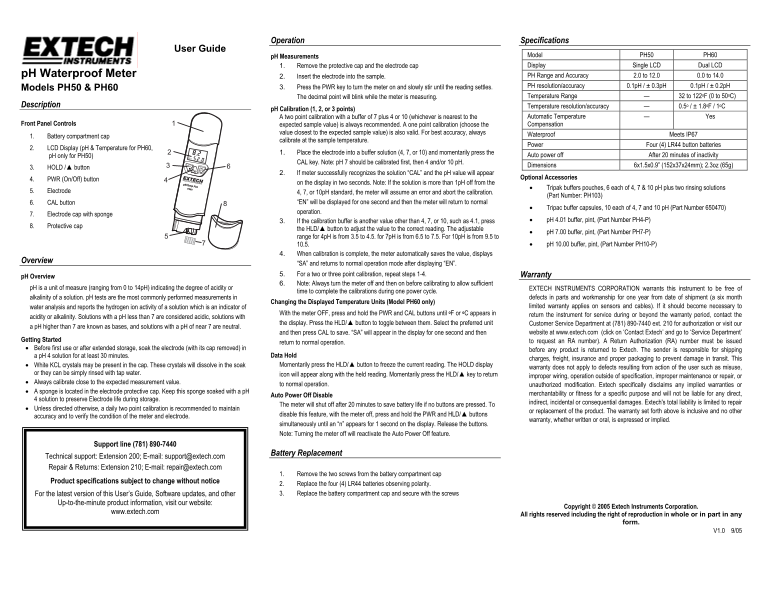
Front Panel Controls expected sample value) is always recommended. A one point calibration (choose the Compensation
value closest to the expected sample value) is also valid. For best accuracy, always
1. Battery compartment cap Waterproof Meets IP67
calibrate at the sample temperature.
Power Four (4) LR44 button batteries
2. LCD Display (p H & Temperature for PH60,
1. Place the electrode into a buffer solution (4, 7, or 10) and momentarily press the
p H only for PH50) Auto power off After 20 minutes of inactivity
CAL key. Note: p H 7 should be calibrated first, then 4 and/or 10 p H.
Dimensions 6x1.5x0.9” (152x37x24mm); 2.3oz (65g)
3. HOLD /▲ button
2. If meter successfully recognizes the solution “CAL” and the p H value will appear
4. PWR (On/Off) button Optional Accessories
on the display in two seconds. Note: If the solution is more than 1p H off from the
• Tripak buffers pouches, 6 each of 4, 7 & 10 p H plus two rinsing solutions
5. Electrode 4, 7, or 10p H standard, the meter will assume an error and abort the calibration.
(Part Number: PH103)
6. CAL button “EN” will be displayed for one second and then the meter will return to normal
• Tripac buffer capsules, 10 each of 4, 7 and 10 p H (Part Number 650470)
operation.
7. Electrode cap with sponge
3. If the calibration buffer is another value other than 4, 7, or 10, such as 4.1, press • p H 4.01 buffer, pint, (Part Number PH4-P)
8. Protective cap
the HLD/▲ button to adjust the value to the correct reading. The adjustable
• p H 7.00 buffer, pint, (Part Number PH7-P)
range for 4p H is from 3.5 to 4.5. for 7p H is from 6.5 to 7.5. For 10p H is from 9.5 to
10.5. • p H 10.00 buffer, pint, (Part Number PH10-P)
4. When calibration is complete, the meter automatically saves the value, displays
Overview
“SA” and returns to normal operation mode after displaying “EN”. 5. For a two or three point calibration, repeat steps 1-4. Warranty
p H Overview
6. Note: Always turn the meter off and then on before calibrating to allow sufficient
p H is a unit of measure (ranging from 0 to 14p H) indicating the degree of acidity or EXTECH INSTRUMENTS CORPORATION warrants this instrument to be free of
time to complete the calibrations during one power cycle.
alkalinity of a solution. p H tests are the most commonly performed measurements in defects in parts and workmanship for one year from date of shipment (a six month
Changing the Displayed Temperature Units (Model PH60 only)
water analysis and reports the hydrogen ion activity of a solution which is an indicator of limited warranty applies on sensors and cables). If it should become necessary to
With the meter OFF, press and hold the PWR and CAL buttons until o F or o C appears in return the instrument for service during or beyond the warranty period, contact the
acidity or alkalinity. Solutions with a p H less than 7 are considered acidic, solutions with
the display. Press the HLD/▲ button to toggle between them. Select the preferred unit Customer Service Department at (781) 890-7440 ext. 210 for authorization or visit our
a p H higher than 7 are known as bases, and solutions with a p H of near 7 are neutral.
and then press CAL to save. “SA” will appear in the display for one second and then website at www.extech.com (click on ‘Contact Extech’ and go to ‘Service Department’
Getting Started to request an RA number). A Return Authorization (RA) number must be issued
return to normal operation.
• Before first use or after extended storage, soak the electrode (with its cap removed) in before any product is returned to Extech. The sender is responsible for shipping
a p H 4 solution for at least 30 minutes. Data Hold
charges, freight, insurance and proper packaging to prevent damage in transit. This
• White KCL crystals may be present in the cap. These crystals will dissolve in the soak Momentarily press the HLD/▲ button to freeze the current reading. The HOLD display
warranty does not apply to defects resulting from action of the user such as misuse,
or they can be simply rinsed with tap water. icon will appear along with the held reading. Momentarily press the HLD/▲ key to return
improper wiring, operation outside of specification, improper maintenance or repair, or
• Always calibrate close to the expected measurement value.
to normal operation. unauthorized modification. Extech specifically disclaims any implied warranties or
• A sponge is located in the electrode protective cap. Keep this sponge soaked with a p H
Auto Power Off Disable merchantability or fitness for a specific purpose and will not be liable for any direct,
4 solution to preserve Electrode life during storage.
indirect, incidental or consequential damages. Extech's total liability is limited to repair
The meter will shut off after 20 minutes to save battery life if no buttons are pressed. To
• Unless directed otherwise, a daily two point calibration is recommended to maintain
or replacement of the product. The warranty set forth above is inclusive and no other
accuracy and to verify the condition of the meter and electrode. disable this feature, with the meter off, press and hold the PWR and HLD/▲ buttons
warranty, whether written or oral, is expressed or implied.
simultaneously until an “n” appears for 1 second on the display. Release the buttons. Note: Turning the meter off will reactivate the Auto Power Off feature.
Support line (781) 890-7440
Battery Replacement
Technical support: Extension 200; E-mail: [email protected] Repair & Returns: Extension 210; E-mail: [email protected]
1. Remove the two screws from the battery compartment cap
Product specifications subject to change without notice
2. Replace the four (4) LR44 batteries observing polarity. For the latest version of this User’s Guide, Software updates, and other 3. Replace the battery compartment cap and secure with the screws
Up-to-the-minute product information, visit our website:
Copyright © 2005 Extech Instruments Corporation.
www.extech.com
All rights reserved including the right of reproduction in whole or in part in any
form.
Page Summary Contents For EXTECH INSTRUMENTS PH50 PH60 PH Waterproof Meter User Guide
Manual Details
| Brand | Extech Instruments |
|---|---|
| Pages | 1 |
| File Size | 108.14 KB |
| Published | May 20, 2026 |
Enter the captcha to get the download link:

Frequently Asked Questions
What preparation is required before first use or after extended storage?
Remove the protective cap and soak the electrode in a pH 4 solution for at least 30 minutes.
When calibrating, what order must I follow to ensure accuracy?
It is recommended to calibrate at pH 7 first, followed by pH 4 and/or pH 10.
What happens if the sample reading is vastly different from the expected value during calibration?
If the solution is more than 1pH off, the meter will display an error and abort the calibration operation.
How do I switch between Fahrenheit and Celsius temperature units on the PH60 model?
With the meter OFF, press and hold PWR and CAL until 'F' or 'C' appears; then use HLD/▲ to toggle.