# A B C D E F G H I J K L M N O P Q R S T U V W X Y Z

EverFocus ED550 User's Manual

Summary

The comprehensive operation guide for the EVERFOCUS ED550 is essential reading for users installing and operating this True Day/Night Indoor Vandal Camera. This manual provides detailed instructions covering product features, proper installation techniques, and advanced user setup functions such as lens control, DNR adjustment, and white balance. It ensures that installers and security professionals can achieve optimal performance while adhering to critical safety precautions, guaranteeing correct and reliable system deployment.
📄 Preview PAGE OF 26

Page 1 Text Content

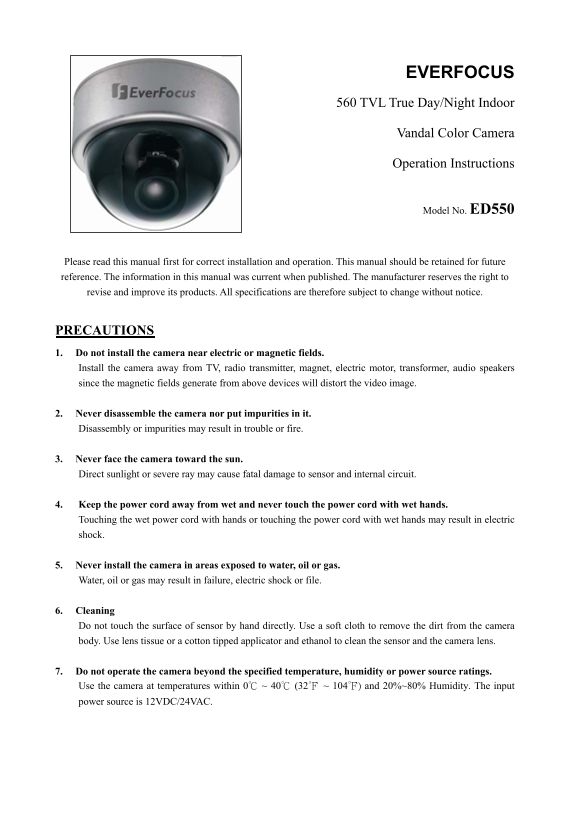
EVERFOCUS 560 TVL True Day/Night Indoor

Vandal Color Camera

Operation Instructions

Model No. ED550

Please read this manual first for correct installation and operation. This manual should be retained for future reference. The information in this manual was current when published. The manufacturer reserves the right to revise and improve its products. All specifications are therefore subject to change without notice.

PRECAUTIONS 1. Do not install the camera near electric or magnetic fields. Install the camera away from TV, radio transmitter, magnet, electric motor, transformer, audio speakers since the magnetic fields generate from above devices will distort the video image.

2. Never disassemble the camera nor put impurities in it. Disassembly or impurities may result in trouble or fire.

3. Never face the camera toward the sun. Direct sunlight or severe ray may cause fatal damage to sensor and internal circuit.

4. Keep the power cord away from wet and never touch the power cord with wet hands. Touching the wet power cord with hands or touching the power cord with wet hands may result in electric shock.

5. Never install the camera in areas exposed to water, oil or gas. Water, oil or gas may result in failure, electric shock or file.

6. Cleaning Do not touch the surface of sensor by hand directly. Use a soft cloth to remove the dirt from the camera body. Use lens tissue or a cotton tipped applicator and ethanol to clean the sensor and the camera lens.

7. Do not operate the camera beyond the specified temperature, humidity or power source ratings. Use the camera at temperatures within 0℃ ~ 40℃ (32℉ ~ 104℉) and 20%~80% Humidity. The input power source is 12VDC/24VAC.

Page Summary Contents For EverFocus ED550 User's Manual

Page 1 EVERFOCUS 560 TVL True Day/Night Indoor Vandal Color Camera Operation Instructions Model No. ED550 Please read this manual first for correct installation and operation. This manual should be retained ...
Page 2 TABLE OF CONTENTS 1. PRODUCT OVERVIEW ...................................................................................................... 4 1.1 Main Features ..........................................
Page 3 5.8.7 SHARPNESS ........................................................................................................................................ 24 5.8.8 RESET ...................................
Page 4 1. PRODUCT OVERVIEW The new ED550 camera is designed with advanced new generation 16-bit DSP which has powerful processing capability to show over 560TVL horizontal resolution. Built-in DNR (Dynamic N...
Page 5 1.3 Specifications Pickup Device 1/3'' SONY Super HAD CCD Video Format NTSC or PAL Scanning System NTSC: 525 TV lines, 60 fields/sec PAL: 625 TV lines, 50 fields/sec Picture Elements 768 x 494 (NTSC) ...
Page 6 1.4 Dimensions 2. NAMES AND FUNCTIONS OF PARTS 2.1 Front Panel Internal Sensor Note: Internal Sensor is a Day/Night Switch Sensor.
Page 8 2.2 Back Panel (1) Power Input Terminal & Video Output Connector Connect to the appropriate power to each model. Video Output connector is for connecting the video output of the camera to a color ...
Page 9 3. INSTALLATION Take off camera's cover first. Fix 3 screws of the bracket firmly to wall or ceiling. Adjust the camera to best angle for viewing. Use the tact switcher at the back panel to make any a...
Page 10 4. CAMERA SETUP OPERATIONS This camera utilizes an On Screen Display (OSD) user setup menu. 4.1 Setup Button To set items on the user setup menu, use the following switch on the back panel. Up: Adjust...
Page 11 4.2 Display/Close the user setup menu screen SETUP > LENS DC <┘ SHUTTER ___ WHITE BAL. ATW Set button BACKLIGHT OFF AGC MIDDLE DNR LOW SENS-UP AUTO <┘ SPECIAL <┘ EXIT I. Press the SET butt...
Page 12 5. USER SETUP 5.1 Lens 1. When the SETUP menu is displayed on the screen, please direct the arrow to point to “LENS” by adjusting the switch to UP or DOWN direction. SETUP > LENS DC <┘ LENS SHUT...
Page 13 SETUP LENS MANUAL > SHUTTER FLK WHITE BAL. ATW BACKLIGHT OFF AGC MIDDLE DNR LOW SENS-UP ___ SPECIAL <┘ EXIT ESC: The shutter speed can automatically be controlled. When ESC mode turns on, the au...
Page 14 5.3 White Balance Control The screen color can be adjusted by using the WHITE BALANCE function. 1. Please direct the arrow to point to “WHITE BAL” on the SETUP menu by adjusting the switch to UP or DO...
Page 15 5.4 Backlight Even there is a massive backlight behind the object, bright images of the background and the object can still be obtained by using the BACKLIGHT function. 1. Please direct the arrow to p...
Page 16 5.6 DNR (Dynamic Noise Reduction) Dynamic Noise Reduction in video images has the following effects. 1. Images are brighter and sharper. 2. When the level of noise is reduced, the performance of a cam...
Page 17 SETUP LENS DC <┘ LIMIT SHUTTER ___ WHITE BAL. ATW > AUTO X 10 BACKLIGHT OFF AGC MIDDLE DNR LOW > SENS-UP AUTO <┘ SPECIAL <┘ EXIT OFF: The function is disabled. NOTE: 1. When SHUTTER is ...
Page 18 SPECIAL > CAMERA ID OFF COLOR ADJ. <┘ SYNC. INT MOTIION DET OFF PRIVACY OFF MIRROR OFF SHARPNESS ON <┘ RESET RETURN <┘ 5.8.1 CAMERA ID Input the camera ID, and it will be appeared on the m...
Page 19 5.8.2 COLOR ADJ Adjust the Color Gain from 0 ~ 15 SPECIAL CAMERA ID OFF COLOR GAIN. > COLOR ADJ. <┘ SYNC. INT > LEVEL |++++++++| 8 MOTIION DET OFF PRIVACY OFF MIRROR OFF SHARPNESS ON <┘ RE...
Page 20 SPECIAL MOTION DETECTION CAMERA ID OFF COLOR ADJ. <┘ > AEREA SEL AREA1 SYNC. INT AREA STATE ON > MOTIION DET ON <┘ TOP |+++++++++| 10 PRIVACY OFF MIRROR OFF DOWN |+++++++++| 25 SHARPNESS O...
Page 21 2. Increase DOWN scale value by 20. AREA1 position after change is: TOP: 10, DOWN: 45, LEFT: 20 and RIGHT: 40. AREA1 3. Increase TOP scale value by 20. AREA1 position after change is: TOP: 30, DOWN: 4...
Page 22 5.8.5 PRIVACY This mode covers the areas you do not want to see on the screen. 1) Please direct the arrow to point to “PRIVACY” by adjusting the switch to UP or DOWN direction. 2) Select “ON” by adjus...
Page 23 1. The original position of AREA1 was TOP: 10, DOWN: 25, LEFT: 20 and RIGHT: 40. AREA1 2. Increase DOWN scale value by 20. AREA1 position after change is: TOP: 10, DOWN: 45, LEFT: 20 and RIGHT: 40. AR...
Page 24 In order to save the changes and complete the setting, press the SET button. This allows you to return to the previous menu. 5.8.6 MIRROR -ON: Sets a horizontal image inversion. -OFF: Disable the inve...
Page 25 5.8.9 RETURN It saves all settings in SPECIAL menu and returns to the SETUP menu. SPECIAL CAMERA ID OFF COLOR ADJ. <┘ SYNC. INT MOTIION DET OFF PRIVACY OFF MIRROR OFF SHARPNESS ON <┘ RESET > ...
Page 26 Ever Focus Electronics Corp. Head Office: Europe Office: 12F, No.79 Sec. 1 Shin-Tai Wu Road, Albert-Einstein-Strasse 1 Hsi-Chih, Taipei, Taiwan D-46446 Emmerich, Germany TEL: +886-2-26982334 TEL: 49-2...

Manual Details

Brand EverFocus
Pages 26
File Size 207.72 KB
Published May 19, 2026
171 views

Enter the captcha to get the download link:

captcha

Frequently Asked Questions

Where should I install the camera device?

Do not install it near electric or magnetic fields such as TVs, radios, transformers, or audio speakers, as this will distort the video image.

What are the proper steps for cleaning the sensor and lens?

Use a soft cloth for the body. For the sensor and lens only, use a lens tissue or cotton tipped applicator combined with ethanol.

What are the required operating conditions for this camera?

The camera must be used between 0℃ ~ 40℃ (32℉ ~ 104℉) humidity levels of 20%~80%.

How should I safely clean the exterior and internal components?

Never disassemble or put impurities inside. For cleaning, use a soft cloth on the body and specialized materials for the sensor/lens.