Dell B2375dnf Quick Reference Guide
Summary
Dell B2375dfw/B2375dnf Mono MFP Quick Reference Guide. This quick reference guide provides essential information for Dell B2375dfw and B2375dnf monochrome multifunction printers. It covers printer component identification, paper jam locations, toner replacement, printer settings printing, wireless setup (B2375dfw model), service tag location, and basic maintenance procedures. The guide is designed for office users and administrators who need quick operational guidance for Dell monochrome MFP devices.
Page 1 Text Content
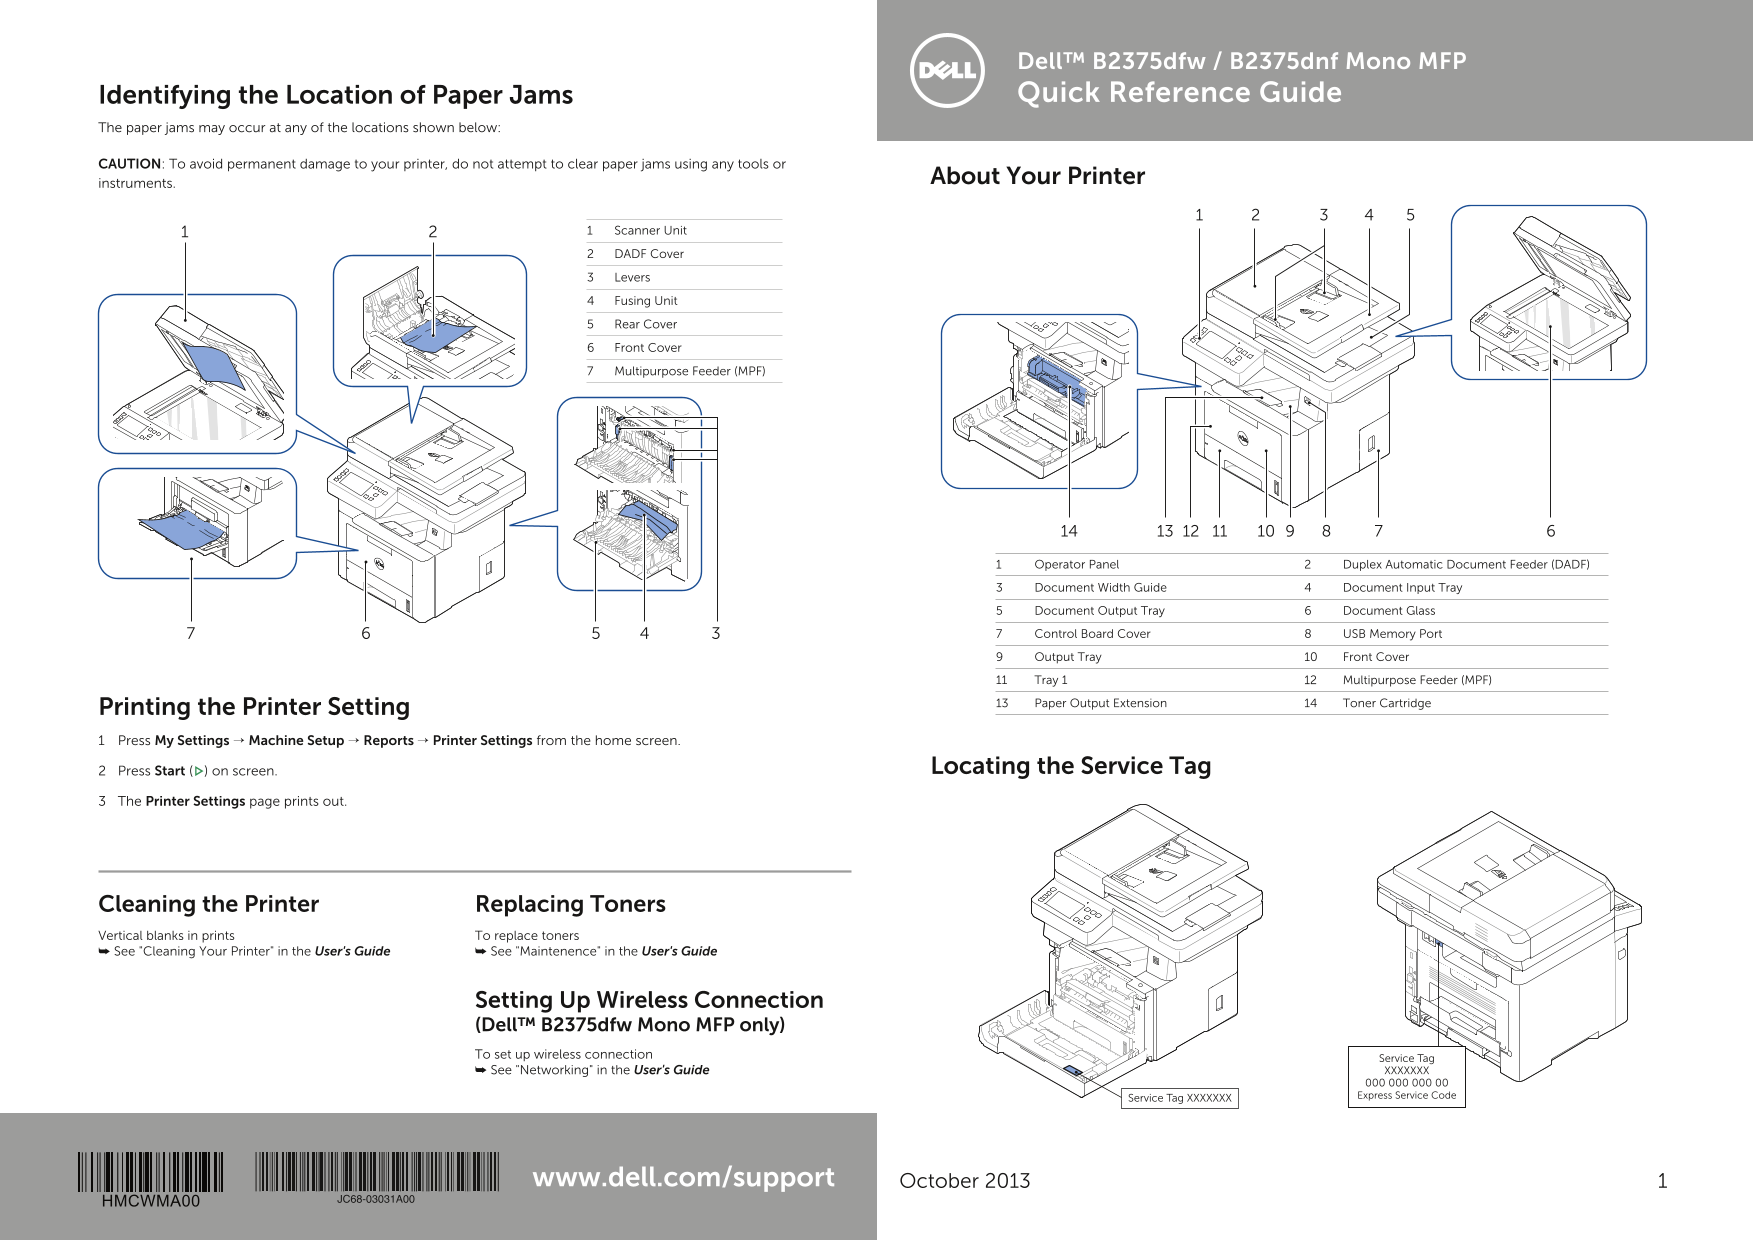
Dell™ B2375dfw / B2375dnf Mono MFP Identifying the Location of Paper Jams Quick Reference Guide
The paper jams may occur at any of the locations shown below:
CAUTION: To avoid permanent damage to your printer, do not attempt to clear paper jams using any tools or
instruments. About Your Printer
1 Scanner Unit
2 DADF Cover
3 Levers
4 Fusing Unit
5 Rear Cover
6 Front Cover
7 Multipurpose Feeder (MPF)
1 Operator Panel 2 Duplex Automatic Document Feeder (DADF)
3 Document Width Guide 4 Document Input Tray
5 Document Output Tray 6 Document Glass
7 Control Board Cover 8 USB Memory Port
9 Output Tray 10 Front Cover
11 Tray 1 12 Multipurpose Feeder (MPF)
13 Paper Output Extension 14 Toner Cartridge
Printing the Printer Setting 1 Press My Settings → Machine Setup → Reports → Printer Settings from the home screen.
2 Press Start ( ) on screen. Locating the Service Tag
3 The Printer Settings page prints out.
Cleaning the Printer Replacing Toners Vertical blanks in prints To replace toners ➥ See "Cleaning Your Printer" in the User's Guide ➥ See "Maintenence" in the User's Guide
Setting Up Wireless Connection (Dell™ B2375dfw Mono MFP only) To set up wireless connection Service Tag
➥ See "Networking" in the User's Guide XXXXXXX 000 000 000 00 Service Tag XXXXXXX Express Service Code
www.dell.com/support October 2013
HMCWMA00 JC68-03031A00
Page Summary Contents For Dell B2375dnf Quick Reference Guide
Manual Details
| Brand | Dell |
|---|---|
| Pages | 6 |
| File Size | 5.82 MB |
| Published | June 26, 2026 |
Enter the captcha to get the download link:

Frequently Asked Questions
Where are the common locations for paper jams?
Paper jams may occur at the Scanner Unit, DADF Cover, Levers, Fusing Unit, Rear Cover, Front Cover, Multipurpose Feeder (MPF), Control Board Cover, and USB Memory Port.
How do I check the printer's status via the LED?
Off means offline or power save; Green Blinking indicates warming up; On means online; Orange Blinking indicates a minor error or low toner.
How do I access detailed printer information?
Press the Info button on the operator panel to view detailed information, product feature guides, troubleshooting, and reports.
How do I load envelopes correctly?
Load envelopes with the flap opened and facing you. For DL and Monarch sizes, load with the print-side facing up to prevent wrinkling.