Setting up your Dell DR4300 System
Summary
Hardware setup guide for Dell DR4300 deduplication backup appliance. Covers pre-installation: site preparation, rack mounting, and network planning. Details verifying system components, locating Service Tag, reading license agreement, and rack installation. Includes connecting optional Dell MD1400 storage enclosure with SAS/power cables and mounting rails. Covers power-on procedures, network configuration, and initial access setup. Also addresses firmware updates and backup infrastructure integration. For IT admins and data center technicians deploying DR4300 systems.
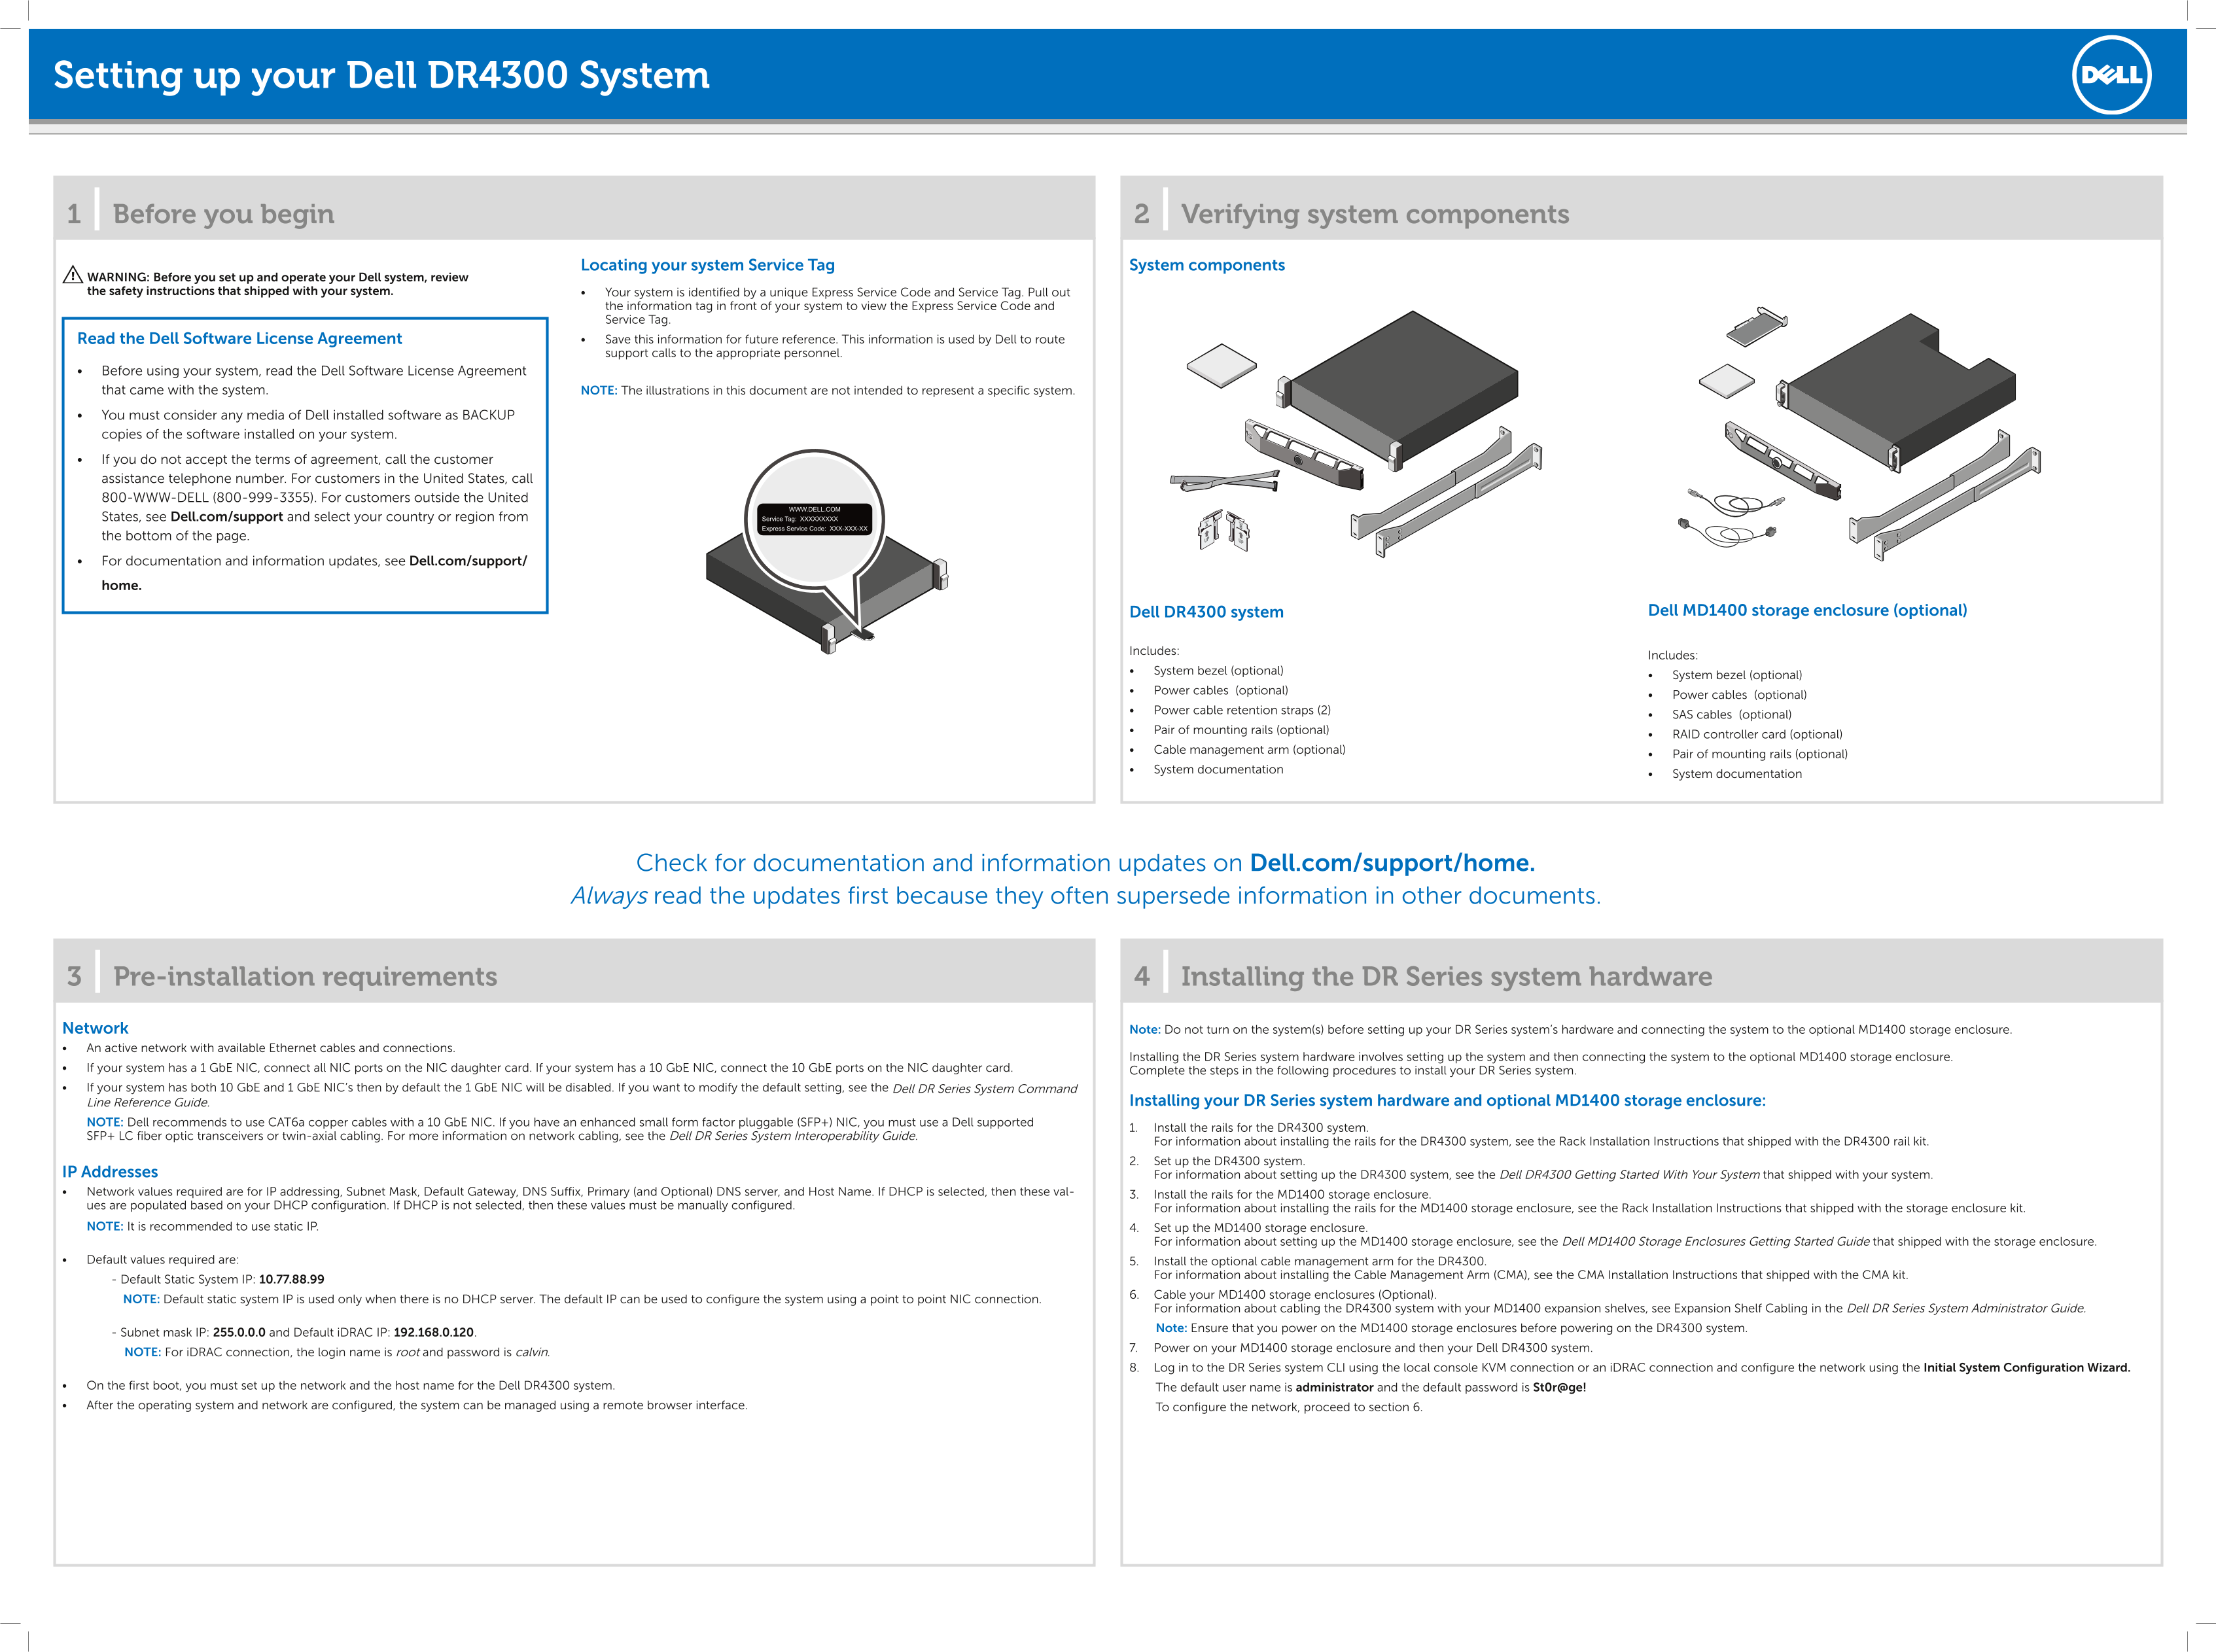
Page 1 Text Content
Setting up your Dell DR4300 System
1 | Before you begin 2 | Verifying system components
Locating your system Service Tag System components
WARNING: Before you set up and operate your Dell system, review the safety instructions that shipped with your system. • Your system is identified by a unique Express Service Code and Service Tag. Pull out
the information tag in front of your system to view the Express Service Code and Service Tag. Read the Dell Software License Agreement • Save this information for future reference. This information is used by Dell to route support calls to the appropriate personnel.
• Before using your system, read the Dell Software License Agreement that came with the system. NOTE: The illustrations in this document are not intended to represent a specific system. • You must consider any media of Dell installed software as BACKUP copies of the software installed on your system. • If you do not accept the terms of agreement, call the customer assistance telephone number. For customers in the United States, call 800-WWW-DELL (800-999-3355). For customers outside the United States, see Dell.com/support and select your country or region from the bottom of the page. • For documentation and information updates, see Dell.com/support/ home.
Dell DR4300 system Dell MD1400 storage enclosure (optional)
Includes:
Includes:
• System bezel (optional)
• System bezel (optional)
• Power cables (optional)
• Power cables (optional)
• Power cable retention straps (2)
• SAS cables (optional)
• Pair of mounting rails (optional)
• RAID controller card (optional)
• Cable management arm (optional)
• Pair of mounting rails (optional)
• System documentation
• System documentation
Check for documentation and information updates on Dell.com/support/home. Always read the updates first because they often supersede information in other documents.
3 | Pre-installation requirements 4 | Installing the DR Series system hardware Network Note: Do not turn on the system(s) before setting up your DR Series system’s hardware and connecting the system to the optional MD1400 storage enclosure. • An active network with available Ethernet cables and connections.
Installing the DR Series system hardware involves setting up the system and then connecting the system to the optional MD1400 storage enclosure.
• If your system has a 1 Gb E NIC, connect all NIC ports on the NIC daughter card. If your system has a 10 Gb E NIC, connect the 10 Gb E ports on the NIC daughter card. Complete the steps in the following procedures to install your DR Series system. • If your system has both 10 Gb E and 1 Gb E NIC’s then by default the 1 Gb E NIC will be disabled. If you want to modify the default setting, see the Dell DR Series System Command
Line Reference Guide. Installing your DR Series system hardware and optional MD1400 storage enclosure:
NOTE: Dell recommends to use CAT6a copper cables with a 10 Gb E NIC. If you have an enhanced small form factor pluggable (SFP+) NIC, you must use a Dell supported
1. Install the rails for the DR4300 system.
SFP+ LC fiber optic transceivers or twin-axial cabling. For more information on network cabling, see the Dell DR Series System Interoperability Guide.
For information about installing the rails for the DR4300 system, see the Rack Installation Instructions that shipped with the DR4300 rail kit. 2. Set up the DR4300 system.
IP Addresses For information about setting up the DR4300 system, see the Dell DR4300 Getting Started With Your System that shipped with your system. • Network values required are for IP addressing, Subnet Mask, Default Gateway, DNS Suffix, Primary (and Optional) DNS server, and Host Name. If DHCP is selected, then these val- 3. Install the rails for the MD1400 storage enclosure. ues are populated based on your DHCP configuration. If DHCP is not selected, then these values must be manually configured. For information about installing the rails for the MD1400 storage enclosure, see the Rack Installation Instructions that shipped with the storage enclosure kit. NOTE: It is recommended to use static IP. 4. Set up the MD1400 storage enclosure.
For information about setting up the MD1400 storage enclosure, see the Dell MD1400 Storage Enclosures Getting Started Guide that shipped with the storage enclosure.
• Default values required are: 5. Install the optional cable management arm for the DR4300.
For information about installing the Cable Management Arm (CMA), see the CMA Installation Instructions that shipped with the CMA kit.
- Default Static System IP: 10.77.88.99
6. Cable your MD1400 storage enclosures (Optional).
NOTE: Default static system IP is used only when there is no DHCP server. The default IP can be used to configure the system using a point to point NIC connection.
For information about cabling the DR4300 system with your MD1400 expansion shelves, see Expansion Shelf Cabling in the Dell DR Series System Administrator Guide. Note: Ensure that you power on the MD1400 storage enclosures before powering on the DR4300 system.
- Subnet mask IP: 255.0.0.0 and Default i DRAC IP: 192.168.0.120.
7. Power on your MD1400 storage enclosure and then your Dell DR4300 system.
NOTE: For i DRAC connection, the login name is root and password is calvin.
8. Log in to the DR Series system CLI using the local console KVM connection or an i DRAC connection and configure the network using the Initial System Configuration Wizard.
• On the first boot, you must set up the network and the host name for the Dell DR4300 system. The default user name is administrator and the default password is St0r@ge! • After the operating system and network are configured, the system can be managed using a remote browser interface. To configure the network, proceed to section 6.
Page Summary Contents For Setting up your Dell DR4300 System
Manual Details
| Brand | Dell |
|---|---|
| Pages | 2 |
| File Size | 773.30 KB |
| Published | June 25, 2026 |
Enter the captcha to get the download link:

Frequently Asked Questions
What network cabling is recommended for 10 GbE NICs?
Use CAT6a copper cables or Dell supported SFP+ LC fiber optic transceivers/twin-axial cabling.
What is the default login for the DR4300 system?
Use the default user name administrator and the default password St0r@ge!
What is the default static system IP address?
The default static system IP is 10.77.88.99.
How do I access the system if DHCP is not selected?
You must manually configure the IP addressing, Subnet Mask, Default Gateway, and other values.
What information is located on the system information tag?
The information tag contains the unique Express Service Code and Service Tag used by Dell for support.